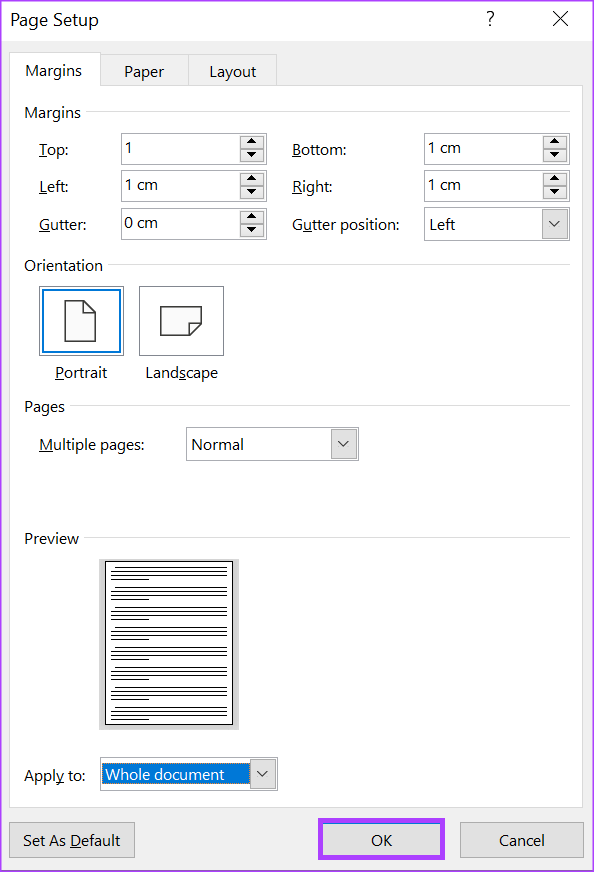
The customizable parameters in the page setup dialog box offer three tabs – page margins, paper, and layout. The Page Setup dialog box is also appears in another Office application – Microsoft Excel. In Microsoft Excel, the layout tab includes a header/footer tab. An additional tab named sheet appears on the Page Setup dialog box in Excel. With the features of the Page Setup dialog box in mind, here’s how to access it in Microsoft Word.
Accessing the Page Setup Dialog Box Using Keyboard Shortcuts
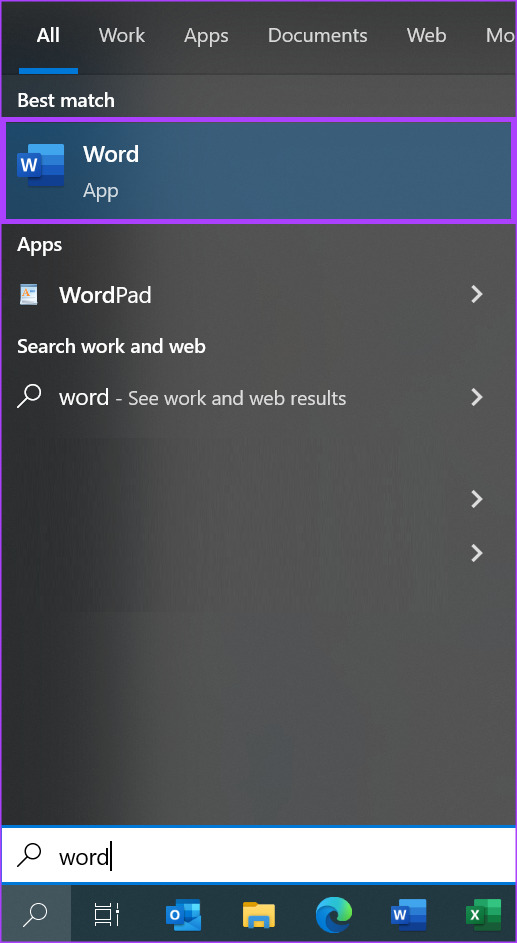
If you are unsure of the shortcut for the features in Microsoft Word, press the Alt key on your keyboard. The Alt key will highlight the corresponding keys for Ribbon features. Here’s how you can access the Page Setup dialog box using keyboard shortcuts. Step 1: Click the Start button on the Taskbar and type word to search for the app.
Step 2: From the results, click on the Microsoft Word app or document to open it.
Step 3: On your keyboard, click on keys in the following sequence: Alt, P, SP. This will launch the Page Setup dialog box.
Accessing the Page Setup Dialog Box Using the Microsoft Word Ruler
The Microsoft Word ruler has several uses which include quickly accessing the Page Setup dialog box. However, before you can use the Microsoft Word ruler to access the Page Setup dialog box, ensure you enable the ruler from your view settings. Here’s how you can access the Page Setup dialog box using the Word ruler. Step 1: Click the Start button on the Taskbar and type word to search for the app.
Step 2: From the results, click on the Microsoft Word app or document to open it.
Step 3: Ensure the vertical or horizontal rulers are visible on your Microsoft Word document.
Step 4: Place your mouse pointer on the grey part of the vertical or horizontal ruler and double-click to launch the Page Setup dialog box.
Accessing the Page Setup Dialog Box Using the Layout Tab of the Word Ribbon
The Page Setup dialog box can also be accessed from the Microsoft Word Ribbon. This feature is present in the layout tab. The layout tab contains options that allow you to customize the pages of your Word document such as setting page indentation and adding line breaks. Here’s how to access the Page Setup dialog box from the layout tab. Step 1: Click the Start button on the Taskbar and type word to search for the app.
Step 2: From the results, click on the Microsoft Word app or document to open it.
Step 3: On the Microsoft Word Ribbon, click on the Layout tab.
Step 4: Within the Page Layout tab, click on the arrow beside the Page Setup group. This will launch the Page Setup dialog box.
Accessing the Page Setup Dialog Box Using the Print Option in the Word File Menu
As previously mentioned, the Page Setup dialog box is usable to customize the pages of a Word document for better printing results. As such, the Page Setup dialog box can also be accessed using the print option of Word. Here’s how to do so: Step 1: Click the Start button on the Taskbar and type word to search for the app.
Step 2: From the results, click on the Microsoft Word app or document to open it.
Step 3: On the Microsoft Word Ribbon, click on the File tab.
Step 4: Click on the Print option in the File menu. Instead of going through the File tab to access the Print option, click the Control + P keys on your keyboard.
Step 5: Scroll down the Print menu, and click on the Page Setup hyperlink at the bottom of the page.
Adjusting the Page Margins in Microsoft Word
Using any of the methods above, you can access the Page Setup dialog box from which you can make changes to the pages of the Word document. One of the changes you can make is adjusting the page margins. However, the Page Setup dialog box isn’t the only way you can adjust your page margins. You can also adjust the page margins using the Microsoft Word ruler. The above article may contain affiliate links which help support Guiding Tech. However, it does not affect our editorial integrity. The content remains unbiased and authentic.


