Whether you want to maintain a stable software environment or prefer more control over the update process, knowing how to stop Microsoft Office from updating automatically can be immensely beneficial. In this article, we will explore four ways to disable Microsoft Office updates on Windows. So, without wasting any more time, let’s dive right in!
Reasons to Disable Automatic Office Updates
It’s always recommended to update Office apps on Windows regularly. Office updates introduce new features and eliminate known bugs and issues. However, you’ll need to consider turning off automatic Office updates for a few important reasons. Let’s check them out:
If you want more control over the Office apps and want to decide which update to install manually, you need to disable automatic Office updates. The automatic update feature can sometimes install updates that might not be compatible with your system. When that happens, your system becomes prone to issues like a blue screen, error codes, or a complete system crash. Automatic Office updates consume a lot of data which is the last thing you want if you are under a data cap.
Those are some reasons you’d want to consider disabling automatic Office updates. Now, let’s check out how to do it.
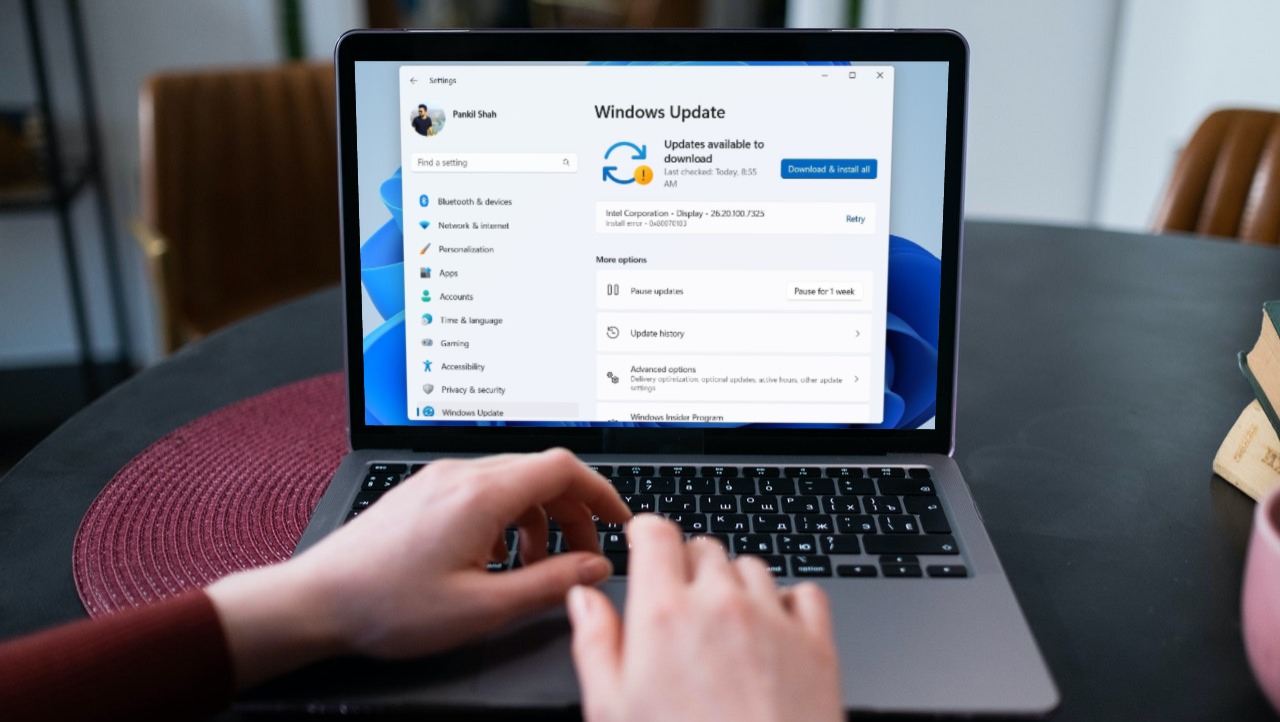
1. Using the Settings App
The quickest way to handle updates on a Windows PC is through the Settings app. You can use it to manage Windows, drivers, and even Microsoft Office updates. Here’s a step-by-step instruction to disable Microsoft Office updates on Windows using the Settings app: Step 1: Press the Windows + I keyboard shortcut to open the Settings app. Step 2: Choose Windows Update from the left sidebar and Advanced options in the right pane. Step 3: Turn off the toggle next to the ‘Receive updates for other Microsoft products’ option.
2. Using an Office App
You can use any Microsoft Office app to turn off automatic updates for all Office applications. We’ll use Microsoft Word in the steps below, but you can also use any other Office app. Here are the steps: Step 1: Press the Windows key to open the Start Menu. Step 2: Type Word and press Enter. Step 3: Click the Account option in the left sidebar. Step 4: Click the Update Options button and choose Disable Updates from the context menu. Step 5: Click Yes to the Universal Access Control that appear. Windows will now not update Office applications on its own.
3. Using the Registry Editor
The Registry Editor in Windows tool is an important utility that enables you to manage crucial registries. You can use it to access the Microsoft Office registry and configure it not to update automatically. Here’s how to do that: Note: Editing the registry can be risky, as one wrong move can make your system unstable. Therefore, back up the registry and create a restore point before proceeding with the steps below. Step 1: Press the Windows key to open the Star Menu, type Registry Editor in the search bar, and press Enter. Step 2: In the Registry Editor, navigate to the following location: Step 3: Right-click on the Microsoft key in the left sidebar, hover the cursor to New and choose Key. Step 4: Name the key Office. Step 5: Right-click on the Office key in the left sidebar, hover the cursor to New and choose Key. Step 6: Name the key 16.0. Step 7: Right-click on the 16.0 key in the left sidebar, hover the cursor to New and choose Key. Step 8: Name the key Common. Step 9: Right-click on the Common key in the left sidebar, hover the cursor to New and choose Key. Step 10: Name the OfficeUpdate. Step 11: Right-click the OfficeUpdate key, hover the cursor to New, and choose DWORD (32-bit) Value. Step 12: Name the value EnableAutomaticUpdates. Step 13: Double-click the EnableAutomaticUpdates value, type 0 in the Value data, and click OK. Next, reboot your system. Following that, Microsoft Office will not download any update on its own.
4. Using the Local Group Policy Editor
Another way to stop Microsoft Office from updating automatically is by using the Local Group Policy Editor. All you need to do is access the ‘Enable Automatic Updates’ policy and set it to Disabled. Let’s check the steps in detail: Note: The Local Group Policy Editor is exclusively available for Windows Pro and Enterprise editions. You’ll get the ‘gpedit.msc missing error’ when you try to access it on Windows Home. To eliminate this error, and access the Local Group Policy Editor on Windows Home, check our guide on fixing gpedit.msc missing error. Step 1: Use the below link to download the ‘Administrative Templates files (ADMX/ADML) for Office apps.’ Administrative Templates files (ADMX/ADML) for Office apps Step 2: Open the download EXE file. Step 3: Select the location where you want to extract the content and click OK. Step 4: Head to where you’ve extracted the content and open the admx folder. Step 5: Press the Ctrl + A keyboard shortcut to select all the files inside the admx folder, and then press Ctrl + C keyboard shortcut to copy them. Step 6: Press the Windows + E keyboard shortcut to open the File Explorer. Step 7: Open the C drive. Step 8: Double-click on the Windows folder. Step 9: Open the PolicyDefinitions folder. Step 10: Press the Ctrl + V keyboard shortcut to paste the copied content into the PolicyDefinations folder. Step 11: Press the Windows + R keyboard shortcut to open the Run tool. Step 12: Type gpedit.msc in the search bar and press Enter. Step 13: In the Local Group Policy Editor, navigate to the following location: Step 14: Double-click on the ‘Enable Automatic Updates’ policy in the right pane. Step 15: Select Disabled. Then, click Apply and OK.
Control Your Office Apps
It’s always great to have control over your apps, and Microsoft Office is no different. If you want to stop Microsoft Office from updating automatically, you can use the above methods. The above article may contain affiliate links which help support Guiding Tech. However, it does not affect our editorial integrity. The content remains unbiased and authentic.