Before we move forward, it is essential to understand what a DNS cache is. In basic terms, DNS cache is a feature that stores information about your recently accessed websites and acts as a temporary database to speed up the browsing experience. However, if a website’s IP address changes, your computer may still try to access the old address due to the cached DNS information. You may encounter errors when attempting to access the site. Hence, to fix this, you must flush DNS cache. Let’s show you how.
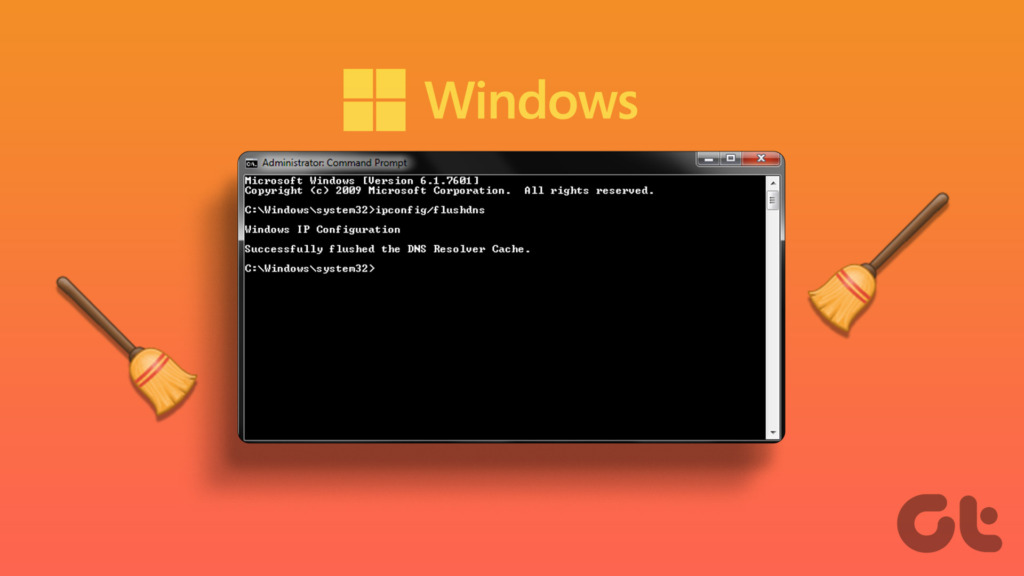
1. Flush DNS Cache Using Command Prompt
Command Prompt lets you do a wide variety of functions, including program launches, managing network settings, performing system administration tasks, troubleshooting common computer issues, and so on. This also includes clearing the DNS cache on the Windows machine. Follow the steps below. Step 1: Press the Windows key on your keyboard, type Command Prompt, and click ‘Run as administrator.’ In the prompt, select Yes. Step 2: Type the following command and press Enter. Afterward, you will see a message stating that the DNS resolver cache has been flushed. If this method fails, you can check out the following method.
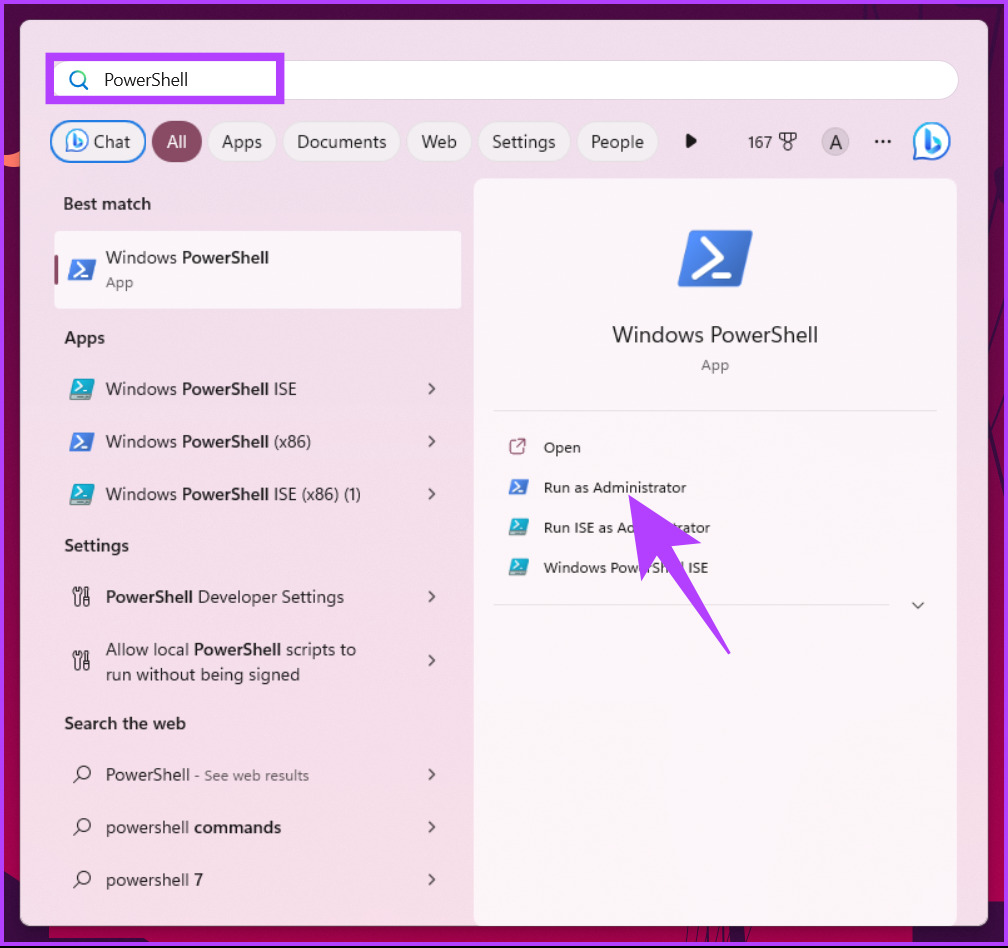
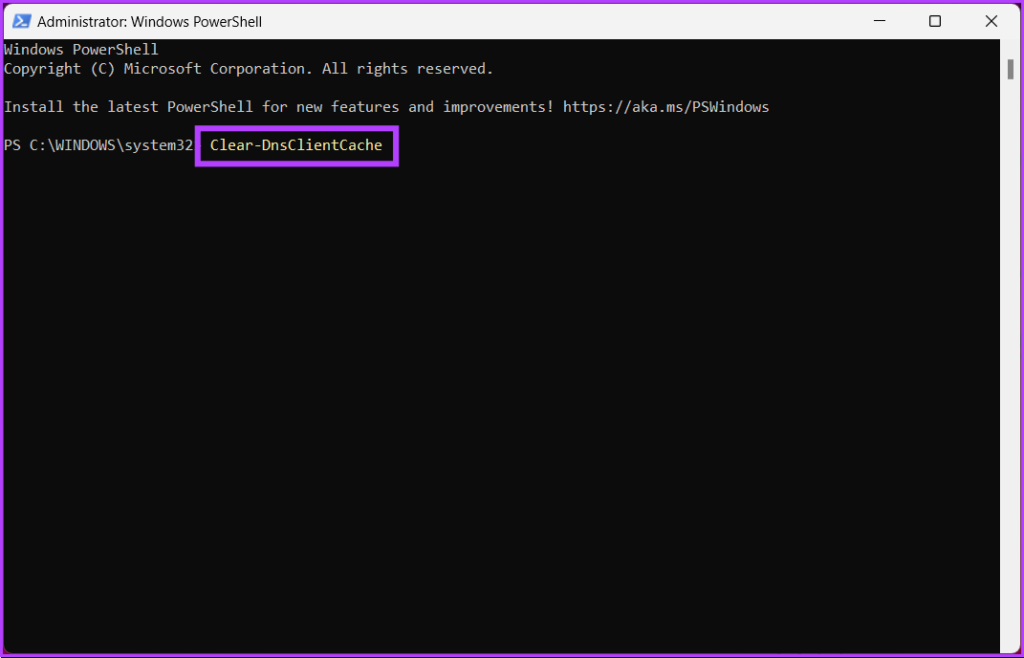
2. Using Windows PowerShell
PowerShell is no different from Command Prompt. Even PowerShell provides a wide range of functionalities, and clearing the DNS cache is one of them. Follow the below-mentioned steps to do so. Step 1: Press the Windows key on your keyboard, type PowerShell, and click ‘Run as administrator.’ In the prompt, select Yes. Step 2: Type the below command and press Enter. That’s it. With this, the DNS cache gets cleared hassle-free. Check out the next method if you don’t want to access the command-line terminal but want to clear the DNS cache.
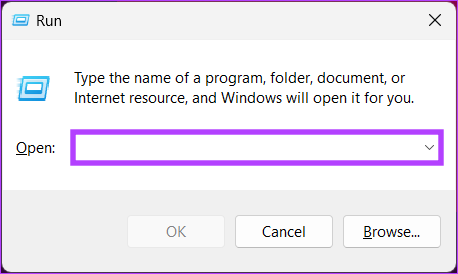
3. Using Run
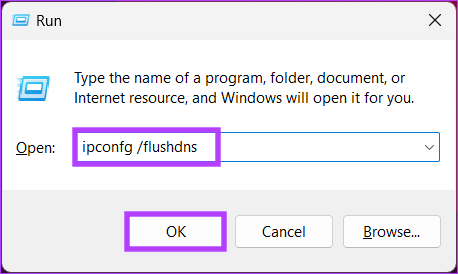
For this method, we will be utilizing the Run window. Considering the above two methods, this may seem easier. Follow the instructions below. Step 1: Press the ‘Windows key + R’ on your keyboard to open the Run dialog box. Note: Alternatively, press the Windows key on your keyboard and type Run. Step 2: Type the below command in the text field and click OK. You will see a command window for a split second, and your DNS cache will be flushed. If you are not looking for a one-time solution but want to access the function whenever you want quickly, jump to the next method.
4. Using a Batch File
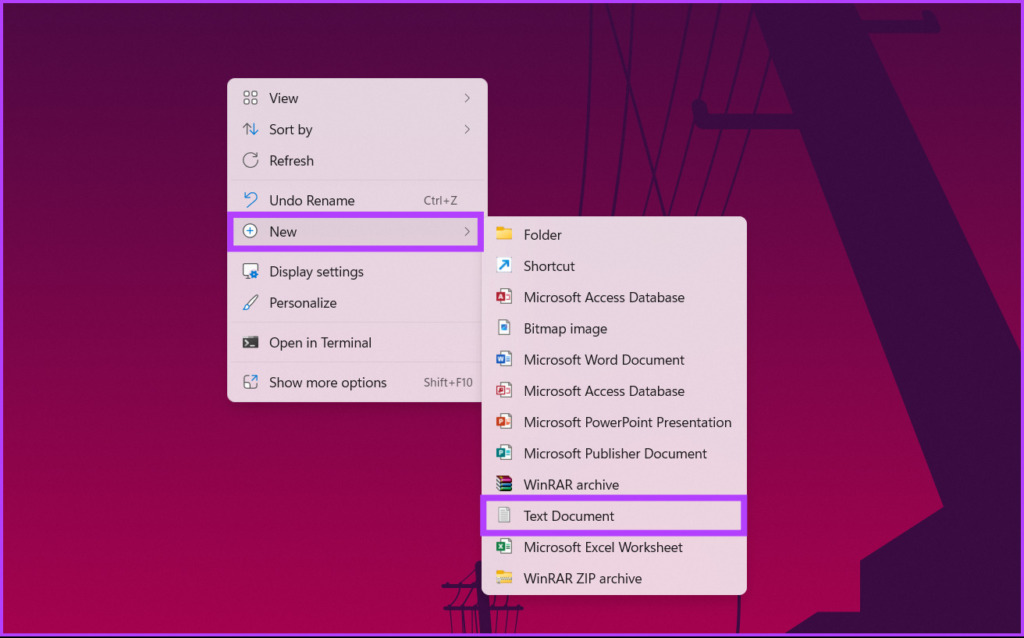
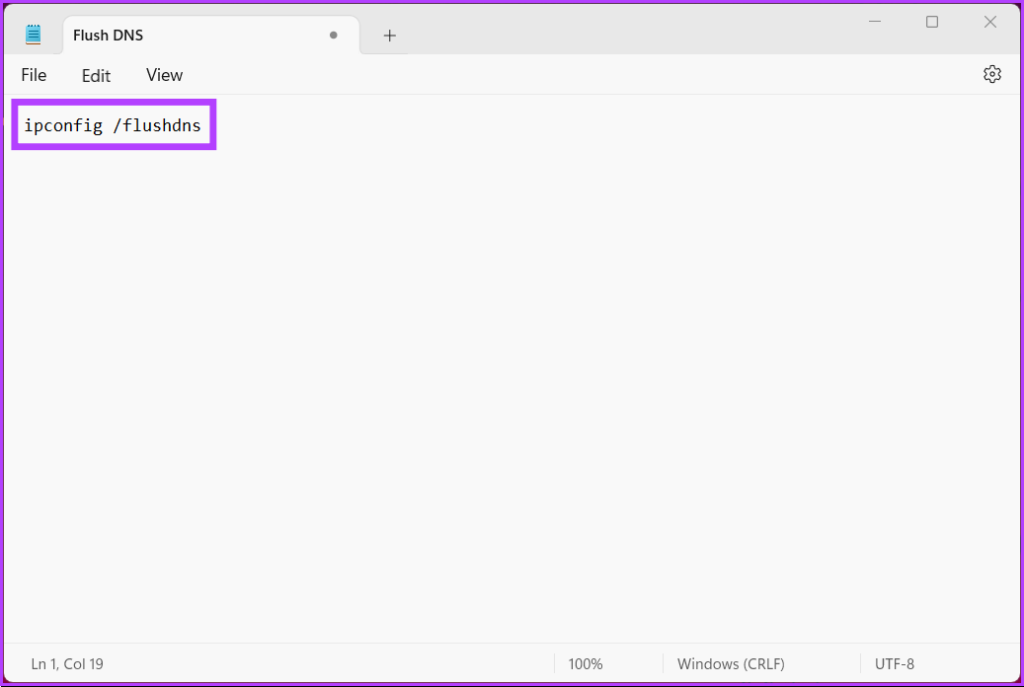
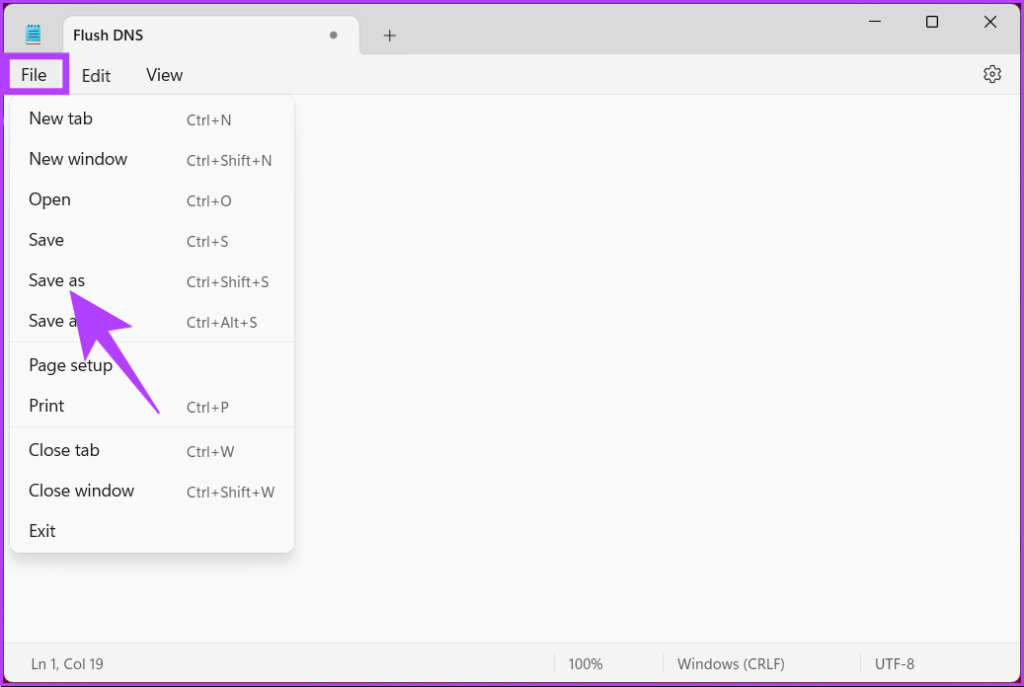
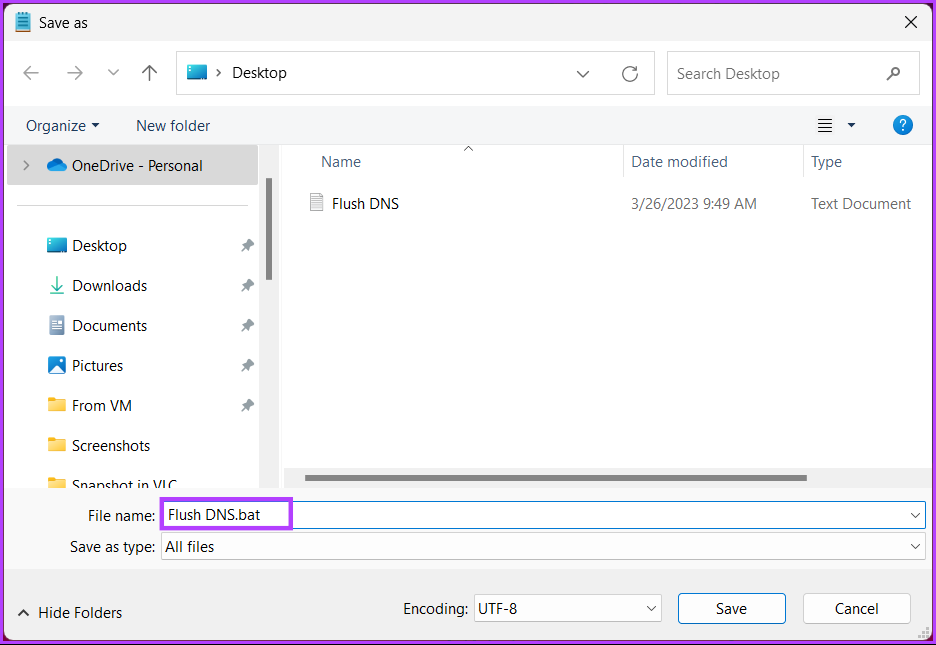
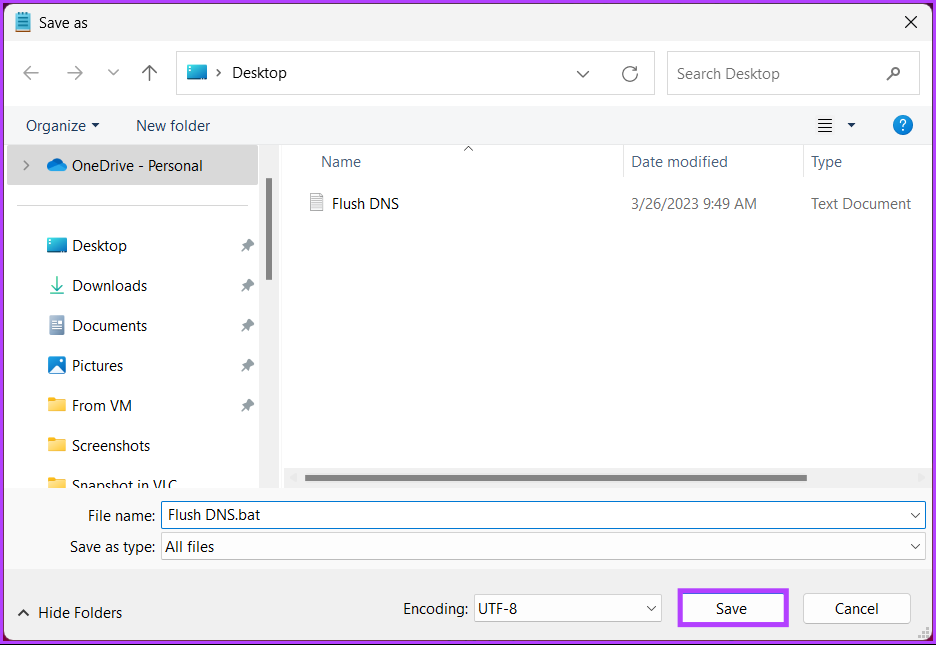
Setting up a batch file would be of great help if you want a one-click solution that resets DNS whenever you need to. Follow the below-mentioned instructions. Step 1: Right-click on the desktop, select New from the context menu, and choose Text Document. Step 2: Name the file and press Enter key on your keyboard. Eg: Flush DNS Step 3: Type the below command. Step 4: Click on the File menu, and from the drop-down menu, click on Save as. Note: You can also save the file by pressing ‘Ctrl+Shift+S’. Step 5: Click the ‘Save as type’ drop-down menu and choose All files. Step 6: Add .bat extension to the file name. Step 7: Finally, click Save. From now on, whenever you need to clear the DNS cache, you only need to double-click on this batch file. If none of the abovementioned methods worked for you, the next one will.
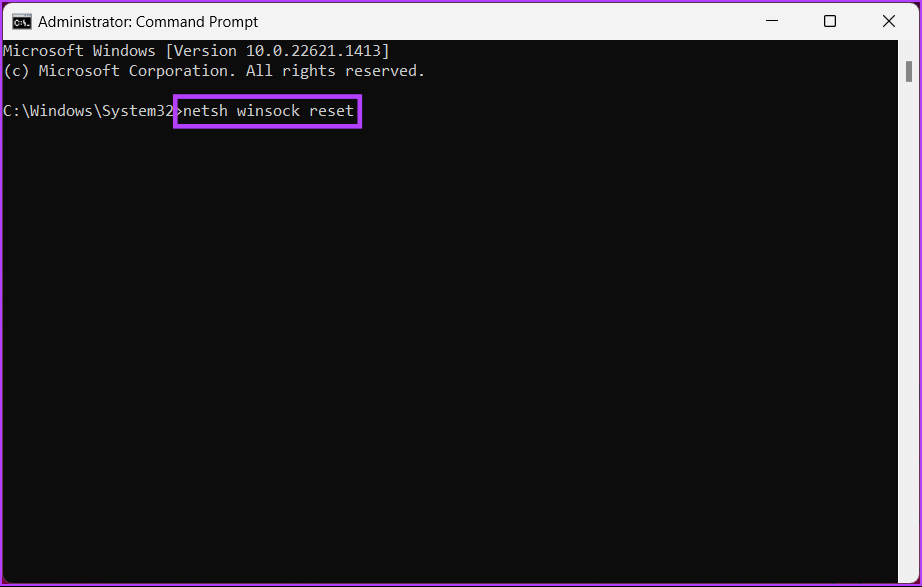
5. Reset Winsock Settings
Winsock (Windows Sockets) is a programming interface that handles input/output requests for Internet applications in the Windows operating system. This includes refreshing the DNS cache from your Windows PC. Follow the instructions below. Step 1: Press the Windows key on your keyboard, type Command Prompt, and click ‘Run as administrator.’ In the prompt, select Yes. Step 2: Type the below command and hit Enter. You will get a message saying that Winsock has been successfully reset. Afterward, you must restart your computer for the settings to take effect.
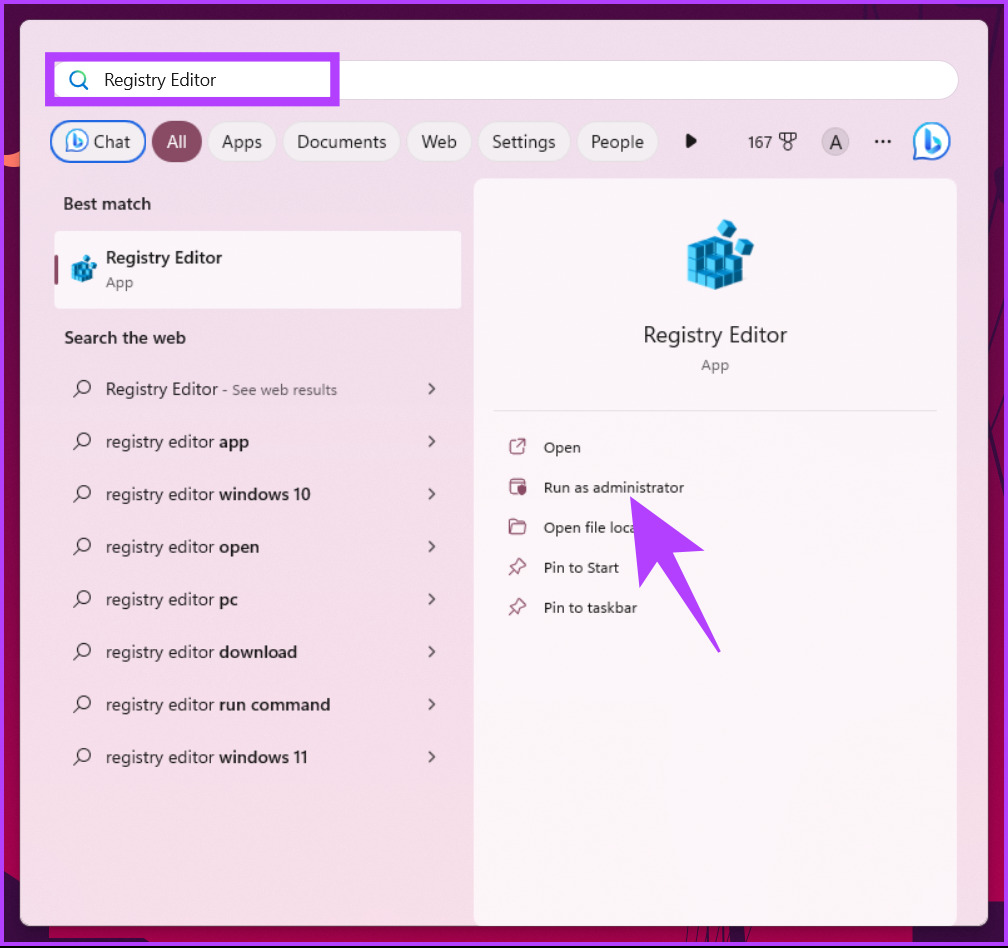
6. Refresh DNS Cache Automatically Using the Registry Editor
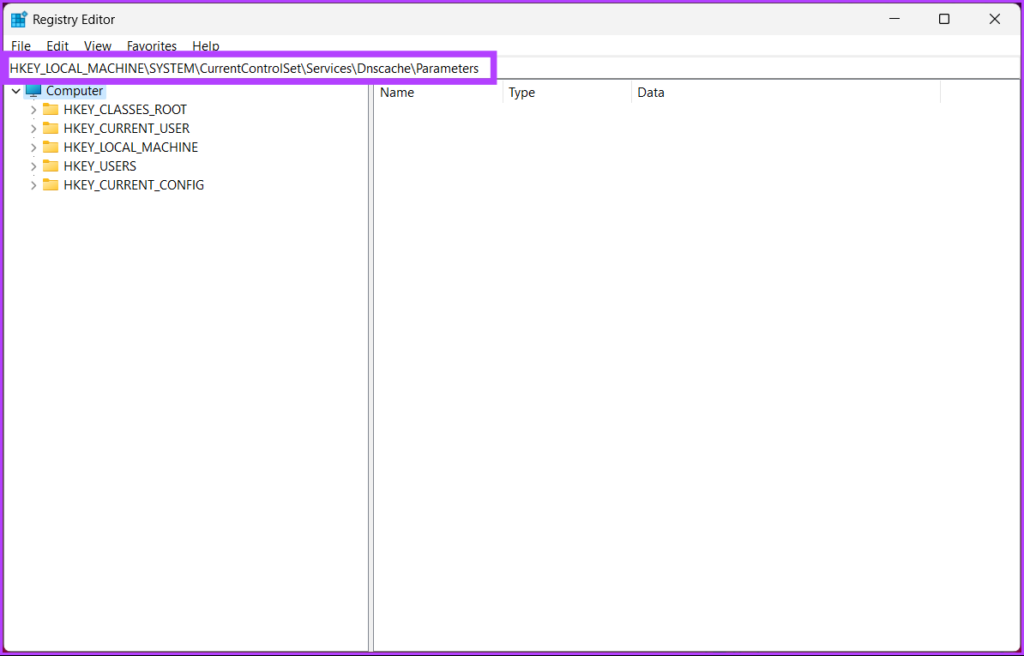
This method is more complex than the above one, but the steps are simple to follow and execute. However, because we will be using Registry Editor, we strongly advise you to back up the Windows Registry before proceeding with the steps below. Step 1: Press the Windows key on your keyboard, type Registry Editor, and click ‘Run as administrator.’ Note: Press ‘Windows key + R’ to open the Run dialog box, type regedit.exe, and click OK to open Registry Editor. In the prompt, select Yes. Step 2: In the top address bar, enter the mentioned address. Note: You can manually navigate to the section too. Step 3: Under the Parameters folder, right-click, select New, and choose ‘DWORD (32-bit) Value.’ Step 4: Type MaxCacheTtl in the name field. Step 5: Double-click on MaxCacheTtl, type 86400 in the Value Data field, and press OK. Step 6: Under the Parameters folder, right-click again, select New, and choose ‘DWORD (32-bit) Value.’ Step 7: Type MaxNegativeCacheTtl in the name field. Step 8: Double-click on MaxNegativeCacheTtl, type 5 in the Value Data field, and press OK. Finally, restart the system to implement the changes. And that’s it! When the system boots back, your Windows machine will flush the DNS cache automatically after every 86400 seconds or 24 hours.
How to Flush Your Browser’s DNS Records
In order to improve the speed of search, browsers store the DNS cache. Since each browser stores the details, it is necessary to clear them separately. Follow the steps below. Step 1: Launch Google Chrome or Edge, enter the below address, and press Enter. This will take you to Chrome’s or Edge’s net internals page. Step 2: Click on the ‘Clear host cache’ button. With that, you have successfully cleared the DNS cache from your preferred browser. Continue reading if you want to reset the DNS cache at a set time on a particular interval. Now that you have cleared the DNS cache, you may want to view your current DNS cache. Move to the next method.
How to View the Current DNS Cache
Step 1: Press the Windows key on your keyboard, type Command Prompt, and click ‘Run as administrator.’ In the prompt, select Yes. Step 2: Type the below command and press Enter.
Clear DNS Cache
Whether you’re experiencing slow internet speeds or encountering errors while browsing, knowing how to flush DNS cache can help resolve the issue. With the step-by-step guide in this article, you can quickly refresh the DNS cache on your Windows and get back to browsing the web without any interruptions. You may also want to read how to change the DNS server on Android and iPhone. The above article may contain affiliate links which help support Guiding Tech. However, it does not affect our editorial integrity. The content remains unbiased and authentic.