But there are other faster methods to open this utility on your system. We will list out all the possible methods using which you can open Network Connections in a jiffy. Let’s begin.
1. Open Network Connections Using the Start Menu
You can find and run programs from the Windows start menu without diving deep into folders or settings. To launch the Network Connections tool using the Start menu, repeat the following steps: Step 1: Press the Windows key to open the Start menu. Step 2: Click on the search bar and type Network Connections. Then, click on the Open button to launch the Network Connections utility.
2. Open Network Connections Using Action Center
Windows Action Center offers quick access to the most useful settings, such as Bluetooth, Wi-Fi, Sound, and more. You can launch the Advanced Network Settings from Action Center. Here’s how: Step 1: Navigate to the extreme right corner of the Taskbar. Right-click on the Wi-Fi / Ethernet icon to open the context menu. Click on the ‘Network and Internet settings’ option.
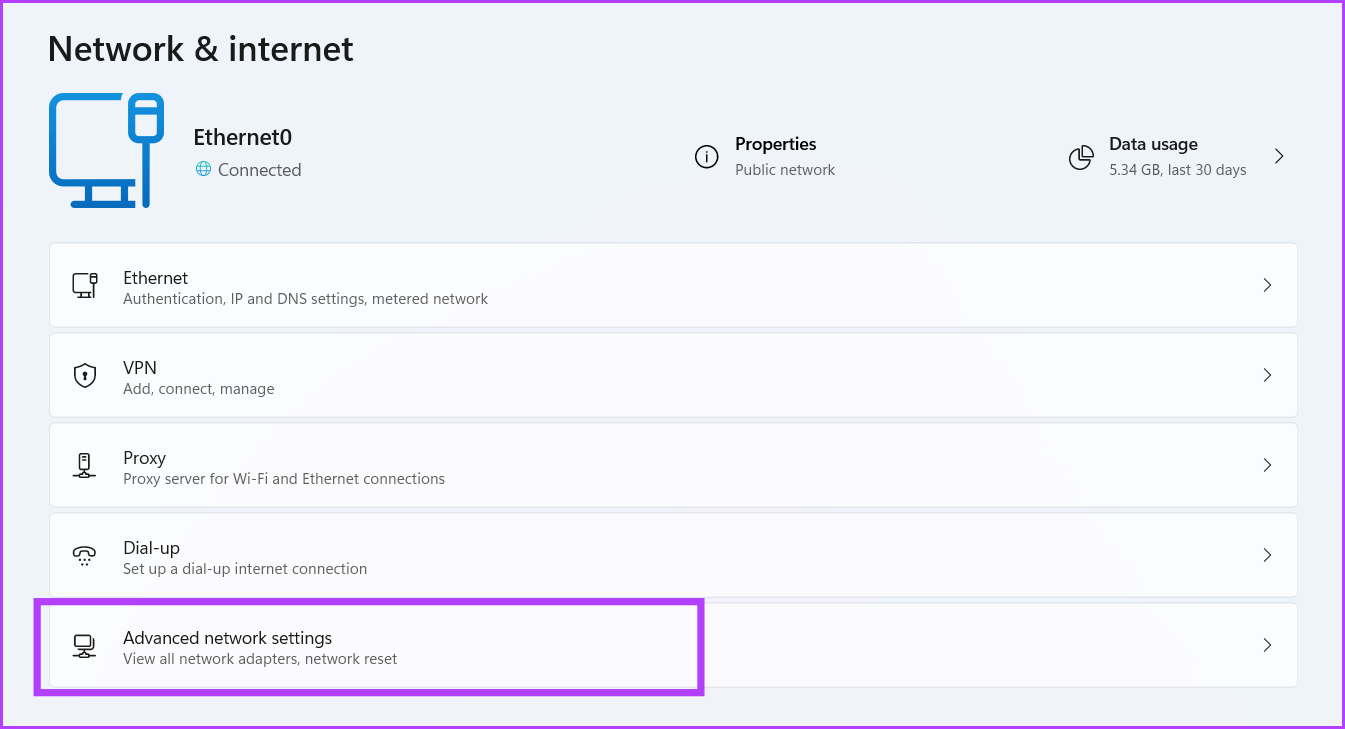
Step 2: The Settings app will launch. Scroll down and click on the ‘Advanced network settings’ option to access a consolidated version of Network Connections.
3. Open Network Connections Using the Power User Menu
Windows Power User menu is exclusive to Windows 10 and 11. It houses all the necessary tools and settings which you may need to access quickly. You can even add or remove items from this menu. Here’s how: Step 1: Press the Windows key + X shortcut to open the Power User menu. Step 2: Click on the Network Connections option to launch the utility.
4. Open Network Connections Using the Control Panel
Network Connections is a Control Panel applet and is nested deep inside the Network and Internet section. So, you can launch the utility from Control Panel too. Here’s how to do it: Step 1: Press the Windows key + S shortcut, type Control Panel, and press the Enter key.
Step 2: In the Control Panel window, click on the Network and Internet option.
Step 3: Click on the Network and Sharing Center option.
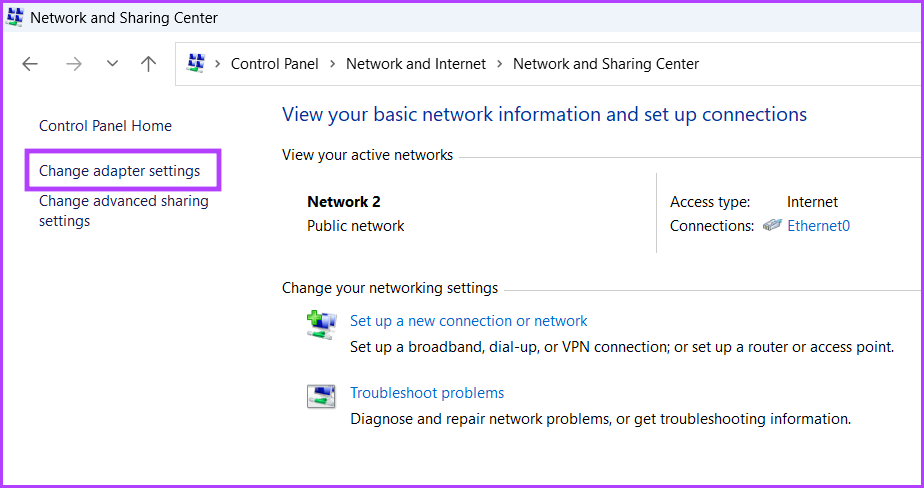
Step 4: Navigate to the top-left area and click on the Change adapter settings option.
Network Connections utility will launch in a separate window.
5. Open Network Connections Using the Run Dialog Box
The Run Dialog Box offers a faster method of opening applications and folder locations. To open Network Connections using the Run dialog box, repeat the following steps: Step 1: Press the Windows key + R shortcut to open the Run dialog box. Step 2: Type ncpa.cpl in the text box and press Enter.
Network Connections utility will open on your system.
6. Open Network Connections Using File Explorer
All system utilities reside inside the Windows folder of the system drive. So, you can use File Explorer to access the Network Connections tool. Repeat the following steps: Step 1: Press the Windows key + E shortcut to open File Explorer. Step 2: Go to the address bar and type the following path:
Step 3: Press the Enter key to launch the Network Connections utility.
7. Open Network Connections Using Desktop Shortcut
Unfortunately, you cannot pin the Network Connections utility to the Start menu or the Taskbar. But you can create a shortcut for the utility and launch it directly from the desktop. Here’s how: Step 1: Press the Windows key + D shortcut to switch to the desktop. Step 2: Right-click on the desktop to open the context menu and click on the New option. Then, select the Shortcut option.
Step 3: In the Create Shortcut window, type the following path.
Step 4: Click on the Next button.
Step 5: Name the shortcut Network Connections for easy identification. Click on the Finish button to create the shortcut.
Step 6: Double-click on the newly created shortcut, and it will open the Network Connections tool on your system.
8. Open Network Connections Using Command Prompt or PowerShell
If you love the Terminal in Windows 11 and prefer running applications that way, it is possible to launch the Network Connections utility directly from the terminal. Here’s how to open it using Command Prompt and PowerShell: Step 1: Right-click on the Windows key and select the Terminal option.
Step 2: Type ncpa.cpl in the Command Prompt window and press Enter.
Step 3: Click on the arrow icon and select the Windows PowerShell option.
Step 4: Type the following command and press Enter:
9. Open Network Connections Using the Settings App
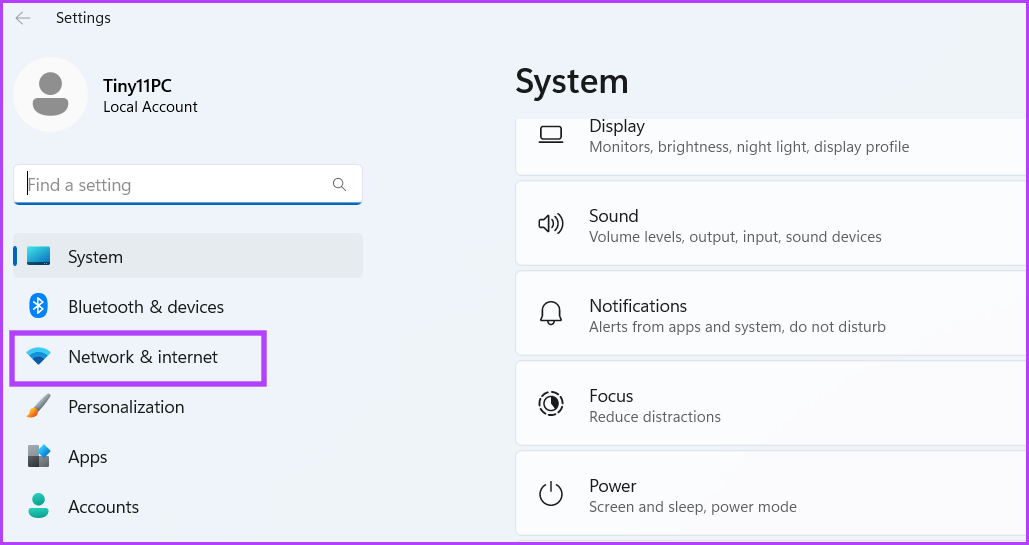
Microsoft is slowly moving many Control Panel utilities to the Settings app. There is an elaborate Network setting in the app, which also has a Network Connections section. However, you can manage many attributes of network Connections from there, but some options will still redirect you to the Control Panel version of Network Connections. Here’s how: Step 1: Press the Windows key + I shortcut to launch the Settings app. Step 2: Go to the left-hand side menu and click on the Network & internet option.
Step 3: Scroll down and click on the Advanced network settings option.
You will see all the Network adapters listed on the page much like the Network Connections utility. Moreover, you can also tweak the adapter setting from here.
Access Network Connections Faster
These were all the methods to run the Network Connections utility. The Power User menu and desktop shortcuts are the fastest methods to access this tool. However, you cannot pin this useful applet to the Start Menu or the Taskbar. The above article may contain affiliate links which help support Guiding Tech. However, it does not affect our editorial integrity. The content remains unbiased and authentic.


