Now, you may be wondering why you would want to access Apple Notes on Windows. The answer is simple – it’s all about convenience. If you’re someone who uses both Windows and Apple devices, having access to your notes across all your devices can be incredibly useful. Whether you’re at work on your PC or on the go with your iPhone or iPad, you can easily access your notes without having to switch devices. It’s a great way to stay organized and keep your notes synced up. With this understanding, let’s begin with the article.
1. Notes Web App
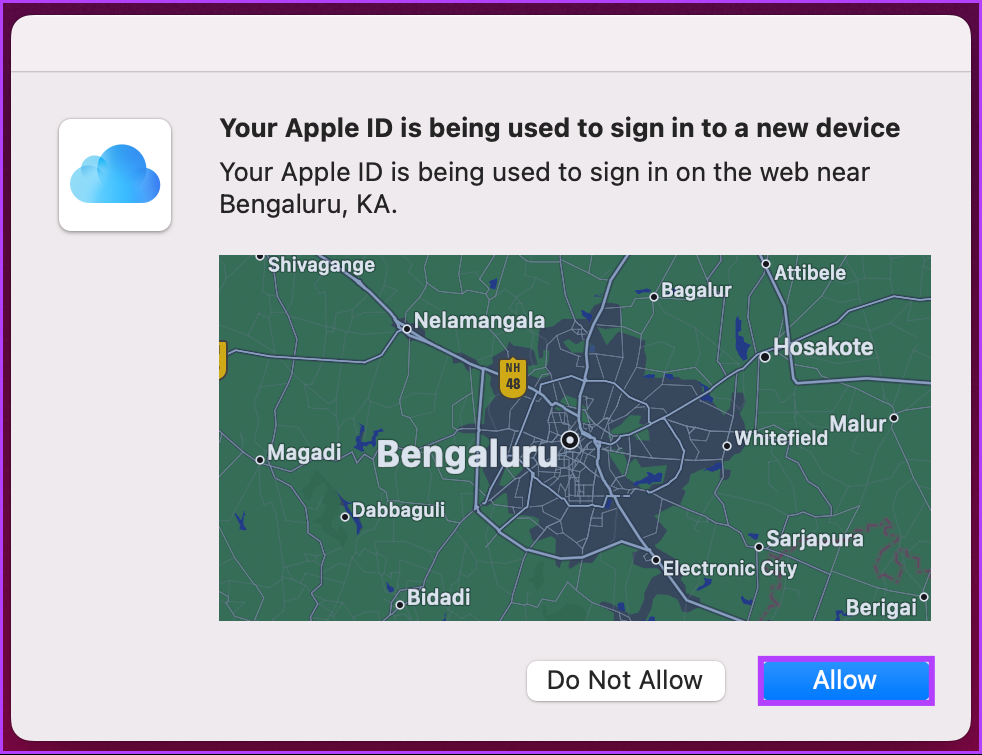
Accessing Apple Notes on Windows is quite straightforward. In fact, this is one of the easiest and most common ways to access Apple Notes on Windows. Follow the below steps. Note: You can’t view or edit any notes present within the Notes app’s ‘On My iPhone’ folder. If you still want to access them, you must move the notes to a folder in the iCloud section of the Notes app. Step 1: Go to iCloud, log in with your Apple ID credentials, and sign in to your account. Go to iCloud Step 2: You will get a pop-up on your other Apple device (iPhone, Mac, or iPad) that says, ‘Your Apple ID is being used to sign into a new device’ click Allow. Step 3: Once you do, you will get a verification code that you will need to enter into your Windows PC, where you want to access Apple Notes. Step 4: On the next screen, you will be asked if you ‘Trust this browser?’ click Trust. Step 5: You will land on your iCloud account. From here, click on Notes. That’s about it. You have access to your Apple Notes. You can read your notes, edit them, create new notes, and add or rename folders. Additionally, you can also share notes with others; any changes you make will sync to your iPhone via iCloud. However, the Notes web app does not allow you to archive or lock notes. If, for some reason, you are unable to see your notes, go to your iPhone’s settings > choose Apple ID > tap on iCloud > toggle on the switch next to Notes. If you use Apple Notes on a daily basis, you may want to create a shortcut for it. Jump to the next method.
2. Create a Progressive Web App (PWA) For Apple Notes
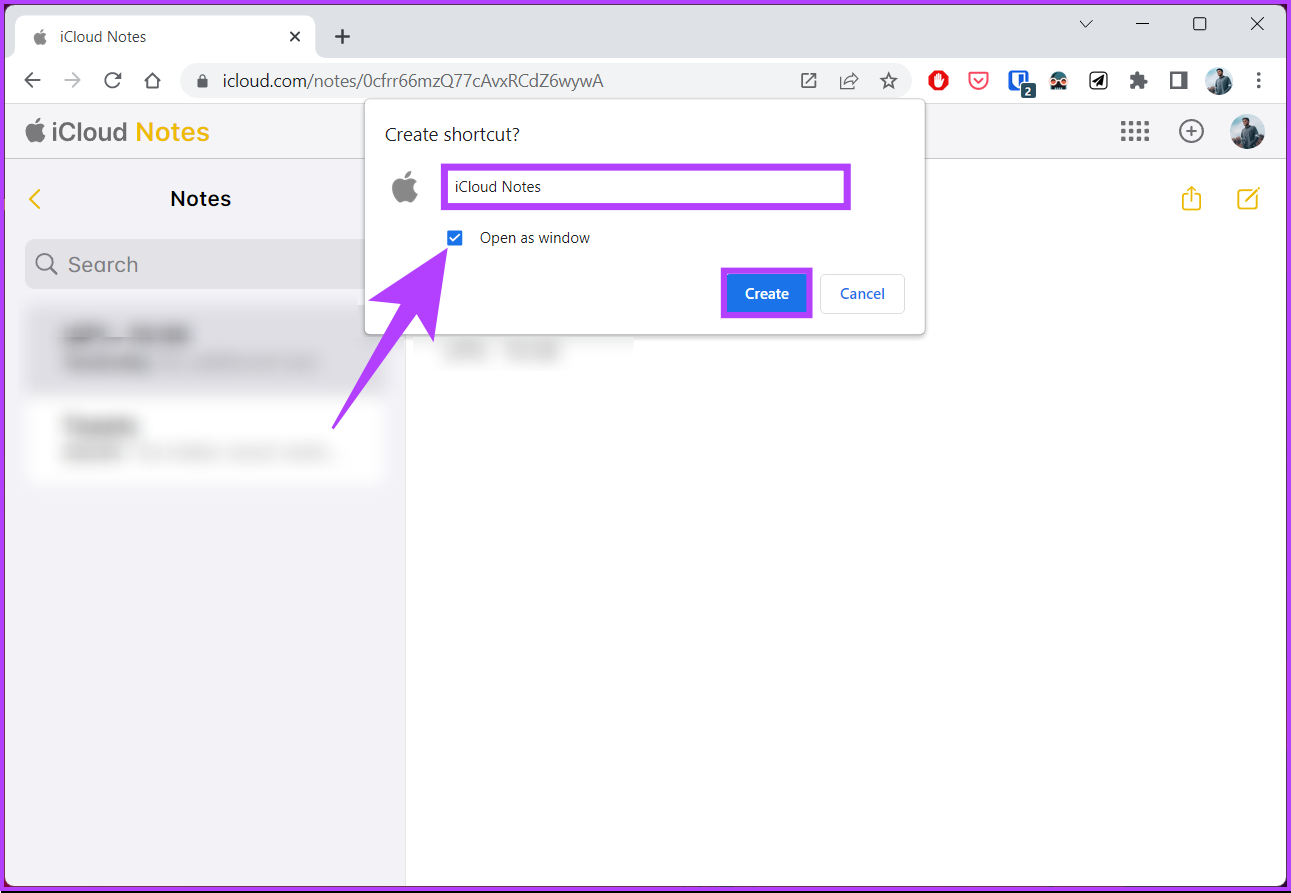
You plan to make the experience of opening and using the Notes web app much more convenient by forcing it to work as a PWA (Progressive Web App). You can execute this method using Google Chrome, Safari, or Microsoft Edge web browser. Note: For demonstration, we will execute the steps on Google Chrome. Step 1: Go to iCloud and log in with your Apple ID credentials and sign in to your account. Go to iCloud Step 2: You will get a pop-up on your other Apple device (iPhone, Mac, or iPad) that says, ‘Your Apple ID is being used to sign into a new device’ Click Allow. Step 3: Once you do, you will get a verification code that you will need to enter into your Windows PC, where you want to access Apple Notes. Step 4: On the next screen, you will be asked if you ‘Trust this browser?’ click Trust. Step 5: You will land on your iCloud account. From here, click on Notes. Step 6: After the Notes web app finishes loading, click on the three-dot Chrome menu at the top right corner. Step 7: From the drop-down, click on More Tools, and choose Create Shortcut. Step 8: In the Create shortcut? prompt, name the web app, check the box next to ‘Open as Window,’ then click Create. There you go. When you open the Apple Notes shortcut web app, it will open in a dedicated Chrome or Edge window without the address bar and offer a very app-like experience. You can view, add, edit, or share notes without issues. If you have inconvenience using the above methods, may the next method will help.
3. Sync Apple Notes to Gmail
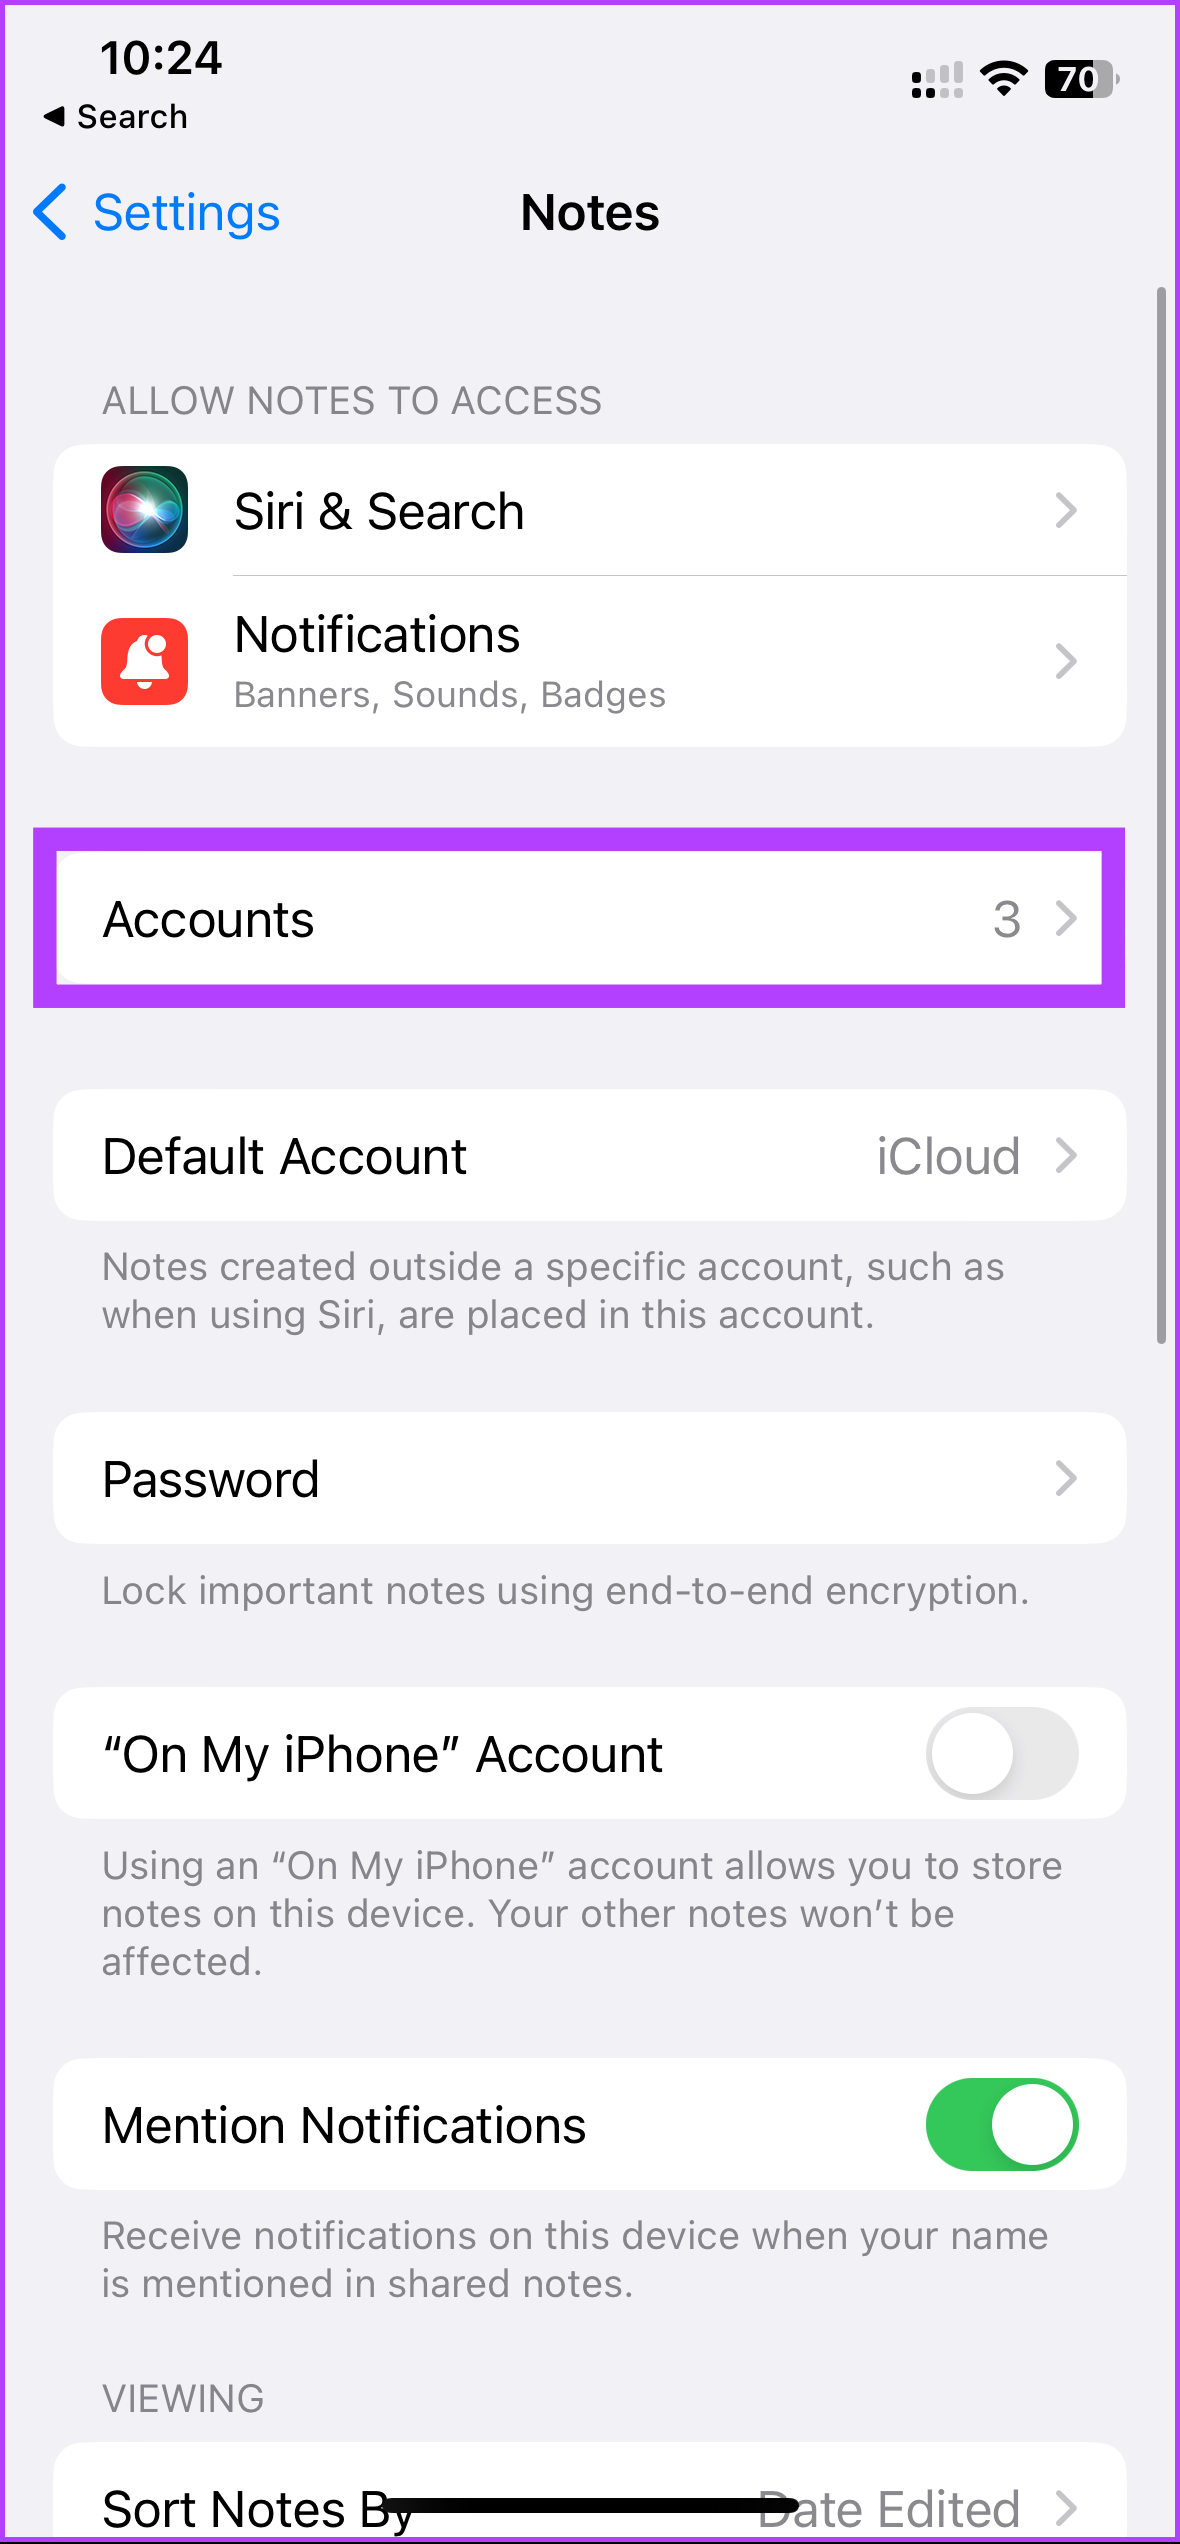
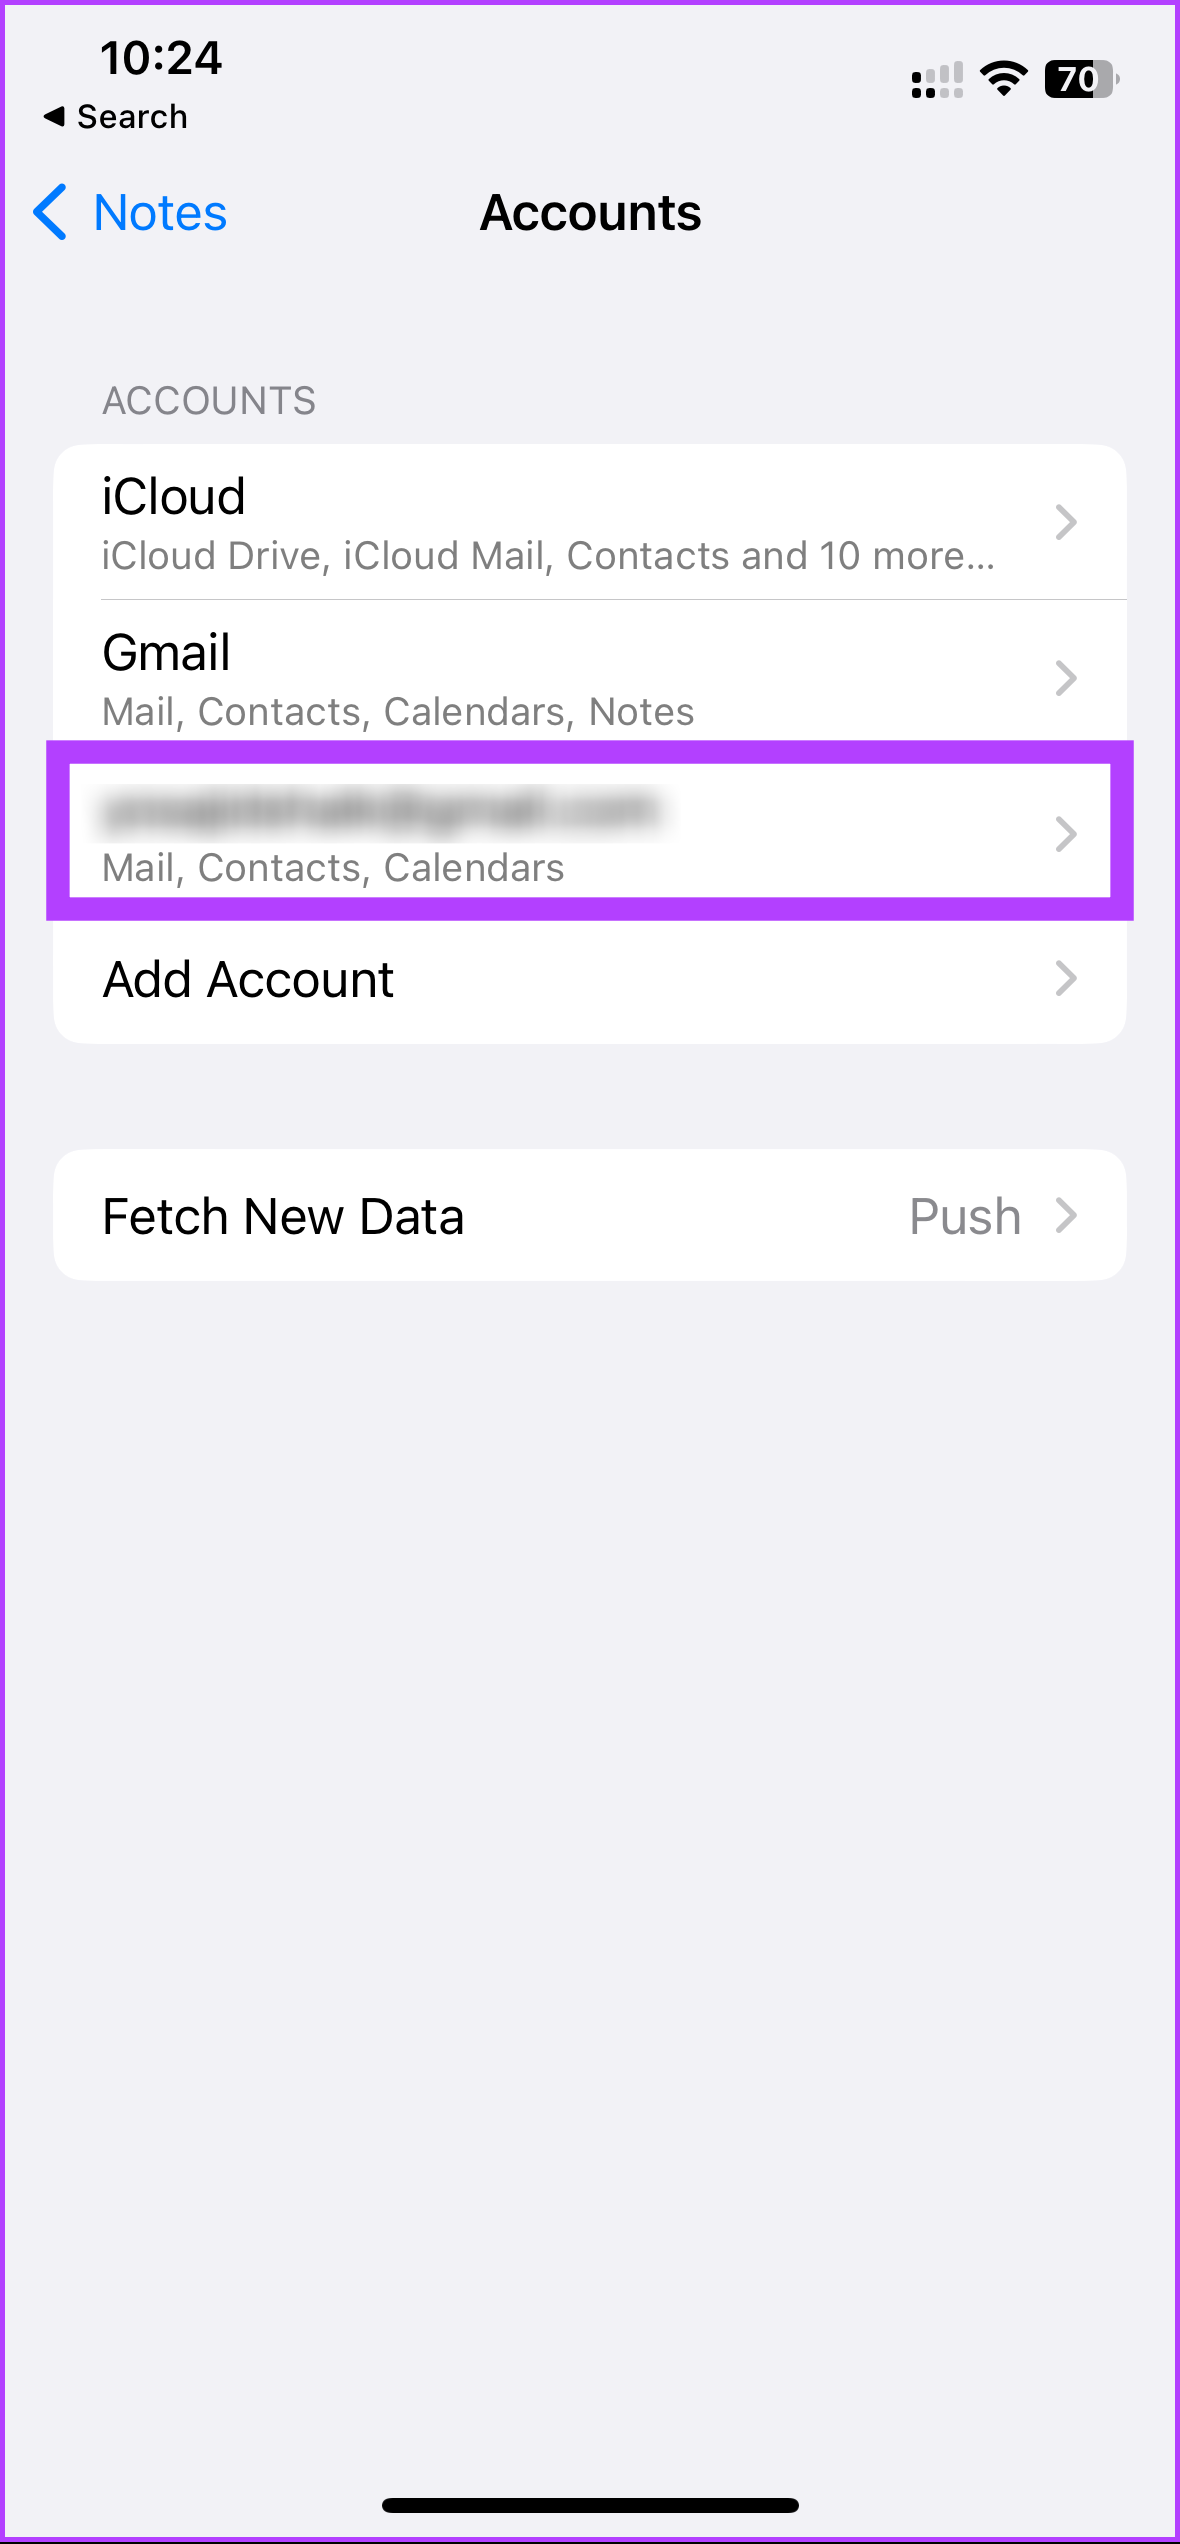
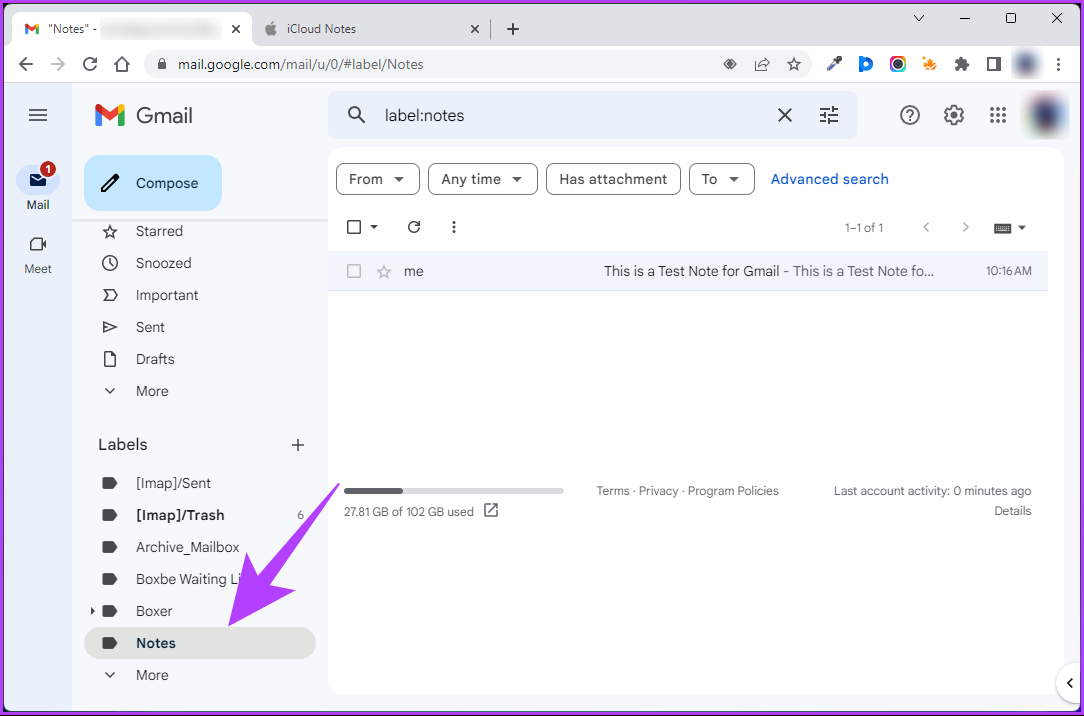
If you have a Google account added to your iPhone, syncing the Apple Notes app on Gmail is possible; in fact, the process becomes so seamless that you will barely see any lag or difference. However, the catch is that only new notes you create within the Gmail folder on your iPhone’s Notes app will sync, not your old notes or the notes in other folders. That said, follow the below-mentioned steps. Step 1: Go to the Settings app on your iPhone and scroll down and tap on Notes. Step 2: Under Notes, tap on Accounts and on the next screen, tap on the Gmail account you want to sync your notes to. Note: If you don’t see Gmail listed, tap the Add Accounts option and add a Google Account to your iPhone. Step 3: Under Gmail account settings, toggle on the button next to Notes. Once you do the above steps, you will see a separate Notes folder under the Gmail header in the Notes app. And any note that you create within it is accessible via the Gmail web app on your PC. Continue the below steps. Step 4: Go to Gmail from your preferred browser on your Windows or Mac computer. Step 5: Under Label, select Notes to view your synced Apple Notes. Do note Gmail does not allow you to edit these notes through its web app. You can only do that on your iPhone; check out our detailed guide on how to view iPhone notes in Gmail.
Access Your Notes Anywhere
With the step-by-step guide above, you can easily set up and access your Apple Notes on your Windows PC without hassle. So, whether you are a student, a professional, or someone who likes to stay organized, try and see how easy it is to access your notes on Windows. You may also want to read how to transfer iPhone Notes to Google Keep. The above article may contain affiliate links which help support Guiding Tech. However, it does not affect our editorial integrity. The content remains unbiased and authentic.


![]()