A legacy contact carries detail of a person who can access the data on your iPhone after your demise. It can be a family member or a close friend who you trust. It’s quite similar to a nominee you add for a bank account. Here’s how you can add a Legacy Contact on your iPhone and grant access to your iCloud data to them after you pass away.
What Data Can a Legacy Contact Access
A legacy contact can access your iPhone’s data synced to iCloud. This includes your installed apps, photos, videos, files, notes, contacts, messages, call logs, and calendar events. However, that person can’t access to saved passwords in the iCloud Keychain. Also, licensed media purchased via services like iTunes will not be accessible. You can set up a legacy contact on your iPhone only when you are comfortable with sharing the information and data after your death.
How to Add a Legacy Contact from Your iPhone
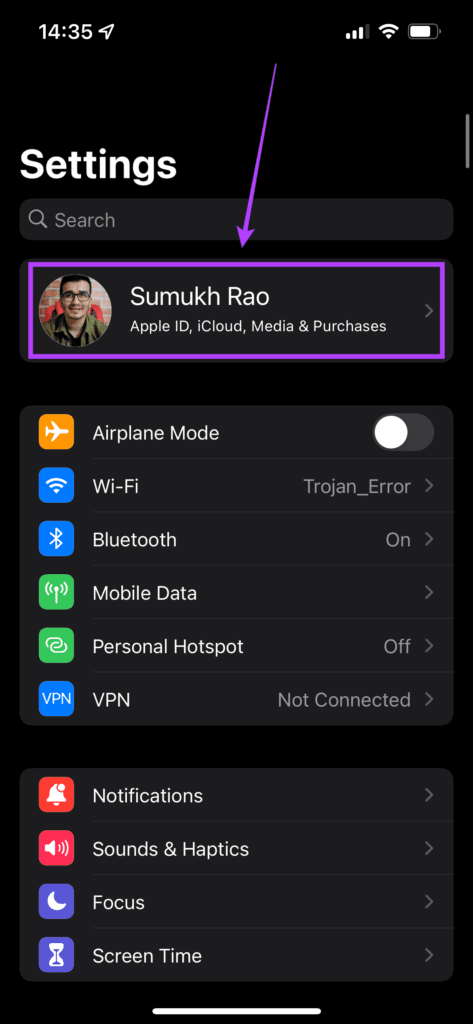
Before you begin, make sure your iPhone software runs iOS 15 or above. This feature is only available from iOS 15 onwards. So if you have an older iPhone that doesn’t support the iOS version, you can’t add a legacy contact. Step 1: Open the ‘Settings; app on your iPhone. Tap on your name displayed at the top of the screen.
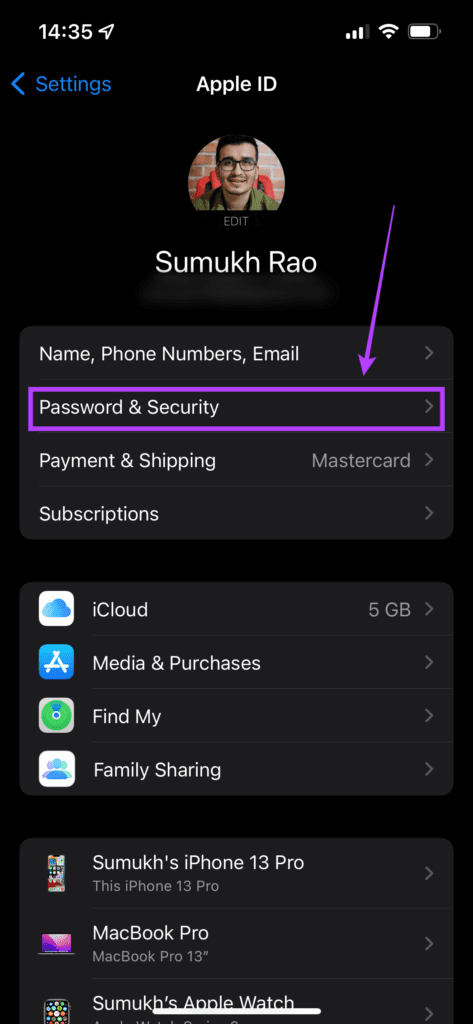
Step 2: Select the ‘Password & Security’ option under your Apple ID.
Step 3: Scroll down till you find the ‘Legacy Contact’ option. Tap on it.
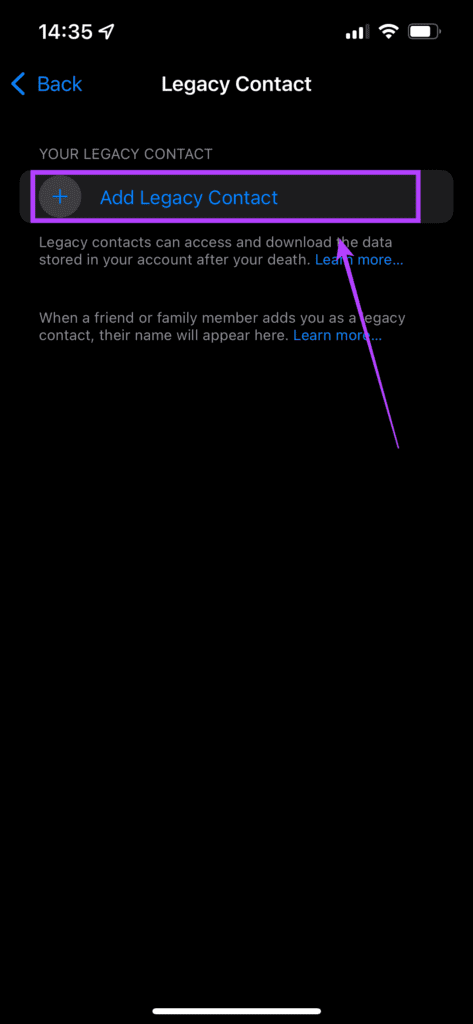
Step 4: Now, tap on the ‘Add a Legacy Contact’ option. It’s also worth noting that if someone has added you as their legacy contact, you will be able to see it on this screen.
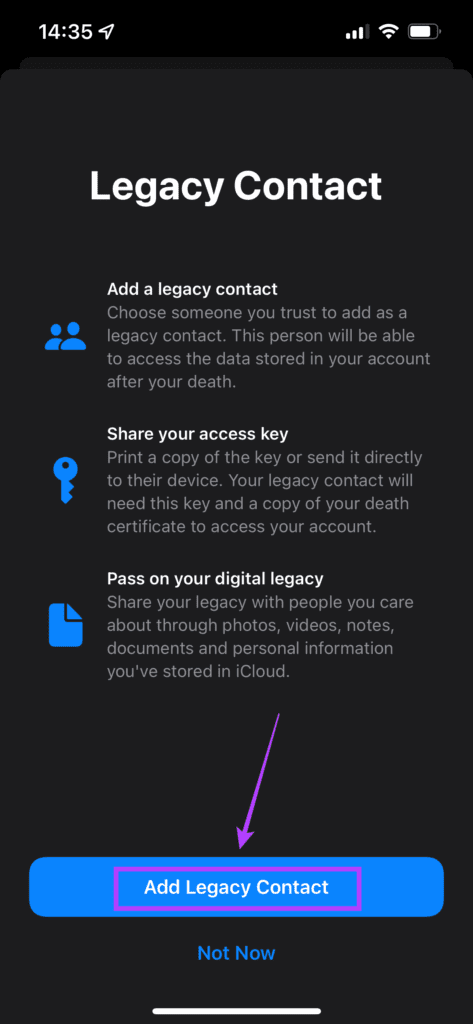
Step 5: Select ‘Add Legacy Contact’ once again after reading through the information displayed.
Step 6: You can now select a contact you want to add as a legacy contact from your phonebook. Once you’ve selected the contact, tap on their phone number or email ID to select the option where to receive the secret key. Then, select ‘Continue.’ The legacy contact you add will show up on your iPhone and other devices connected to the same Apple ID. Step 7: You can choose from two options to share the secret access key with the contact. You can send it to the person you’ve selected as the Legacy Contact via iMessage, which will automatically store the key on their device. Or, you can choose to take a physical printout to hand it over.
Step 8: On the ‘Legacy Contact Added’ screen, you will find an option to update your birthday. Select that option if you haven’t set your birthday on your iCloud account or if it’s incorrect. If it’s already set accurately, tap on ‘Done.’
To add multiple legacy contacts, repeat the entire process once again. Selecting a legacy contact will give you the option to view their access key and remove that person as a legacy contact. You can take a printout of the access key and store it in a safe place. It contains a QR code with a unique 88-character key that unlocks your data.
How to Access iCloud Data as a Legacy Contact
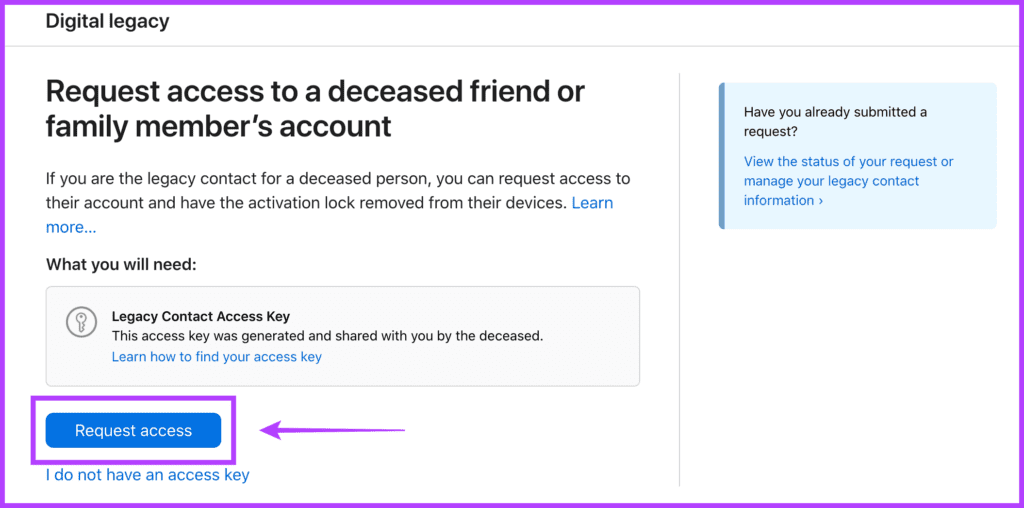
Adding someone as a legacy contact does not mean they can access your data whenever they feel like it. The contact has to follow certain steps before the iCloud data is accessible. Here’s the procedure. Step 1: Visit Apple’s Digital Legacy Portal and select ‘Request Access’. Log in with your Apple ID when prompted.
Step 2: Enter the first 32 characters of the access key after which you will be asked to upload a copy of the death certificate of the deceased. You will also have to verify the birthday before access is granted. Step 3: Once verified, you can access the relevant data on iCloud or even download a copy if you want to store it and view it later on.
Let Your Legacy Continue
By setting up legacy contacts, you can let people access important data and share your life’s memories with your family and close friends. Also, in case of your absence, the legacy contact is helpful to prove that a particular device belongs to you. The above article may contain affiliate links which help support Guiding Tech. However, it does not affect our editorial integrity. The content remains unbiased and authentic.
