But you might need to upgrade your cloud storage with time, especially if you click many photos, shoot many videos, or want to store large files. So in this post, we will share the steps to upgrade, downgrade or cancel your iCloud Storage Plan using your iPhone, iPad, Mac, and Windows PC.
Apple One vs iCloud+
Before showing you the steps, let us quickly mention the differences between Apple One and iCloud+ subscriptions. If you are already a paying iCloud customer, Apple upgraded your subscriptions to iCloud+ and offered you more options to upgrade your storage. On the other hand, Apple One is an all-inclusive service that bundles iCloud+ storage with services like Apple TV+, Apple Arcade, Apple Music, Apple Fitness+, and Apple News+. You can still upgrade your iCloud+ storage while using an Apple One plan. However, you will also have to cancel your Apple One plan to cancel your iCloud+ plan.
Change iCloud Storage Plan on iPhone and iPad
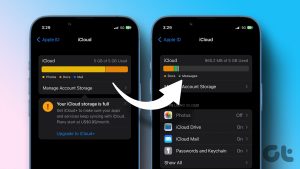
Let us now show you the steps to change your iCloud+ storage plan. We will be referring to iCloud as iCloud+ for this post because Apple calls it the same. First, we will share the steps for iPhone and iPad. They remain the same for both platforms. Step 1: Open the Settings app on your iPhone or iPad. Step 2: Tap on your profile name at the top. Step 3: Tap on iCloud. Step 4: Select Manage Account Storage. Step 5: Tap on Change Storage Plan. Step 6: You can now choose between different options for upgrading your iCloud+ storage. After you select a specific upgrade, you will also see your total iCloud+ storage. Step 7: Tap on Buy at the top-right corner. Step 8: Follow the on-screen steps to complete the purchase. Your upgraded iCloud storage will be visible in the Settings app.
Downgrade or Cancel iCloud Storage on iPhone and iPad
When you cancel your iCloud+ subscription, you will be downgraded to the default 5GB storage. You also lose access to all the privacy features like Privacy Relay and Hide My Email. If you wish to upgrade or cancel your Apple storage subscription, you can do it on your iPhone or iPad. The steps remain the same for iPhone and iPad.
For iCloud+ Users
Step 1: Open the Settings app on your iPhone or iPad. Step 2: Tap on your profile name at the top. Step 3: Tap on iCloud. Step 4: Select Manage Account Storage. Step 5: Tap on Change Storage Plan. Step 6: Tap on Downgrade Options. Follow the on-screen instructions to downgrade or cancel your iCloud+ subscription.
For Apple One Users
Step 1: Open the Settings app on your iPhone or iPad. Step 2: Tap on your profile name at the top. Step 3: Tap on iCloud. Step 4: Select Manage Account Storage. Step 5: Tap on Change Storage Plan. Step 6: Select Change Apple One Plan. Step 7: Top on Apple One. Step 8: To upgrade plans, tap on See All Plans. To cancel, tap on Cancel All Services. Follow the on-screen instructions to finish the process.
Change iCloud Storage Plan on Mac
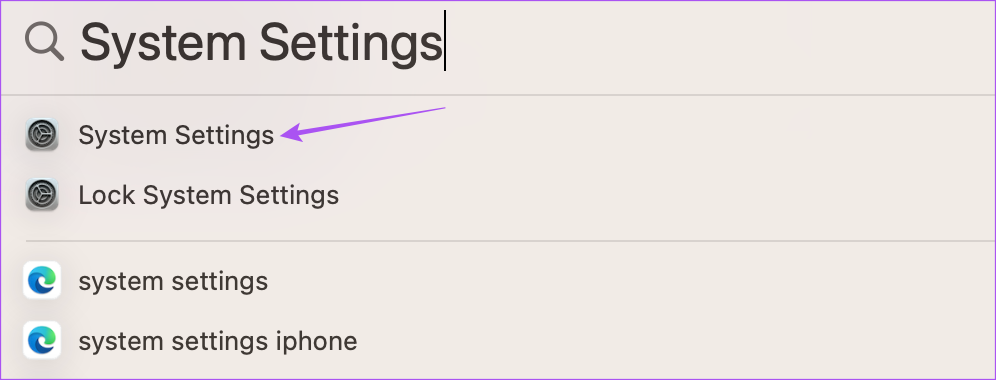
You can free up the internal storage of your Mac by moving your files to iCloud. However, you can manage your iCloud+ storage subscription by changing your current plan, if the need arises. Ensure that you are using a strong internet connection while following the steps. Also, these steps are applicable for both Apple One and iCloud+ subscriptions. Step 1: Press Command + Spacebar keyboard shortcut to open Spotlight Search, type System Settings, and press Return. Step 2: Click on your profile name at the top-left corner. Step 3: Select iCloud. Step 4: Click Manage next to Account Storage. Step 5: Click on Change Storage Plan. Step 6: Select from the upgrade options. Step 7: Click on Next at the bottom-right corner. Follow the on-screen steps to complete the process. Refer to our post if you spot an error connecting to iCloud on your Mac.
Downgrade or Cancel iCloud Storage on Mac
We will now show you the steps to downgrade or cancel your iCloud+ or Apple One subscription on Mac.
For iCloud+ Users
Step 1: Press Command + Spacebar keyboard shortcut to open Spotlight Search, type System Settings, and press Return. Step 2: Click on your profile name at the top-left corner. Step 3: Select iCloud. Step 4: Click Manage next to Account Storage. Step 5: Click on Change Storage Plan. Step 6: Click on Downgrade Options on the bottom-left side. Follow the on-screen instructions to downgrade or cancel your iCloud+ subscription.
For Apple One Users
Step 1: Press Command + Spacebar keyboard shortcut to open Spotlight Search, type System Settings, and press Return. Step 2: Click on your profile name at the top-left corner. Step 3: Select iCloud. Step 4: Click Manage next to Account Storage. Step 5: Click on Change Storage Plan. Step 6: Click on Change Apple One Plan at the bottom-left side. You will be redirected to Apple Music on your Mac. Step 7: Click on Edit next to Apple One. You have the option to upgrade or cancel your subscription. Select an option and follow the on-screen prompts to complete the process.
Change iCloud Storage Plan on Windows PC
Apple also allows you to manage your iCloud+ subscription if you have a Windows PC. All you need is to install the iCloud app from Microsoft Store. Download iCloud for Windows After you download and install it, here’s how to change your storage plan. Step 1: Click the Start icon on your Windows PC, type iCloud, and press Enter to open iCloud. Step 2: Sign in to your Apple account. Step 3: Click on Storage at the bottom-right side. Step 4: Click on Change Storage Plan at the top right side. Step 5: Select the storage upgrade and click on Next at the bottom-right corner. Follow the on-screen instructions to complete the process.
Downgrade or Cancel iCloud Storage on Windows PC
Here’s how you downgrade or cancel your iCloud+ storage plan on your Windows PC. Do ensure that you are also using Apple Music on your Windows PC.
For iCloud+ Users
Step 1: Click the Start icon on your Windows PC, type iCloud, and press Enter to open iCloud. Step 2: Sign in to your Apple account. Step 3: Click on Storage at the bottom-right side. Step 4: Click on Change Storage Plan at the top right side. Step 5: Click on Downgrade Options in the bottom-left corner. Follow the on-screen instructions to complete the process.
For Apple One Users
Step 1: Click the Start icon on your Windows PC, type iCloud, and press Enter to open iCloud. Step 2: Sign in to your Apple account. Step 3: Click on Storage at the bottom-right side. Step 4: Click on Change Storage Plan at the top right side. Step 5: Click on Change Apple One Plan on the bottom-left side. Step 6: Click the prompt to Open iTunes in your web browser. Step 7: Click on Edit next to Apple One. Select your plan or cancel your Apple One subscription.
Manage iCloud Storage
Keeping a tab on your cloud storage for better file management is important. Apple lets you take control of all your storage needs by offering different plans to choose from using any Apple or non-Apple device. The above article may contain affiliate links which help support Guiding Tech. However, it does not affect our editorial integrity. The content remains unbiased and authentic.


![]()

