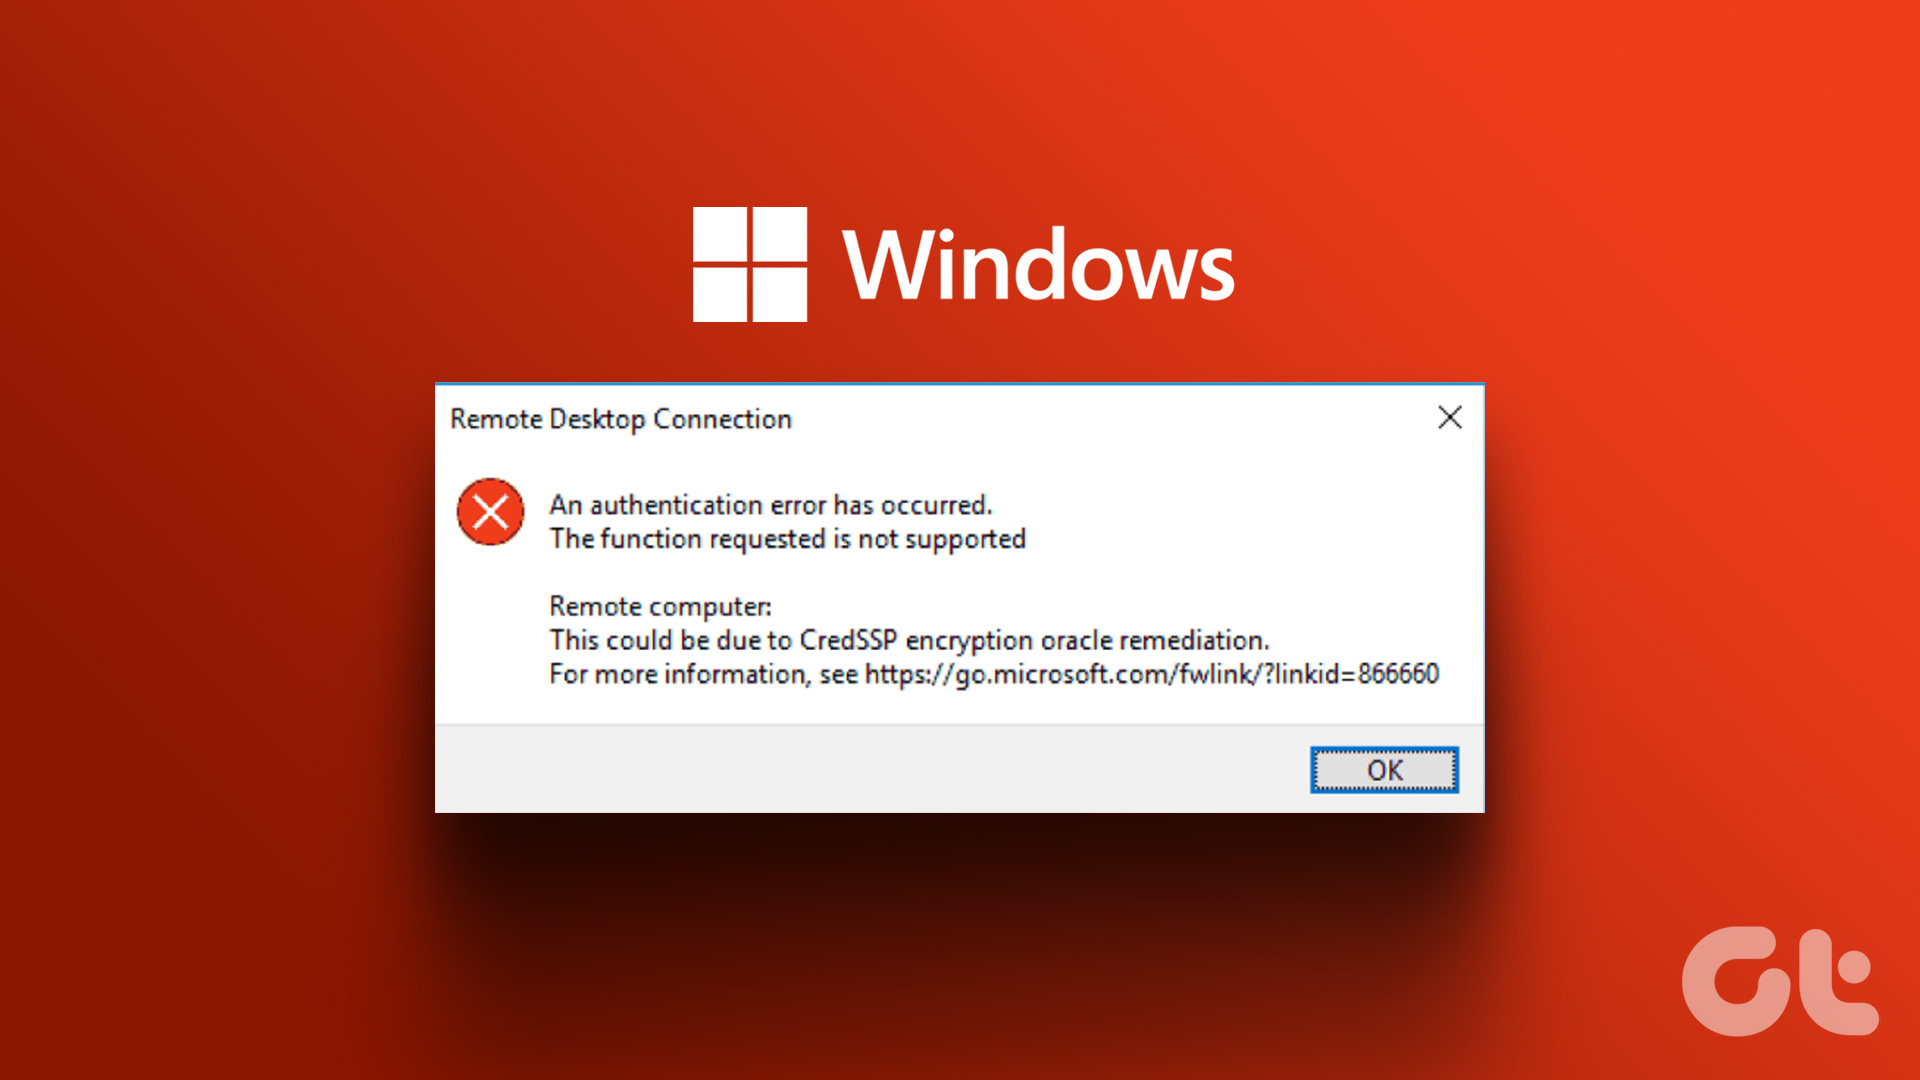
On Windows 10, iTunes is well-known for throwing around the most ridiculous of errors. Be it failing to read the contents on your iPhone to just flat out refusing to play your music, iTunes will rarely disappoint you in that department. Of course, I’m hoping you’ll get my sarcasm which comes from frustration of facing several such niggles. Just the other day, my Windows 10 PC greeted me with ‘iTunes could not connect to this iPhone, an unknown error occurred (0xE800000A)’ prompt, and left me clueless. I wanted to back up my iPhone to install the iOS 13 beta, and the timing couldn’t be worse. Thankfully, iTunes-related errors can be fixed easily provided you are prepared to spend some timing trying out certain troubleshooting tips. So without any further ado, let’s check out what you can do to fix the iTunes 0xE80000A error when connecting an iPhone to your PC.
1. Update Windows, iOS, and iTunes
The first thing that you should do is to go on an updating spree. If the iTunes 0xE80000A error is caused due to software or hardware incompatibilities, installing the latest updates for Windows 10, iOS, and iTunes will likely fix it. Start by updating Windows 10. To do that, type check for updates into the Start menu, and then click Open. On the Windows Update box that shows up, click Check for Updates, and install any updates if available. When it comes to iOS, open the Settings app on your iPhone, tap General, and then tap Software Update. If any updates are available, click Download and Install. Finally, update iTunes. Simply type apple software update in the Start menu, and then press Enter. If there are any updates available, install them. While you are at it, also install updates for related Apple software such as iCloud.
2. Disable Antivirus
Third-party antivirus applications can often cause connectivity issues between iTunes and your iPhone. To check that, pause your antivirus software temporarily and try connecting your iPhone again. Tip: If that helped resolve the issue, you should add iTunes as an exemption to the antivirus application’s firewall.
3. Reset Location and Privacy Settings
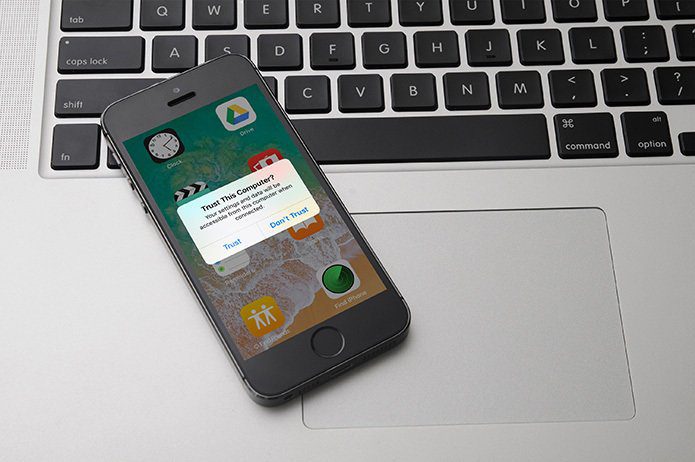
Corrupted location and privacy settings on your iPhone are another reason for the iTunes 0xE80000A error to show up. These settings carry the trust permissions that were granted to your iPhone the first time you linked it to your PC. To resolve the issue, you need to reset them. Note: Step 1: On the Settings app of your iPhone, tap General, and then tap Reset. Step 2: On the subsequent screen, tap Reset Location and Privacy, and then tap Reset Settings as confirmation. After resetting the location and privacy settings, connect your iPhone to your PC. Launch iTunes, and then tap Trust on the pop-up prompt on your iPhone when prompted.
4. Reset Lockdown Folder
The Lockdown folder is a special directory created by iTunes that contains the various security certificates required to communicate with previously connected iOS devices successfully. Just like with the trust permissions on your iPhone, it’s time to reset the folder. Step 1: Press Windows+R to open the Run box. Type %ProgramData% into the Open field, and then click OK. Step 2: On the File Explorer window that shows up, double-click the folder labeled Lockdown. Step 3: Within the Apple directory, right-click the folder labeled Lockdown, and then click Rename. Step 4: Rename the folder to Lockdown.old. Note: Relaunch iTunes, connect your iPhone and then tap Trust when prompted. The Lockdown folder will be created from scratch complete with the security certificates required to communicate successfully between both devices.
5. Reinstall iTunes
If you are still faced with the 0xE80000A error when connecting your iPhone, then it’s time to reinstall iTunes. That should hopefully take care of any corrupted data or improper settings which are causing the error to show up. Type apps & features into the Start menu, click Open, and then remove iTunes related programs in the following order:
iTunesApple Software UpdateApple Mobile Device SupportBonjourApple Application Support 32-bitApple Application Support 64-bit
Afterward, restart your computer, download a fresh copy of iTunes, and then reinstall it. Download iTunes
6. Switch Versions
A year ago, Apple released iTunes on the Windows Store. While it looks nearly the same, the Windows Store version is marginally better in terms of performance and throws far fewer errors compared to the normal desktop version. If the fixes above didn’t help, then switching to the Windows Store version of iTunes should likely resolve the issue. Migrating to the Windows Store version is also painless. iTunes migrates the downloaded music and backups automatically during installation. Get to the iTunes page within the Windows Store, click Install, and you should be good to go in a matter of minutes. Download iTunes Windows Store Version
Growing Pains
Hopefully, the iTunes 0xE80000A error no longer shows up, and you can now go about successfully connecting your iPhone to iTunes. However, there’s simply no excuse for these weird issues to show up in the first place. Apple needs to take drastic action by splitting iTunes into its various components (Music, Podcasts, etc.) on Windows as well — just like the company did with new macOS Catalina. That should help cut the bloat out and provide the vast majority of Windows and iPhone users a decent experience for a change. Next up: Hate using iTunes to stream your music on a desktop? Here are three terrific web apps that you can use instead. The above article may contain affiliate links which help support Guiding Tech. However, it does not affect our editorial integrity. The content remains unbiased and authentic.