For example, it may refuse to record your screen while using specific apps. It may appear grayed out within the Control Center. Maybe you have disabled Screen Recording and forgotten about it. Or it may end up throwing an obscure ‘Screen recording failed to save’ error message instead. If that sounds familiar, then here’s what you need to know if Screen Recording is not working on your iPhone or iPad.
1. Check if the App Supports Screen Recording
Let’s get this out of the way first — Screen Recording won’t work everywhere. Usually, this happens when certain apps impose limitations on functionality when playing copy-protected content. If this is the case, Screen Recording may fail to start, the app that you are attempting to record may pause or freeze, or stopping the recording can result in an error message. For example, you can’t use Screen Recording while playing music or videos in the Music app. Problems with Screen Recording isolated to a certain app most likely means that this is the reason. Sadly, you can’t do anything about it.
2. Restart Your iPhone
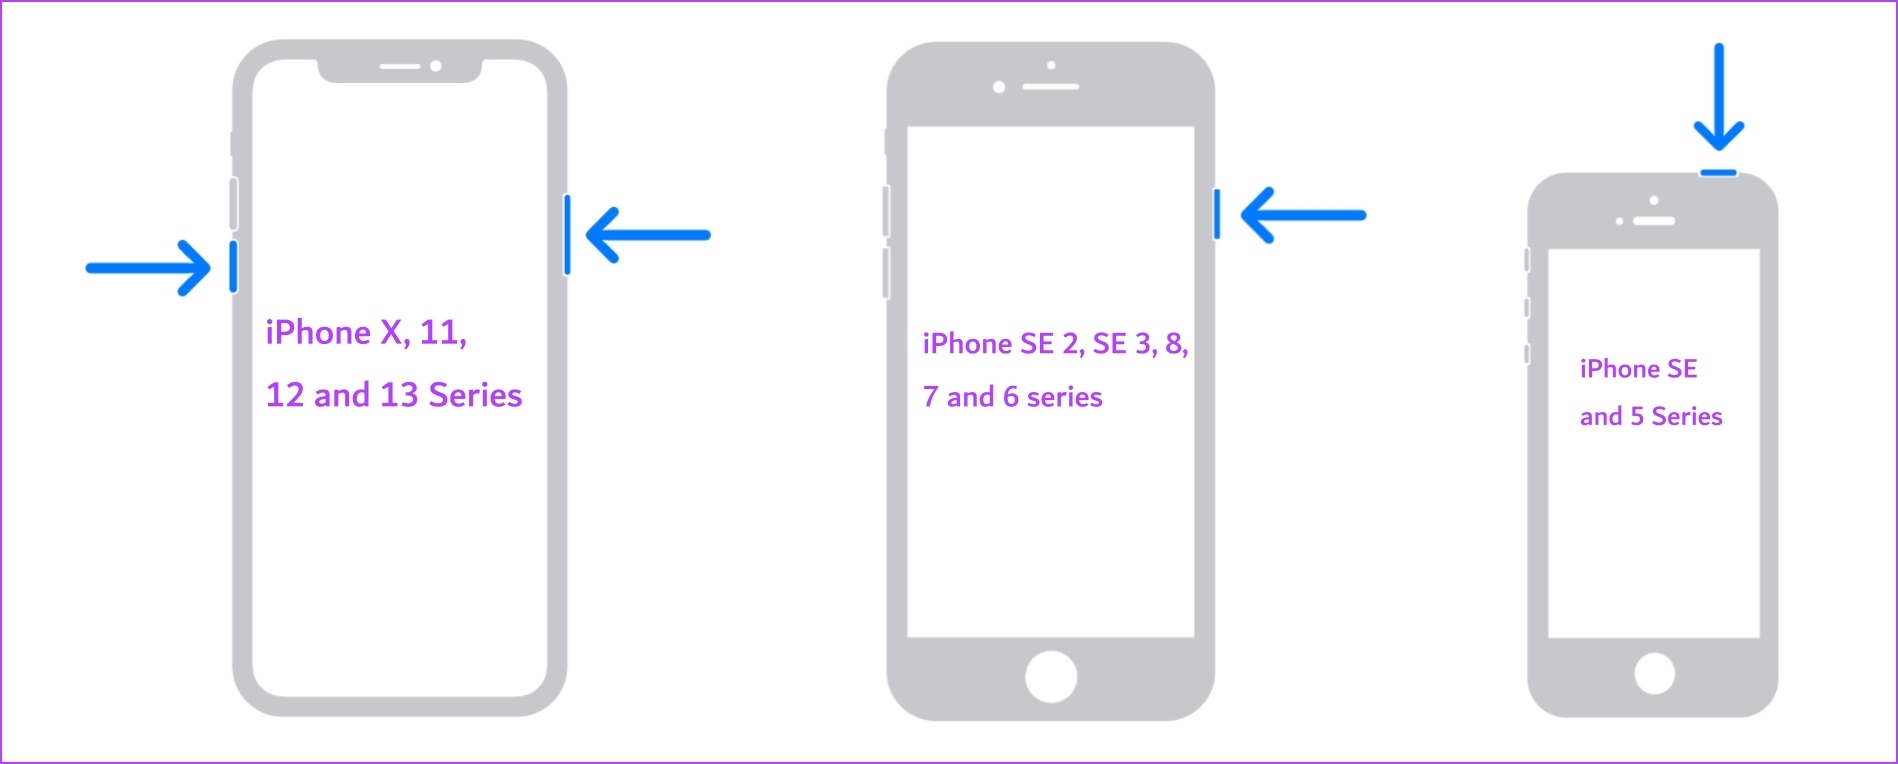
If Screen Recording was working without issues all along and suddenly stopped functioning, then it might be worth restarting your device. That should likely help resolve any software glitches preventing Screen Recording from running properly. Step 1: First, shut down your device.
On iPhone X and above Press and hold the volume down and the side button. On iPhone SE 2nd or 3rd gen, 7, and 8 series: Press and hold the side button. On iPhone SE 1st gen, 5s, 5c, or 5: Hold the power button at the top. On iPad: Hold the power button at the top.
Step 2: Now, drag the power slider to turn off the device. Step 3: Next, turn on your device by pressing an
3. Update iPhone or iPad
Keeping your iPhone or iPad up to date is a good idea, especially if many users find that screen recording is not working on iPhone and iPad. Often, the latest iOS and iPadOS updates bring significant bug fixes and performance enhancements that can help to fix persistent problems for good. Furthermore, we recommended that you keep your library of apps updated. Long-press the App Store icon on your iPhone or iPad and then tap Updates to do that. Step 1: Open the Settings app, and select General. Step 2: Tap on Software Update. Tap on ‘Download and Install’ to update your iPhone or iPad.
4. Add Screen Recording to Control Center
Is the Screen Recording icon missing from the Control Center? If that is the case, then here’s how you can add it to the control center so that you can easily find the option to start a screen recording on your iPhone and iPad. Step 1: Open the Settings app, and open Control Center. Step 2: Scroll down to find the Screen Recording option, and select the ‘+’ icon next to it. You can now see that Screen Recording is added to Included Controls.
5. Check Restrictions for Screen Recording
Is the Screen Recording icon on the Control Center grayed out? If so, the feature is likely restricted. To lift the restriction, here’s what you must do. Step 1: Open the Settings app. Step 2: Tap on Screen Time. Step 3: Tap on ‘Content and Privacy Restrictions’. Step 4: Tap on Content Restrictions. Step 5: Scroll down, and tap on Screen Recording. Step 3: Tap Allow, and then exit the Settings app. The Screen Recording icon within the Control Center should now be active. Simply tap on it to start recording.
6. Disable Low Power Mode
Are you receiving a ‘Screen recording failed to save’ error message when stopping your screen recordings? If you have Low Power Mode enabled, then that likely could be the reason. Low Power Mode curtails certain functions within iOS and iPadOS, and that might prevent Screen Recording from capturing and saving your screen properly. Step 1: Open the Settings app. Step 2: Tap on Battery. Step 3: Turn off the toggle for ‘Low Power Mode’.
7. Check Storage
Are your recordings failing to save to the Photos app? You must check if storage is the likely issue. If your storage is full, there will not be any space to save your screen recordings. Step 1: Open the Settings app and select General. Step 2: Tap on iPhone Storage. Check if you have enough storage space left. Step 3: If not, clear your storage space. You can also delete or offload unnecessary apps yourself. Or you can use these tips and tricks to free up storage on your iPhone or iPad.
8. Enable Microphone for Screen Recording
Is Screen Recording failing to capture sounds from your microphone? Easily fixable. Just turn on the microphone before initiating Screen Recording. To do that, perform a Haptic Touch gesture (long-press) on the Screen Recording icon within the Control Center, and then tap Microphone. You can also do this after starting a recording.
9. Reset All Settings
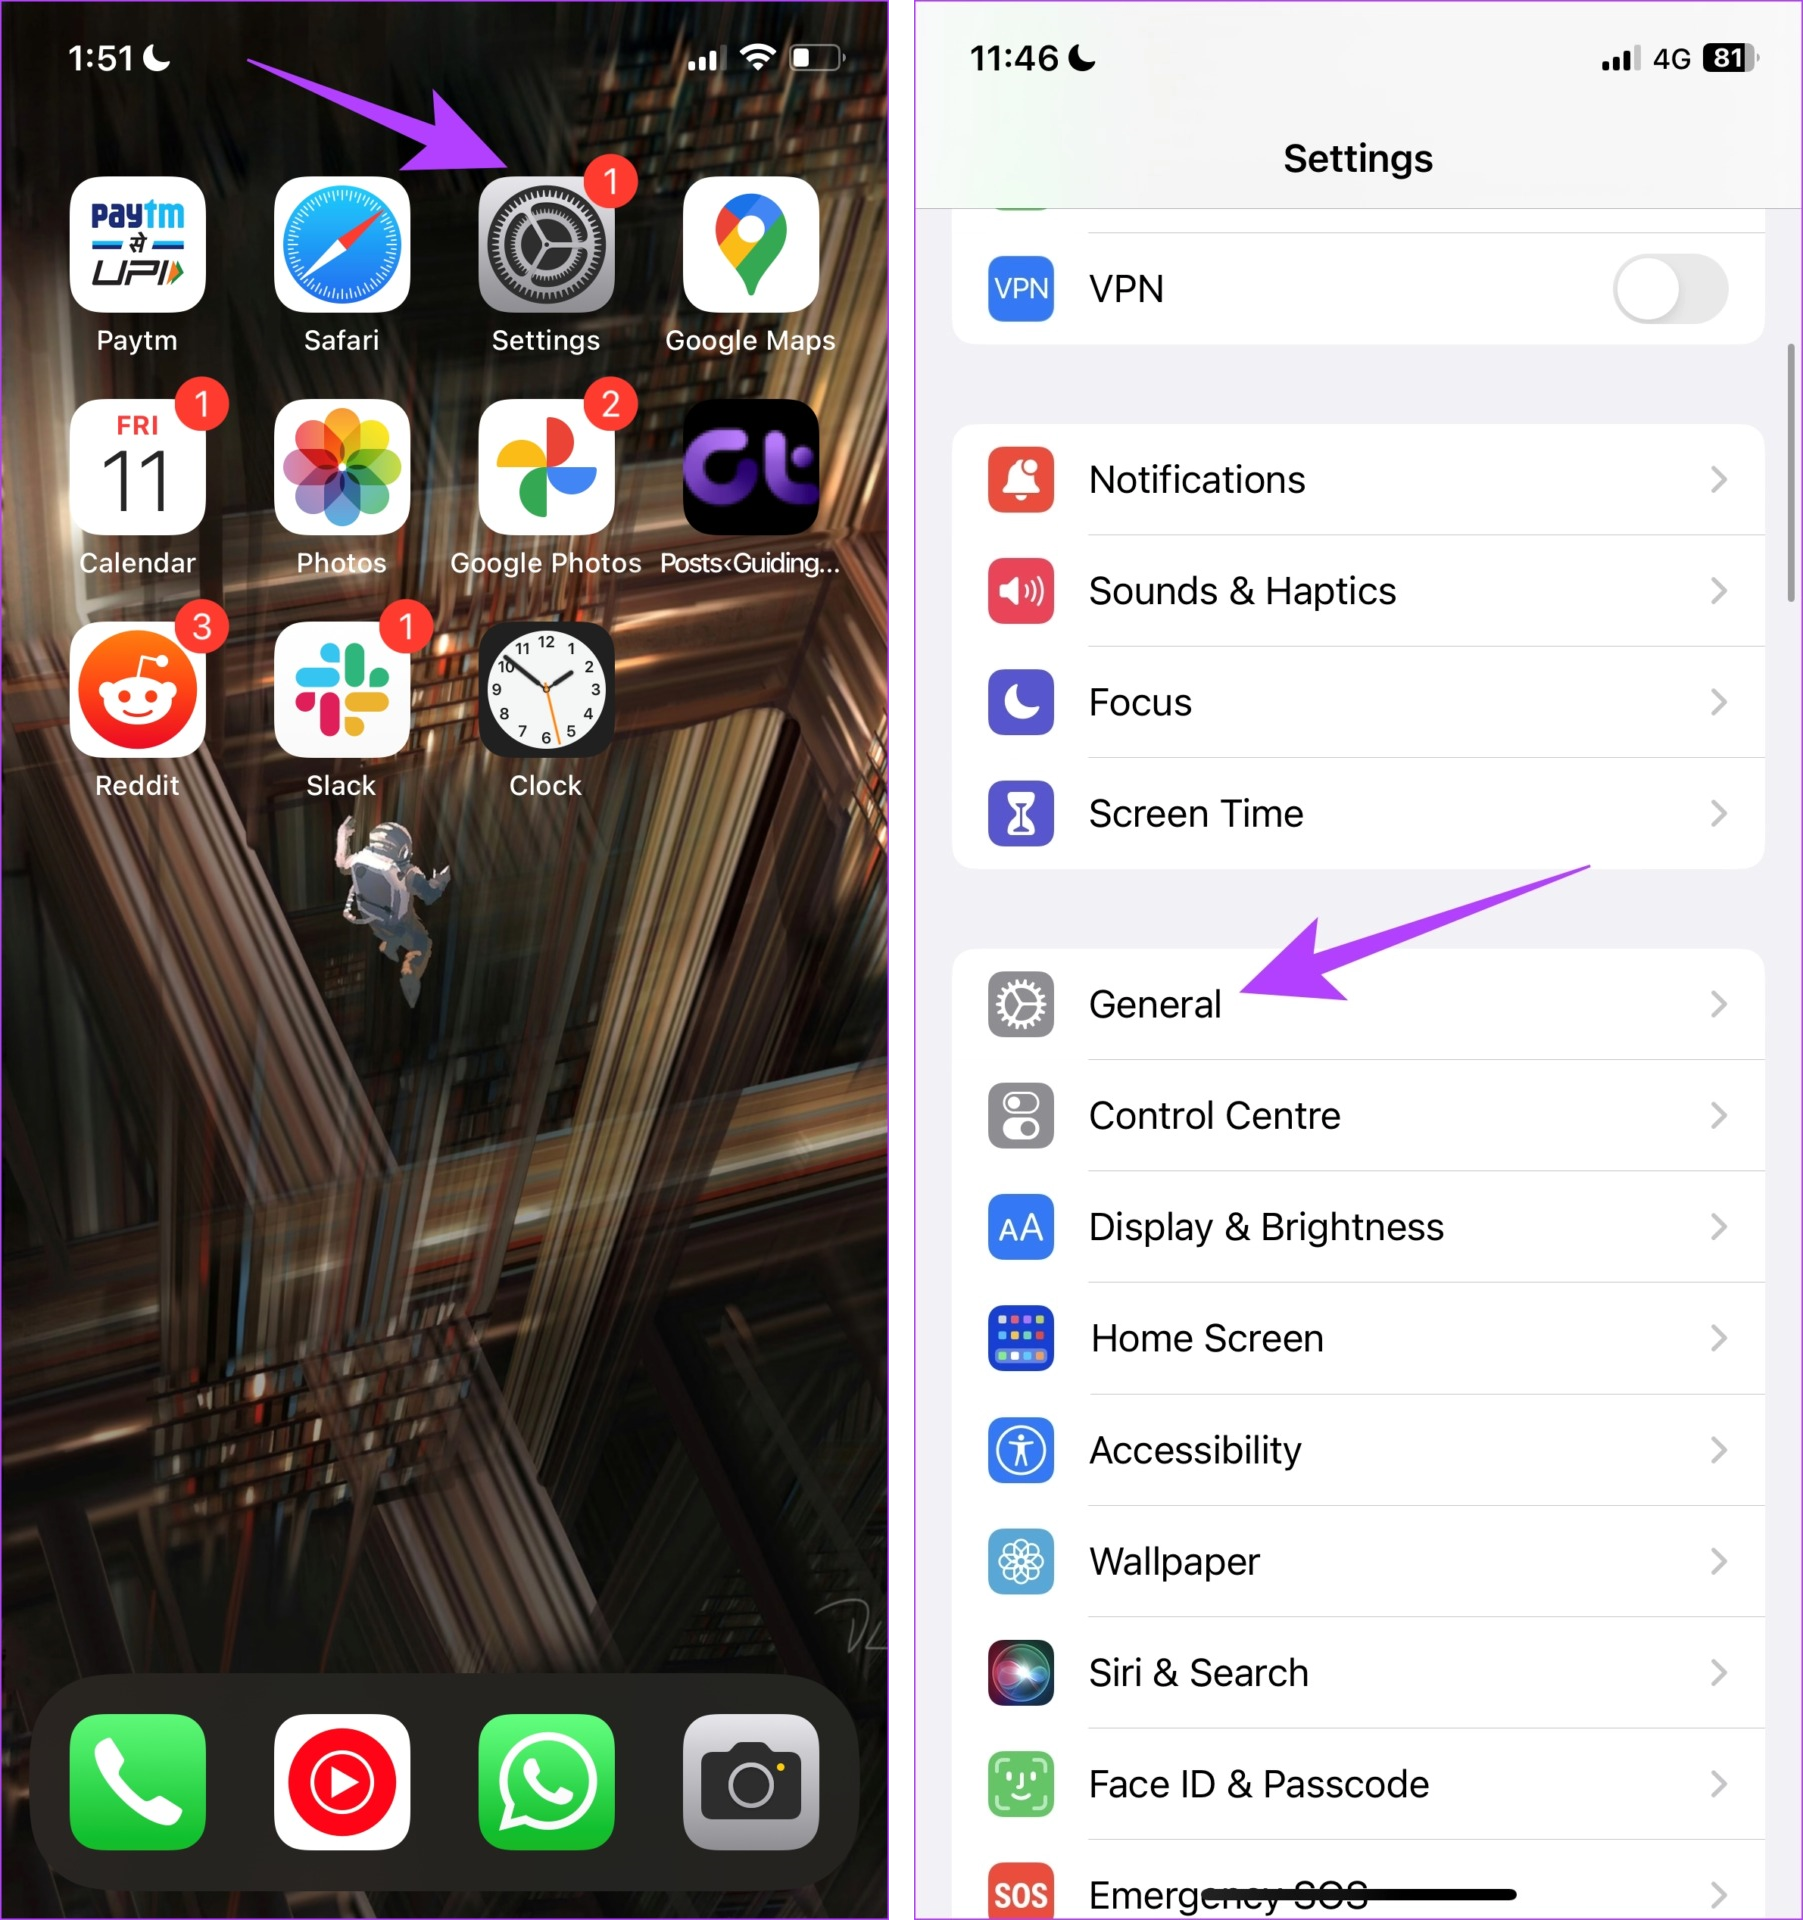
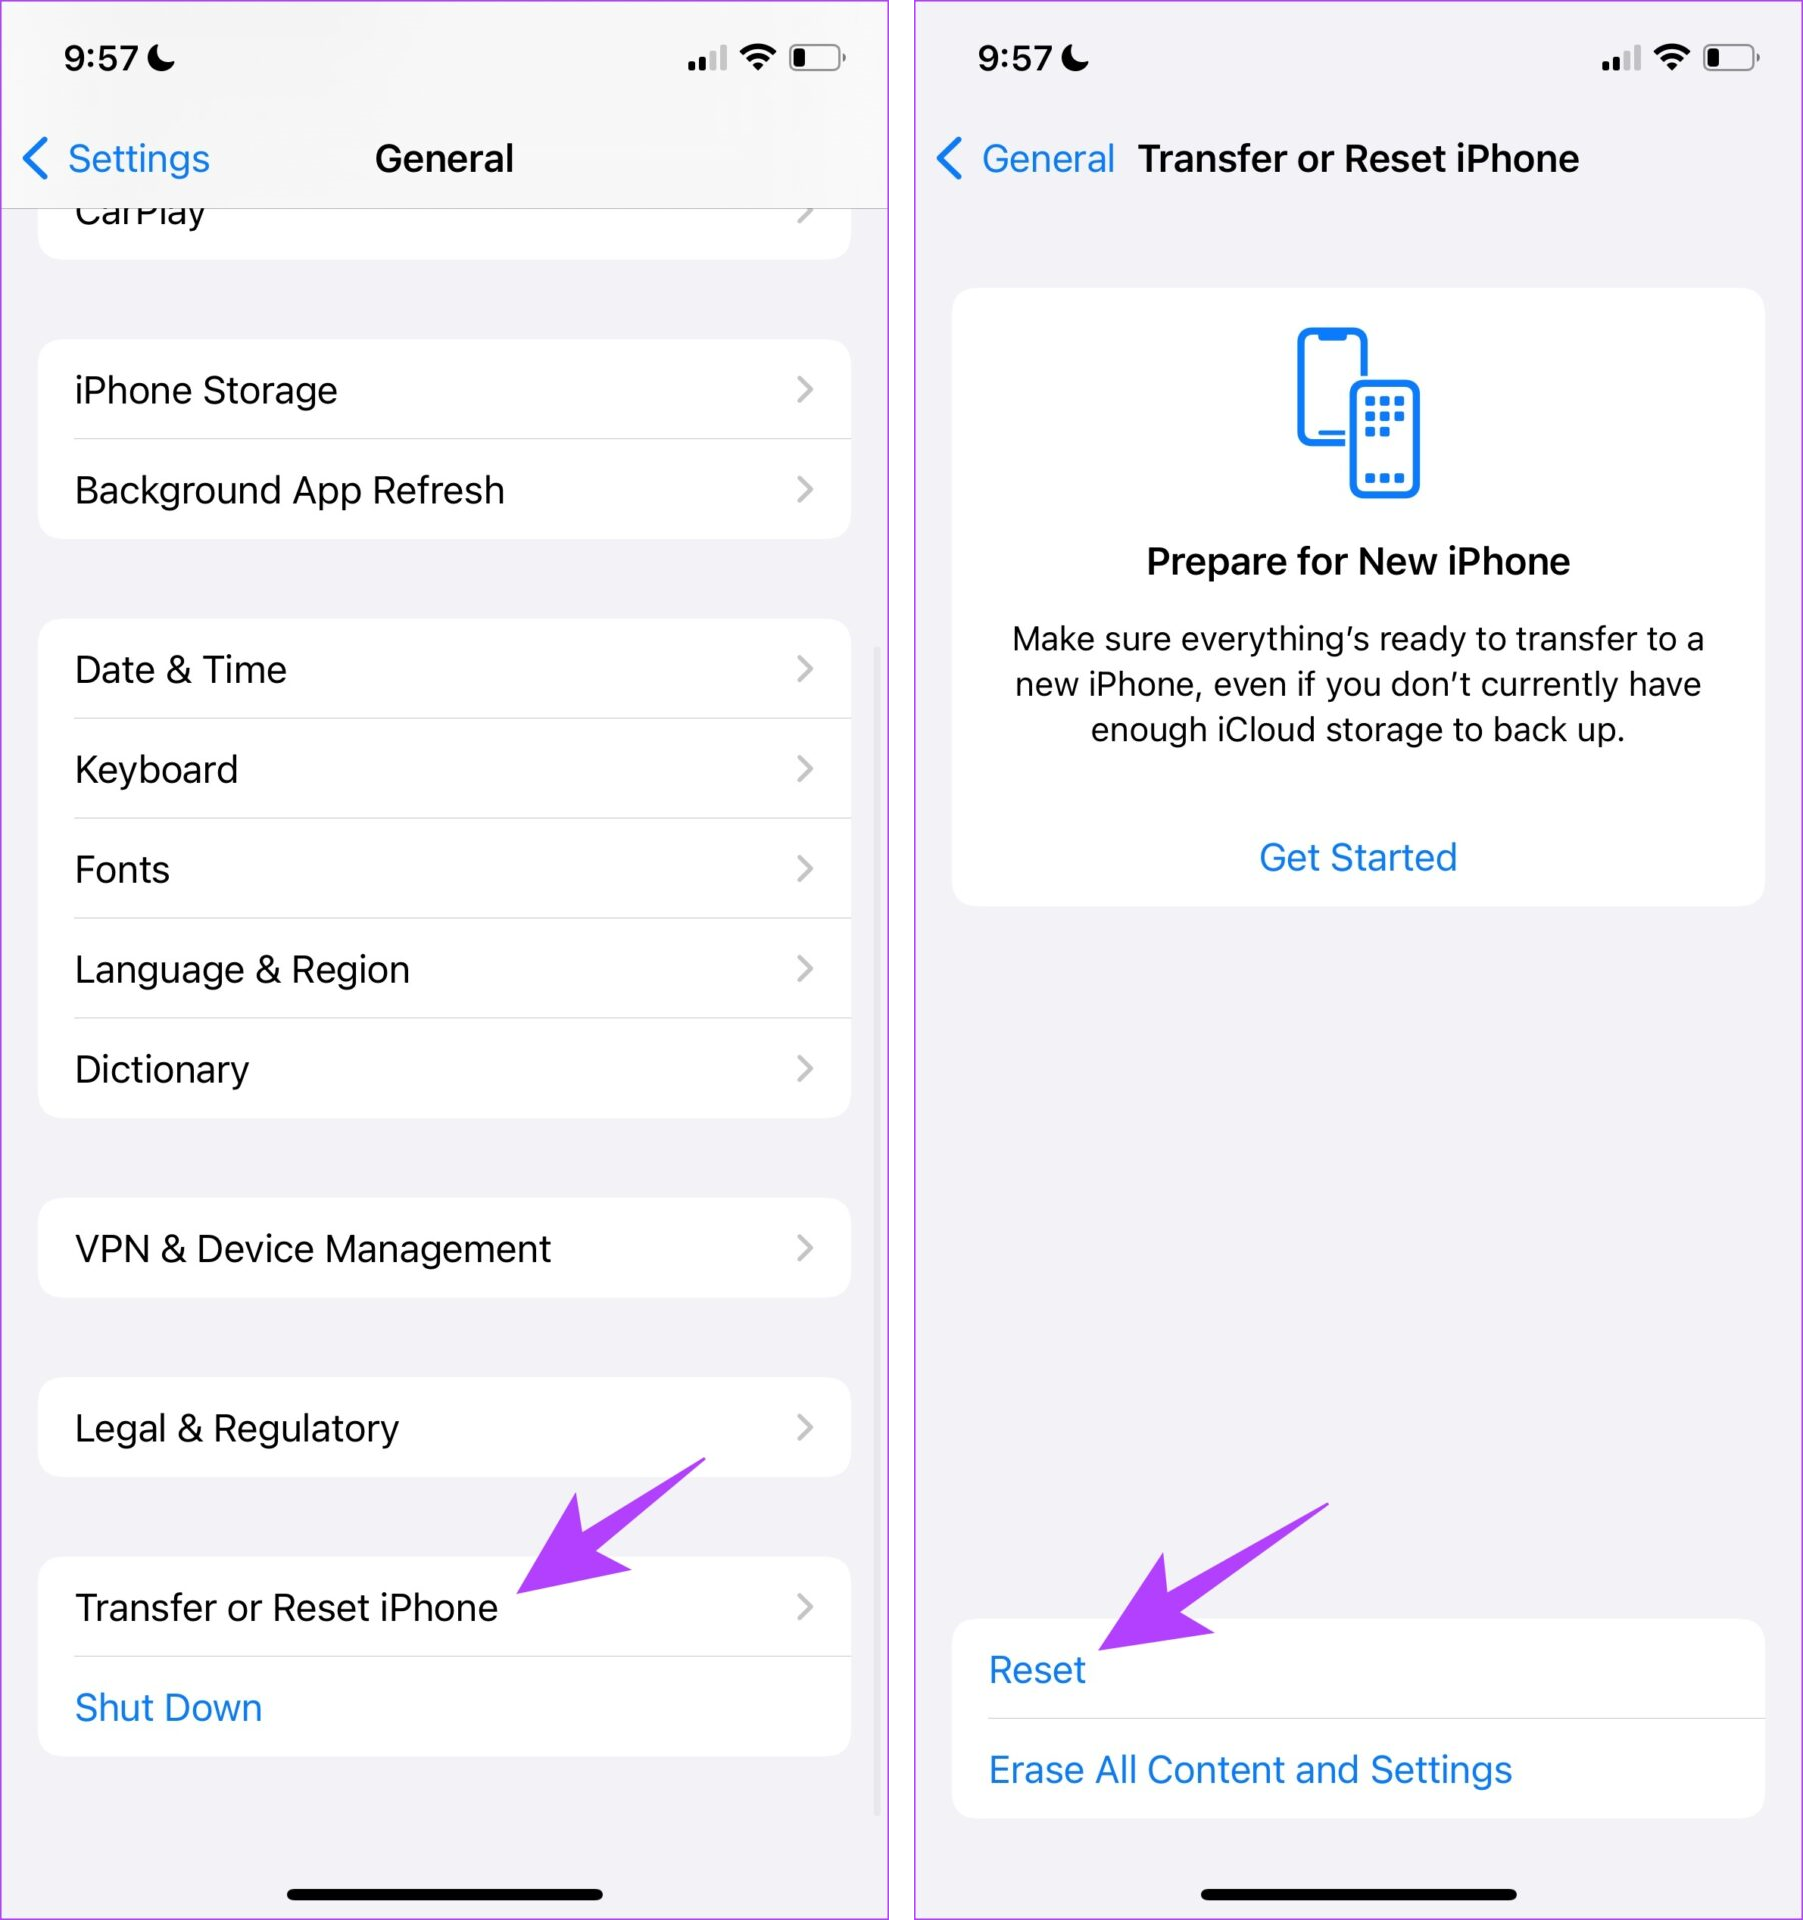
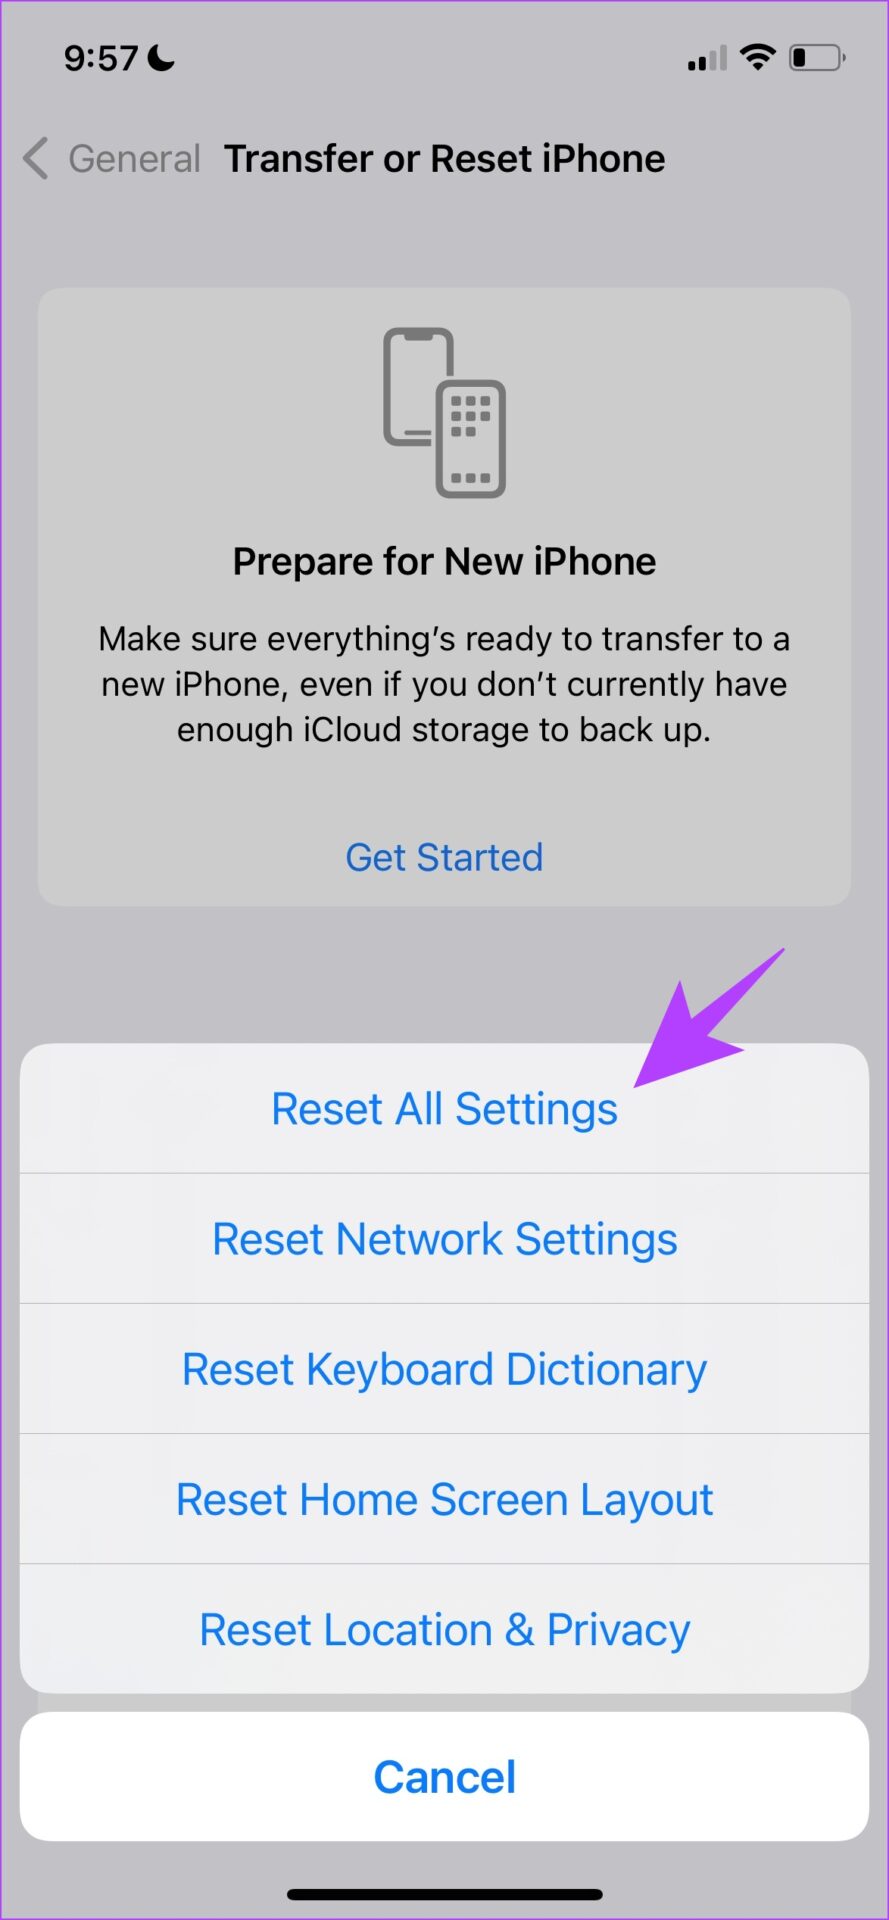
If you are still facing issues with Screen Recording, consider resetting the settings of your iPhone or iPad. That should likely help patch up any improperly configured settings preventing the functionality from working properly. This means that all your location, home screen layout, privacy settings, and more will be back to default. Here’s how to do it. Step 1: Open the Settings app and tap on General. Step 2: Select ‘Transfer or Reset iPhone’. Step 3: Tap on Reset. Step 4: Tap on ‘Reset All Settings’ to return all configurations to their default state. This will most probably fix this issue.
Back in Action
Screen Recording is an essential functionality with multiple use cases. Not only does it help you capture amazing moments on your iPhone or iPad, but It lets you record and share complicated processes, helps you submit feedback to app developers, and more. Hence, ensuring that it’s ready to go off at a moment’s notice is crucial. Hopefully, the fixes above helped, and you are back in business. The above article may contain affiliate links which help support Guiding Tech. However, it does not affect our editorial integrity. The content remains unbiased and authentic.