Every Blue Screen of Death has a stop code that, when found and analyzed, lets you understand the real cause of the issue. We have covered one such error code, fltmgr.sys. In this article, we will show you how to simulate the Blue Screen error; in other words, how to manually cause a BSOD error in Windows. Let’s jump right into it. Note: It is vital that you save your work before proceeding with the below-mentioned steps and methods.
1. How to Force BSOD in Windows Using Task Manager
Forcing the Blue Screen of Death using Task Manager is simple. However, you need to keep an eye on minute details. Follow the below steps. Step 1: Press the Windows key on your keyboard, type Task Manager, and click ‘Run as administrator.’ Note: There are many ways to open Task Manager; however, the easiest way is to use the Ctrl+Alt+Delete hotkeys.
Step 2: Under the Processes tab, scroll down to find ‘Service Host: DCOM Server Process Launcher.’
Step 3: Select the Process and click End task from the top-right corner. Note: Alternatively, you can right-click and select End task to end the process.
Step 4: In the prompt, check ‘Abandon unsaved data and shut down,’ and click Shut down.
And that’s it. Your PC will crash with a Blue Screen of Death, displaying the stop code as ‘Critical Process Died.’ If you are uncomfortable using Task Manager, there’s another way using PowerShell.
2. Use Powershell to Manually Cause BSOD in Windows
The method may seem complicated but it is not. This method barely has any steps and is the easiest way to manually cause BSOD in Windows. Let’s show you how: Step 1: Press the Windows key on your keyboard, type PowerShell, and click ‘Run as administrator.’
In the prompt, click Yes. Step 2: Type the command mentioned below and press Enter.
And there you go. When you press Enter, your Windows PC will crash, displaying a Blue Screen of Death with a crash code saying ‘Critical Process Died.’ The step isn’t complicated if you want to do it through Command Prompt. Jump to the following method and figure it out yourselves.
3. Fake Blue Screen of Death in Windows Using Command Prompt
There is barely any task that cannot be performed using Command Prompt or Terminal. Follow the below-mentioned steps to force BSOD on your Windows computer. Step 1: Press the Windows key on your keyboard, type Command Prompt and click ‘Run as administrator.’
In the prompt, click Yes. Step 2: Type the following command and press Enter.
There you go. This is how you can fake Blue Screen of Death on your Windows PC. If you are someone who would be forcing BSOD errors on your Windows PC, it is ideal to create a shortcut for it instead of going through all the steps again and again. Jump to the next method.
4. How to Get BSOD Using Windows Shortcut
This is an extended version of the above method. Follow the below steps to create a shortcut for the BSOD error. Step 1: Right-click on the desktop, go to New, and select Shortcut.
Step 2: In the text field, type the below command and click Next.
Step 3: Give a name to the shortcut and click Finish. Ex: BSOD
Step 4: Now, right-click the shortcut and select Properties.
Step 5: Click on the Advanced button.
Step 5: Under Advanced Properties, select ‘Run as administrator,’ and then click OK.
Step 6: Finally, click Apply and OK.
There you have it. You have set up the shortcut. From now on, double-click on the shortcut and select Yes in the prompt to force the BSOD error on your Windows PC.
5. How to Force Crash Windows Using Registry Editor
This method is more complex than the above one, but the steps are pretty simple to follow and execute to simulate a blue screen crash in Windows. However, because we will be using Registry Editor, we strongly advise you to back up the Windows Registry before proceeding with the steps below. Step 1: Press the Windows key on your keyboard, type Registry Editor, and click ‘Run as administrator.’ Note: You can also press ‘Windows key + R’ to open the Run dialog box, type regedit.exe, and click OK to open Registry Editor.
In the prompt, select Yes. Step 2: In the top address bar, enter the mentioned address. If you are using a USB keyboard, ignore the above command and type the below command Note: You can manually navigate to the section too.
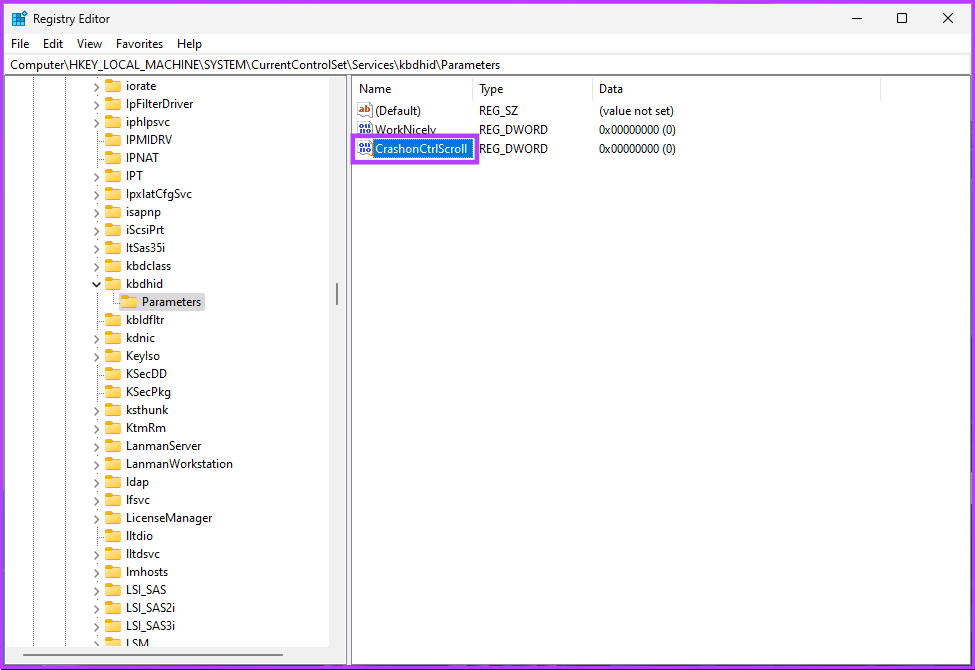
Step 3: Under the Parameters folder, right-click, select New, and choose ‘DWORD (32-bit) Value.’
Step 4: Type CrashonCtrlScroll in the name field.
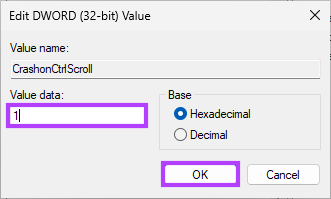
Step 5: Double-click on CrashonCtrlScroll, type 1 in the Value Data field, and press OK.
Finally, restart the system to implement the changes. And that’s it! When the system boots back, all you need to do is, press the ‘(right) Ctrl key + Scroll lock’ twice to force your Windows PC to display the BSOD error. If these steps are complicated, jump to the next method.
6. Use a Third-Party BSOD Simulator on Windows
We will be using the ‘Not My Fault’ app, which is more or less, a BSOD simulator that forces your Windows PC to go Blue Screen of Death with a click of a button. Follow the steps mentioned below. Step 1: Go to the ‘Not My Fault’ app download page using the link below and click on Download. Download Not My Fault App
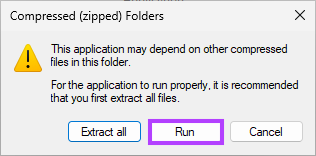
Step 2: Install and run the app on your computer.
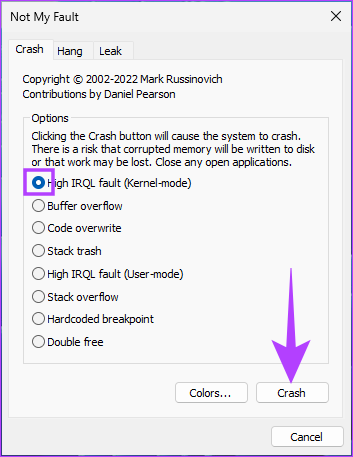
Step 3: When you open the blue screen simulator app, you will be given choices to force the Windows crash. Under the Crash tab, Select any option (Ex: High IRQL fault) and click Crash.
That’s it, your PC will crash, and you will see a Blue Screen of Death. The Stop Code will be dependent on the option you choose to crash. For this example, the Stop Code is ‘DRIVER IRQL NOT LESS OR EQUAL.’
Initiate the Windows Crash
So that’s how you can manually cause BSOD in Windows. Now that you know how to do it, you must understand that, at times, overdoing BSOD simulation may result in Windows functional and operational errors. The above article may contain affiliate links which help support Guiding Tech. However, it does not affect our editorial integrity. The content remains unbiased and authentic.