If you’ve just installed a fresh copy of Windows 11 on your PC, you’ve probably set it up by signing into your Microsoft account. While this is the right way to do it, there’s one downside – the User folder gets named based on the first five characters of your email address. This can be annoying if you want to set a custom name for the folder, as the first five characters can sound very random. Luckily, there are a couple of ways to change it.
What Is the User Folder on Windows 11
Every copy of Windows 11 installed will have a folder named after the user account. This folder is where your downloads, documents, pictures, and other personal data are stored.
By default, Windows 11 assigns a five-letter name to this folder which turns out to be the first five characters of your email ID registered with Windows. This can be annoying, especially if your name has six letters, but good old Windows drops the last letter when naming the User folder.
How To Rename the User Folder
Unfortunately, you cannot just right-click on the User folder and rename it. There are two ways to rename the User folder on Windows 11.
Rename User Folder by Creating a New User Account
This is the simpler method of the two and involves changing some basic settings. Instead of renaming the User folder, it’s easier to create a new user account and name the folder to whatever you want. Here’s how you can do it. Step 1: Click on the Search icon on your Windows 11 taskbar.
Step 2: Enter Settings in the search bar and click on the app to open it.
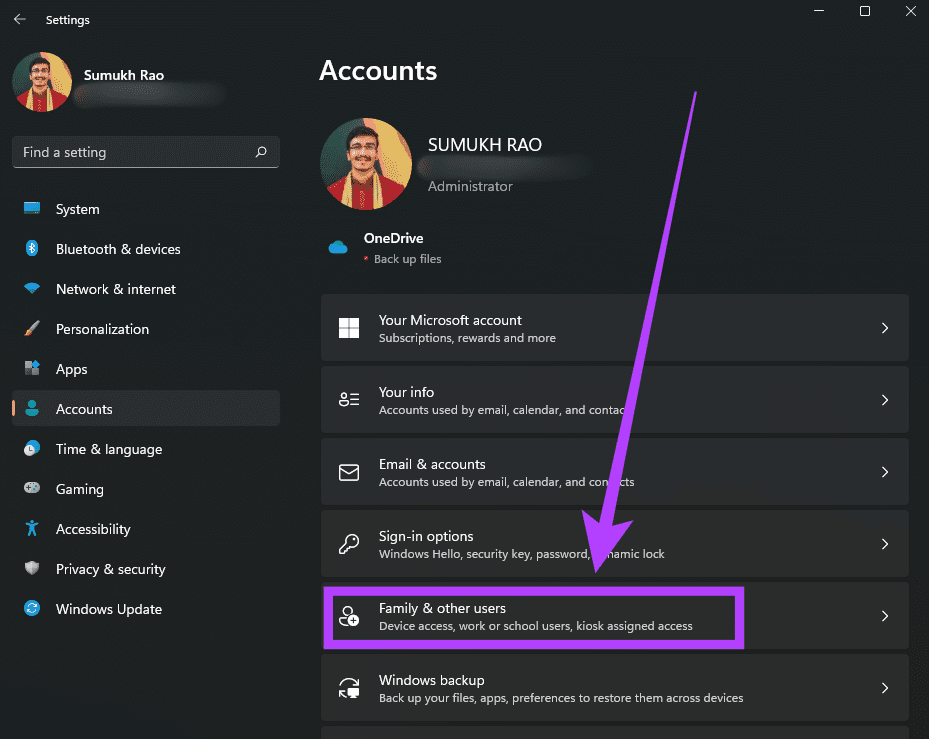
Step 3: Navigate to the Accounts section in the left panel.
Step 4: Select Family & other users.
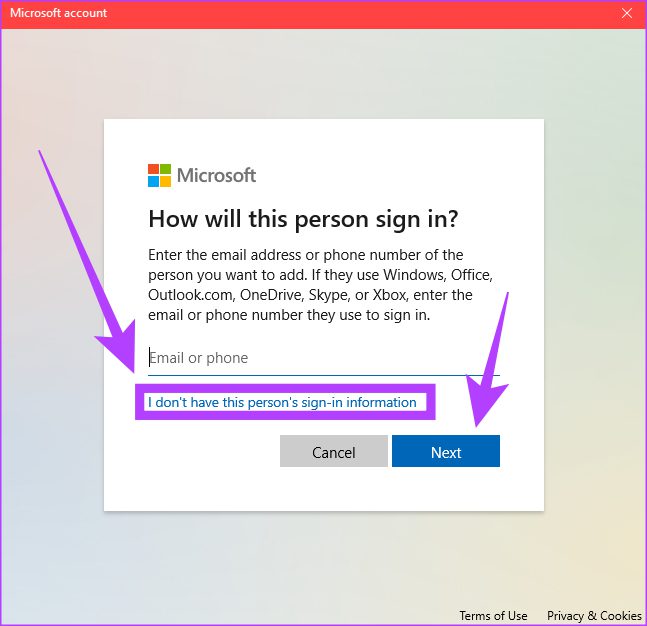
Step 5: Click on the Add account option next to Other users.
Step 6: You will now see an account setup wizard. Note that you have to select ‘I don’t have this person’s sign-in information’ to proceed further. Do not use your Microsoft account at this stage.
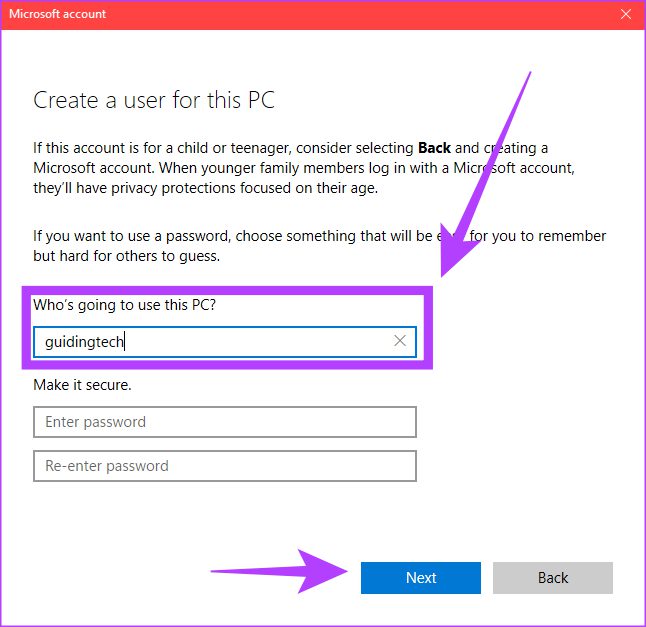
Step 7: Enter a name for the new user account. This will be the name of your User folder as well. You can also choose to enter a password to secure the account. Once done, click on Next.
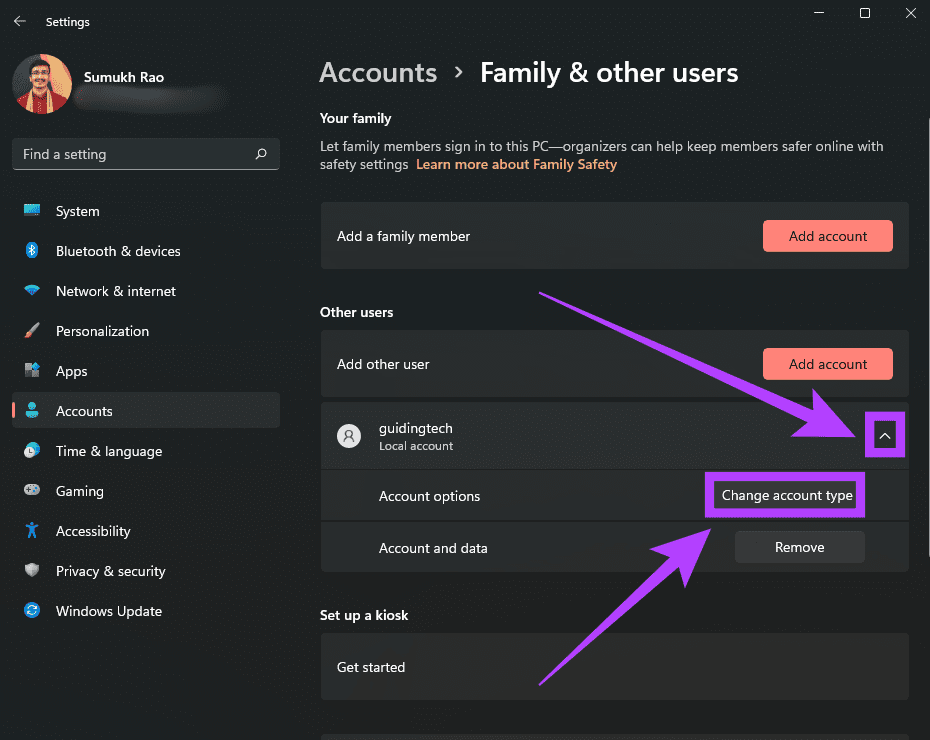
Step 8: Your new account is now ready. Now, click on the small arrow next to the new user account and select Change account type.
Step 9: Select Administrator as the account type and click on OK.
Step 10: Shut down your PC and the next time you turn it on, log in using the new user account. That’s one way to get a User folder with a desired, easy name. This is a workaround since the way to rename the User folder is slightly complex. If you’re willing to take that route, though, here’s how you can do it.
Rename User Folder Using Registry Editor
As mentioned earlier, this is a slightly advanced method and involves a small element of risk. It’s advisable to take a complete backup of your PC before attempting this method. Step 1: Create a new user account using the steps mentioned in the first method above. Restart your PC and log in to that account. Step 2: Click on the Search icon in the Windows 11 taskbar.
Step 3: Enter Command Prompt and click on the app to open it.
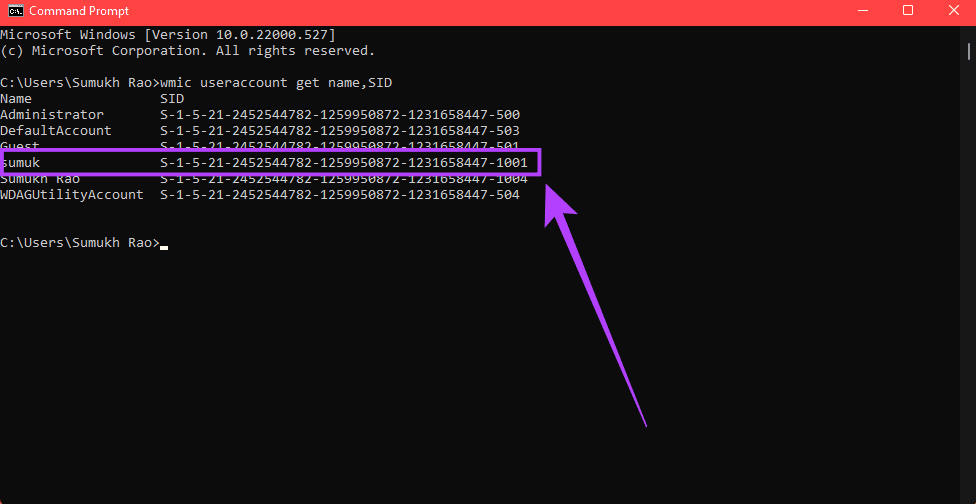
Step 4: Type in the command wmic useraccount get name,SID and hit the Enter key.
Step 5: You will now see all the user accounts with their respective SIDs displayed on your screen. Make a note of the SID of the username for which you want to rename the User folder.
Step 6: Launch Run by pressing the Windows + R keys on your keyboard.
Step 7: Enter regedit in the Run window and press the Enter key. Click on Yes if you’re asked whether you want to allow this app to make changes to your device.
Step 8: Y0u have now opened the Registry Editor on Windows 11.
Step 9: In the Registry Editor window, click on the small arrow next to HKEY_LOCAL_MACHINE folder on the left. Then, click on the arrow next to SOFTWARE. Keep doing this till you reach \Microsoft\Windows NT\CurrentVersion\ProfileList\SID where the SID is the one you noted down earlier.
Step 10: Click on the correct SID to expand the contents on the right half of your screen.
Step 11: In the list of items displayed in the right window, select the ProfileImagePath file and right-click on it. Click on ‘Modify.’
Step 12: Enter the desired name for the Users folder after the ‘C:\Users\’ path. Click on OK once done.
Step 13: Open Windows Explorer and head to the User directory. You will find the User folder with the old name. Right-click on it and select the Rename option.
Step 14: Enter the same name as what you entered in the Registry Editor. Once done, press the Enter key.
Restart your PC and log in to the account you have renamed the User folder. You should see that the folder has been renamed. You can delete the secondary account you created now on your PC and continue to use the primary one if you wish.
Change the Name of the User Folder
While the first method is a workaround, the second method will help you rename the user folder on your primary account in Windows 11. Next time you’re setting up Windows, make sure you don’t sign in with your Microsoft account at the start. That’s the way to avoid Windows naming the User folder automatically. The above article may contain affiliate links which help support Guiding Tech. However, it does not affect our editorial integrity. The content remains unbiased and authentic.