Passkeys are safer alternatives to passwords as they use the existing device password and biometric data to facilitate sign-in. This means, in most cases, it will be difficult to hack and access a Passkey to log in to your Google Account. On that note, let us look closer at how to set up a Passkey for your Google Account and facilitate a passwordless login on your Android device. Note: Ensure you’re signed in to your personal Google account. Workspace or professional Google accounts might not support the creation of a Google Passkey.
Hardware and Software Requirements to Use Google Passkeys
Before we get started on how to set up and use Passkeys for your Google account, let us quickly look at the software and hardware requirements to support a Passkey on your device.
When using a PC, it should be running at least Windows 10, macOS Ventura, or ChromeOS 109. Your mobile device should run iOS 16 or Android 9 at the minimum. Your PC and mobile should have the provisions to turn on and set up Bluetooth. The device hardware security key should support the FIDO2 protocol. A password, biometric lock, or both should be available and set up on your Android device and PC. If you’re using a browser, it should run version 109 or later for Chrome, version 16 or later for Safari, and version 109 or later for Edge.
Now that you’ve confirmed your device is compatible, let us check how to set up and use a Passkey on Android.
How to Create a Google Passkey on Android
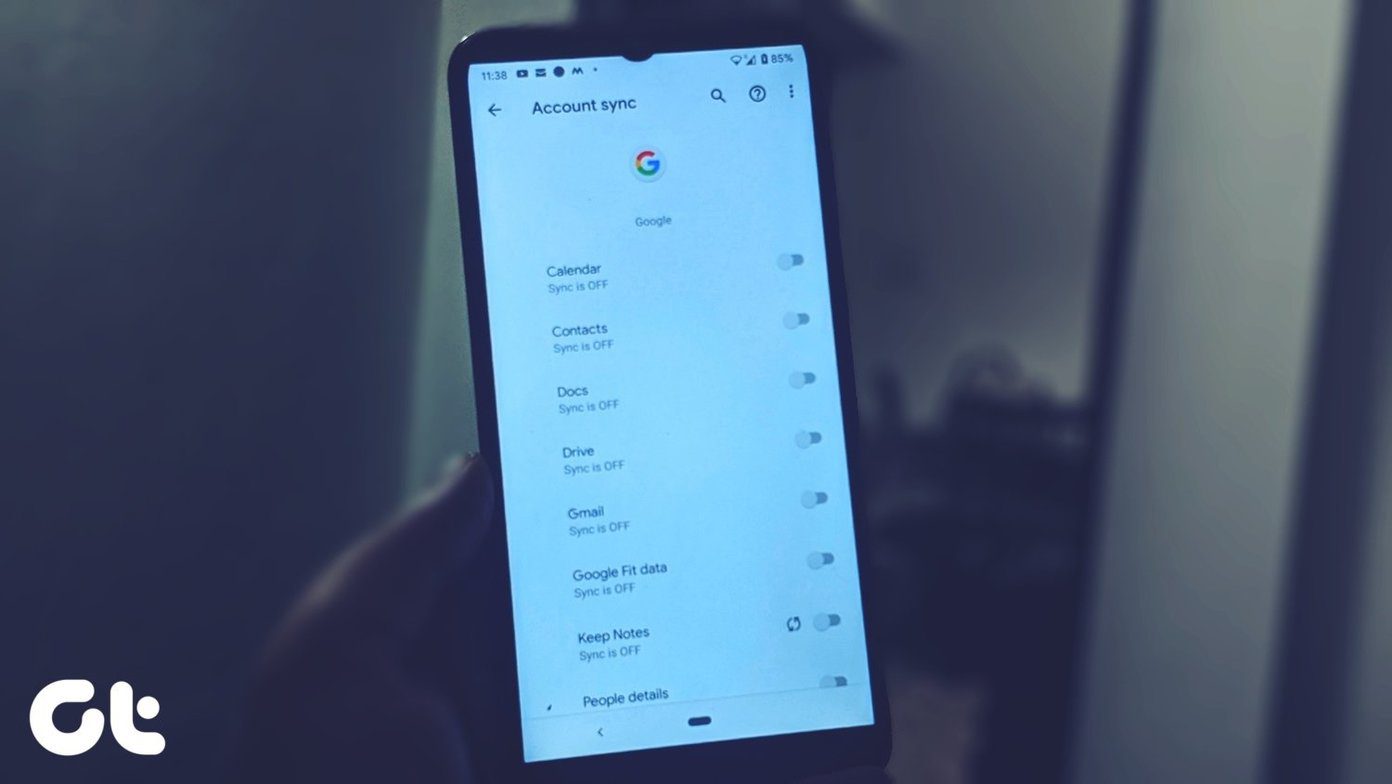
While most Google accounts automatically set up Passkeys for Android devices once signed in, there are instances when this does not happen. In this case, you can manually create a Google Passkey on your Android device. Follow the below steps to do it. Step 1: Open the Google app on your Android device. Open the Google app on Android Step 2: Here, tap on your profile icon. Step 3: Then, tap on Google Account. Step 4: From the menu options, go to Security. Step 5: Scroll down and tap on Passkeys. Step 6: When prompted, enter your Google account password and tap on Next. Step 7: Here, tap on Use passkeys. Step 8: Tap on Done. This will enable Passkey for the selected device. You can now use it to log in to your selected Google account whenever required.
How to Use Google Passkey on Android to Log in to Other Devices
Once set up, it is time to use the Passkeys for your Google account on Android to log in to other devices. Here, we will sign into a Windows PC using the Google Passkey. Follow the below steps to do it. Note: Ensure Bluetooth is enabled on both devices before proceeding. Step 1: Open Google on any web browser. Open Google Step 2: Here, click on Sign in. Step 3: Enter the email ID you wish to sign into and click on Next. Step 4: Then, click on Continue. Step 5: Once the QR code is generated, switch to your mobile. Step 6: Here, use the Quick Settings menu to scan the QR code. Tip: Check out all the ways to scan QR codes using Android. Step 7: Then, tap on Open link. Step 8: Check the ‘Remember this computer’ box if you want Google to remember this device. Then, tap on Allow. Step 9: Tap on Allow. Google will now confirm your device’s Passkey by using biometrics. Once done, it will proceed to sign in to the web browser. Ensure your Android device is placed near your PC to facilitate the sign-in process.
What to Do if You Can’t Find an Android Device
Once you activate the Passkey for a device, it automatically appears in the list of devices available in your Google account. However, there are times when you might not be able to find the relevant devices at a glance. If this happens, you can open the list of all the currently and previously added devices and check again. Here’s how. Step 1: Open the Google app on your Android device. Step 2: Here, tap on your profile icon. Step 3: Tap on Google Account. Step 4: Go to Security and tap on Passkeys. Step 5: Then, tap on Continue. Step 6: Verify your identity using your device’s password or biometrics. Step 7: Here, check for your device. If you can’t find it, tap on Manage devices. Step 8: Scroll through the list of available devices to find your Android device. Android devices that have been inactive for a certain period might be available at the bottom of the list with a yellow icon and days inactive visible in front of it. Additionally, if a device has a grey icon in front of it, you might need to sign in to that device again.
Bonus: Set Up Passkey From Web Browser
Apart from creating a Google Passkey on Android, you can also set one up for your Windows device. This will allow you to log in to Windows using the Google Passkey. Please note Google Passkeys might not sync, requiring you to create a Passkey individually for all your Windows devices. Follow the below steps to do it. Step 1: Open the Google My Account page on any web browser. Open Google My Account page Step 2: From the menu options in the sidebar, select Security. Step 3: Then, click on Passkeys. Step 4: When prompted, enter your Google account password and click on Next. Step 5: Scroll down and click on ‘Create a passkey’. Step 6: Here, click on Continue. Step 7: If your PC has a PIN or password, enter it in the designated box. Step 8: Click on Done. This will create a Google Passkey and facilitate passwordless login for your Windows device.
Create a Google Passkey on Android
We hope this article helped you set up and use Passkeys for your Google Account on Android. However, if you no longer wish to use the Google Passkey to sign in, you can also delete the Google Passkey from your Android device. The above article may contain affiliate links which help support Guiding Tech. However, it does not affect our editorial integrity. The content remains unbiased and authentic.