You can use Safari extensions on iPad to block unwanted ads, manage passwords, enable dark mode on unsupported websites, and so much more. With the support for extensions, Safari on iPad has truly become a worth replacement for a desktop-class browser. In this guide, we will show you how to add, manage, and delete Safari extensions on iPad with ease.
Download and Add Safari Extensions
Unlike Chromium-based browsers like Google Chrome, Safari doesn’t have a dedicated extension store. Instead, you’ll need to download extensions directly from the App Store. Of course, your iPad requires to run iPadOS 15 to use extensions. So, update your iPad before you begin exploring the extensions. Step 1: Open the Settings app on your iPad.
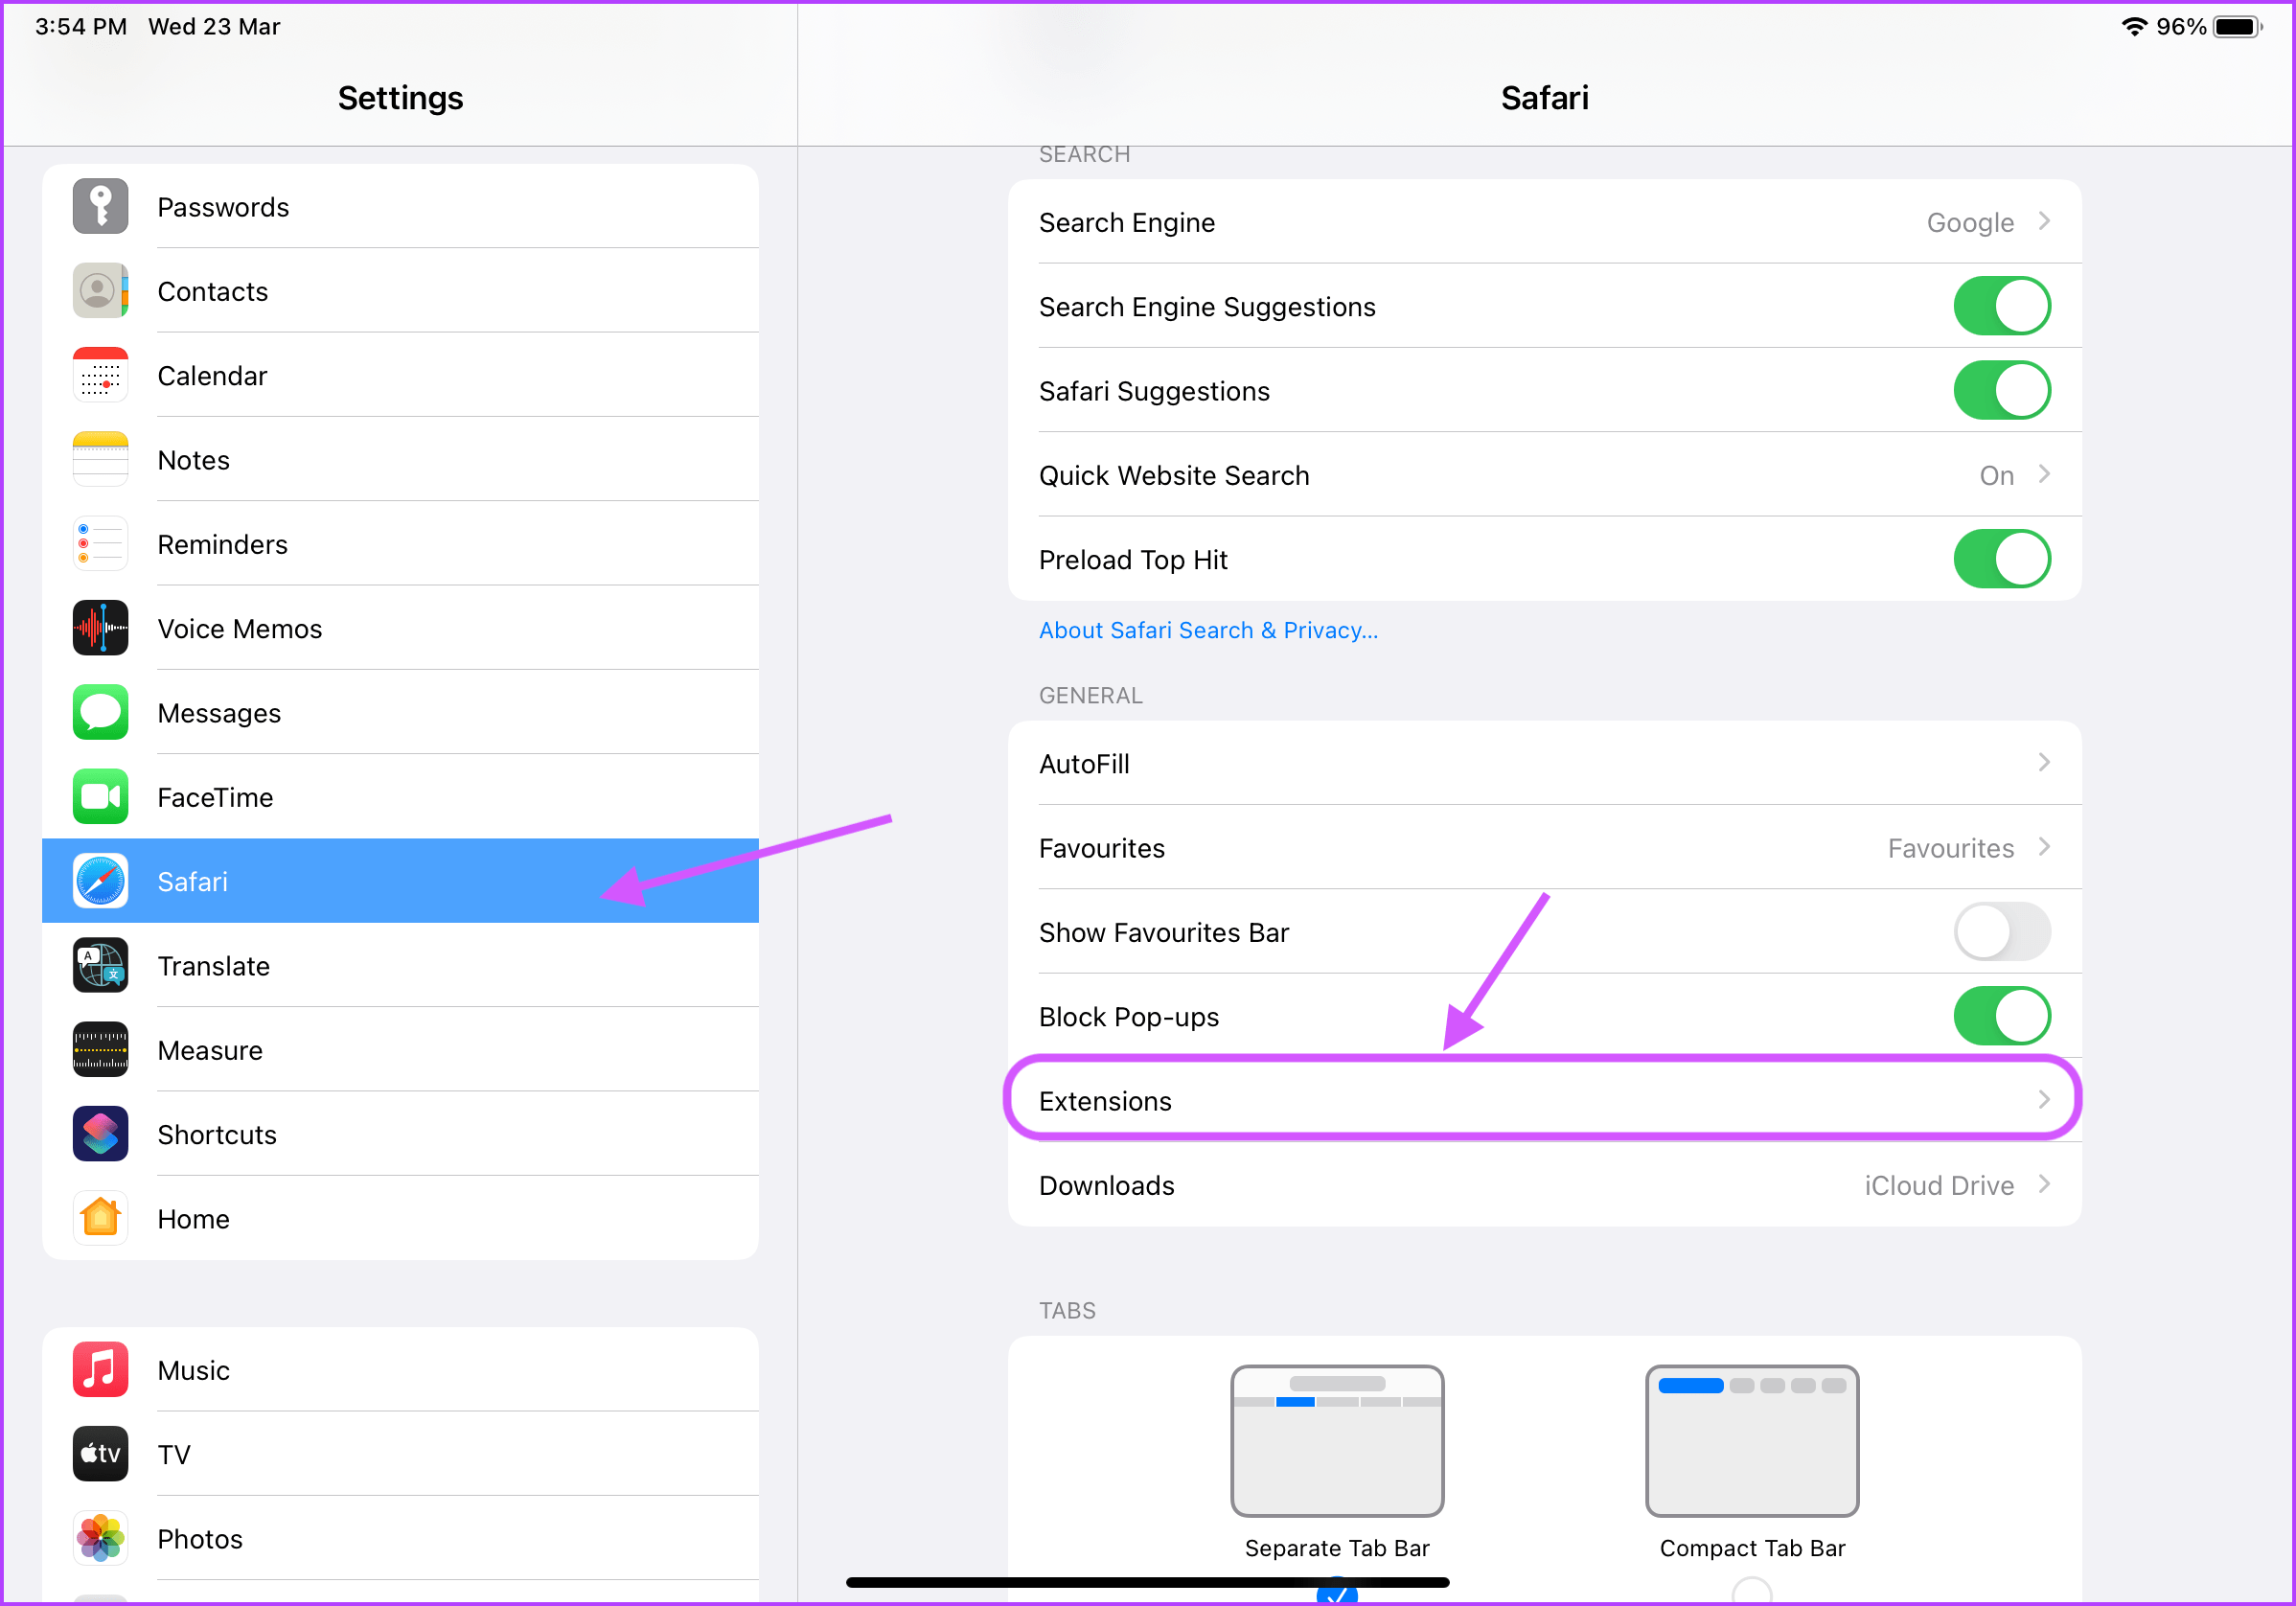
Step 2: Scroll down to find Safari in the left-side column and tap on it. Now, tap on Extensions option in the right pane.
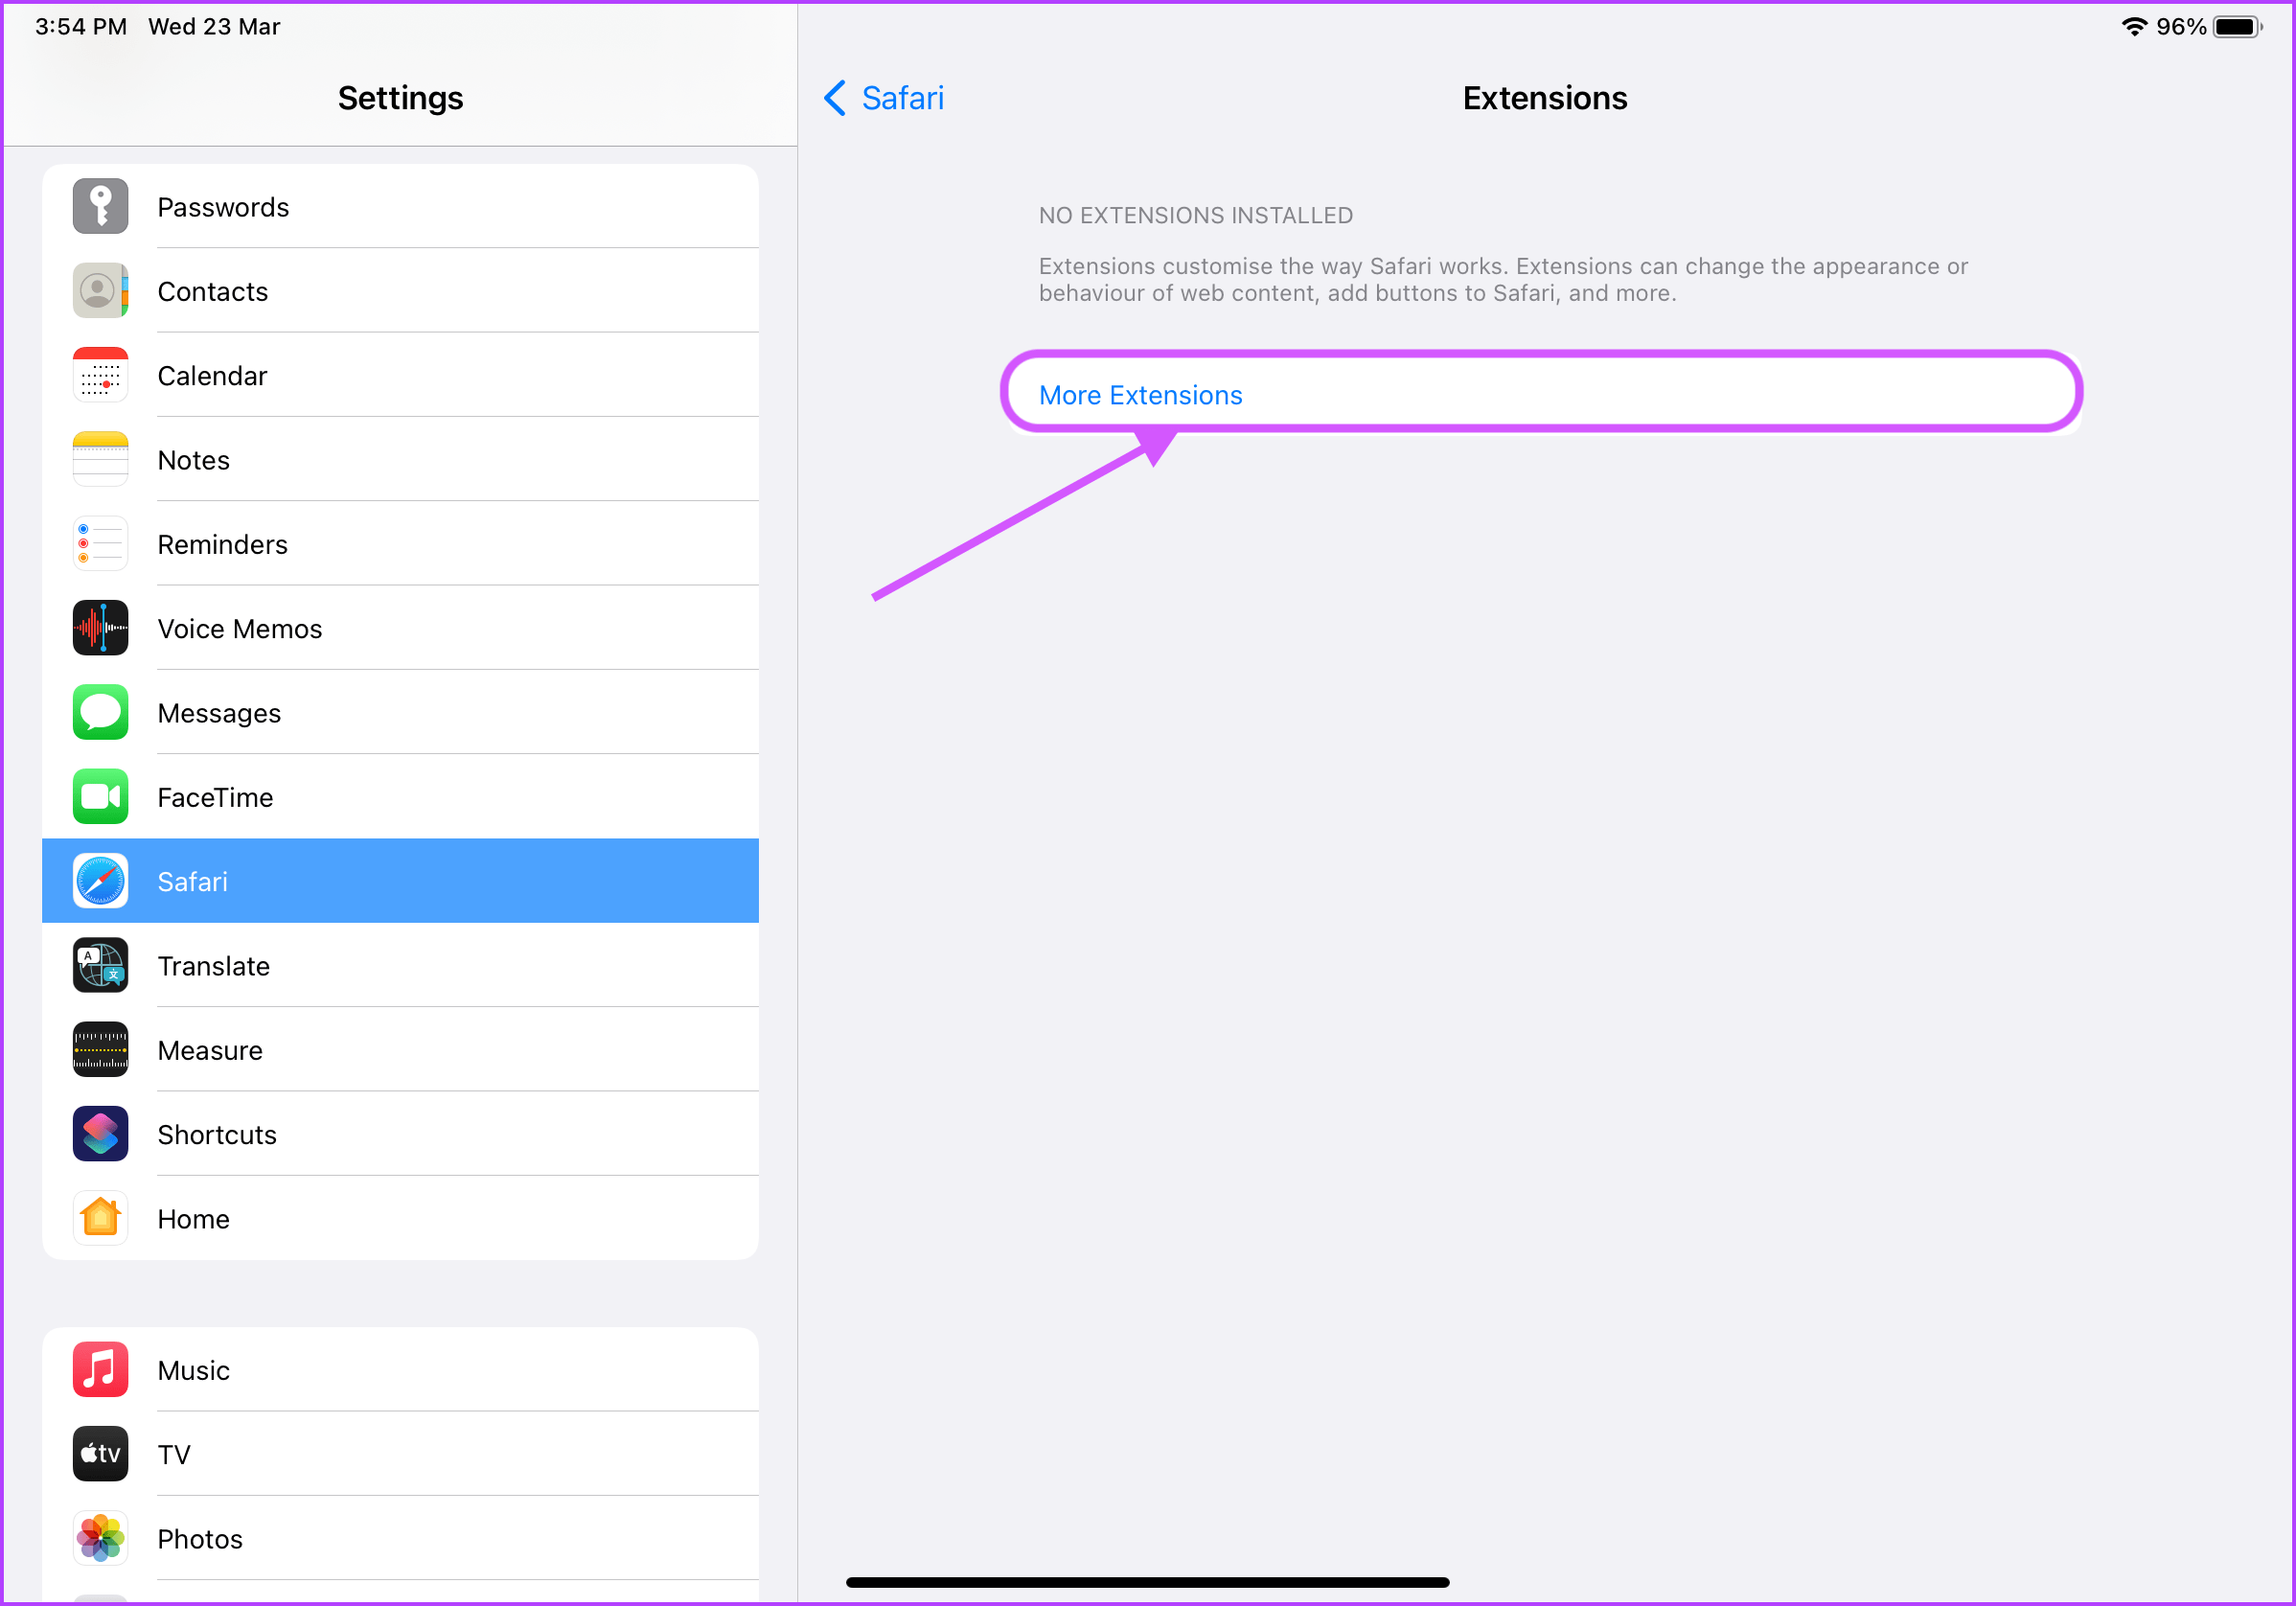
Step 3: Tap on More Extensions. It will open the Safari extension section inside App Store.
Step 4: You can browse and download extensions just as you install any other app on your iPad.
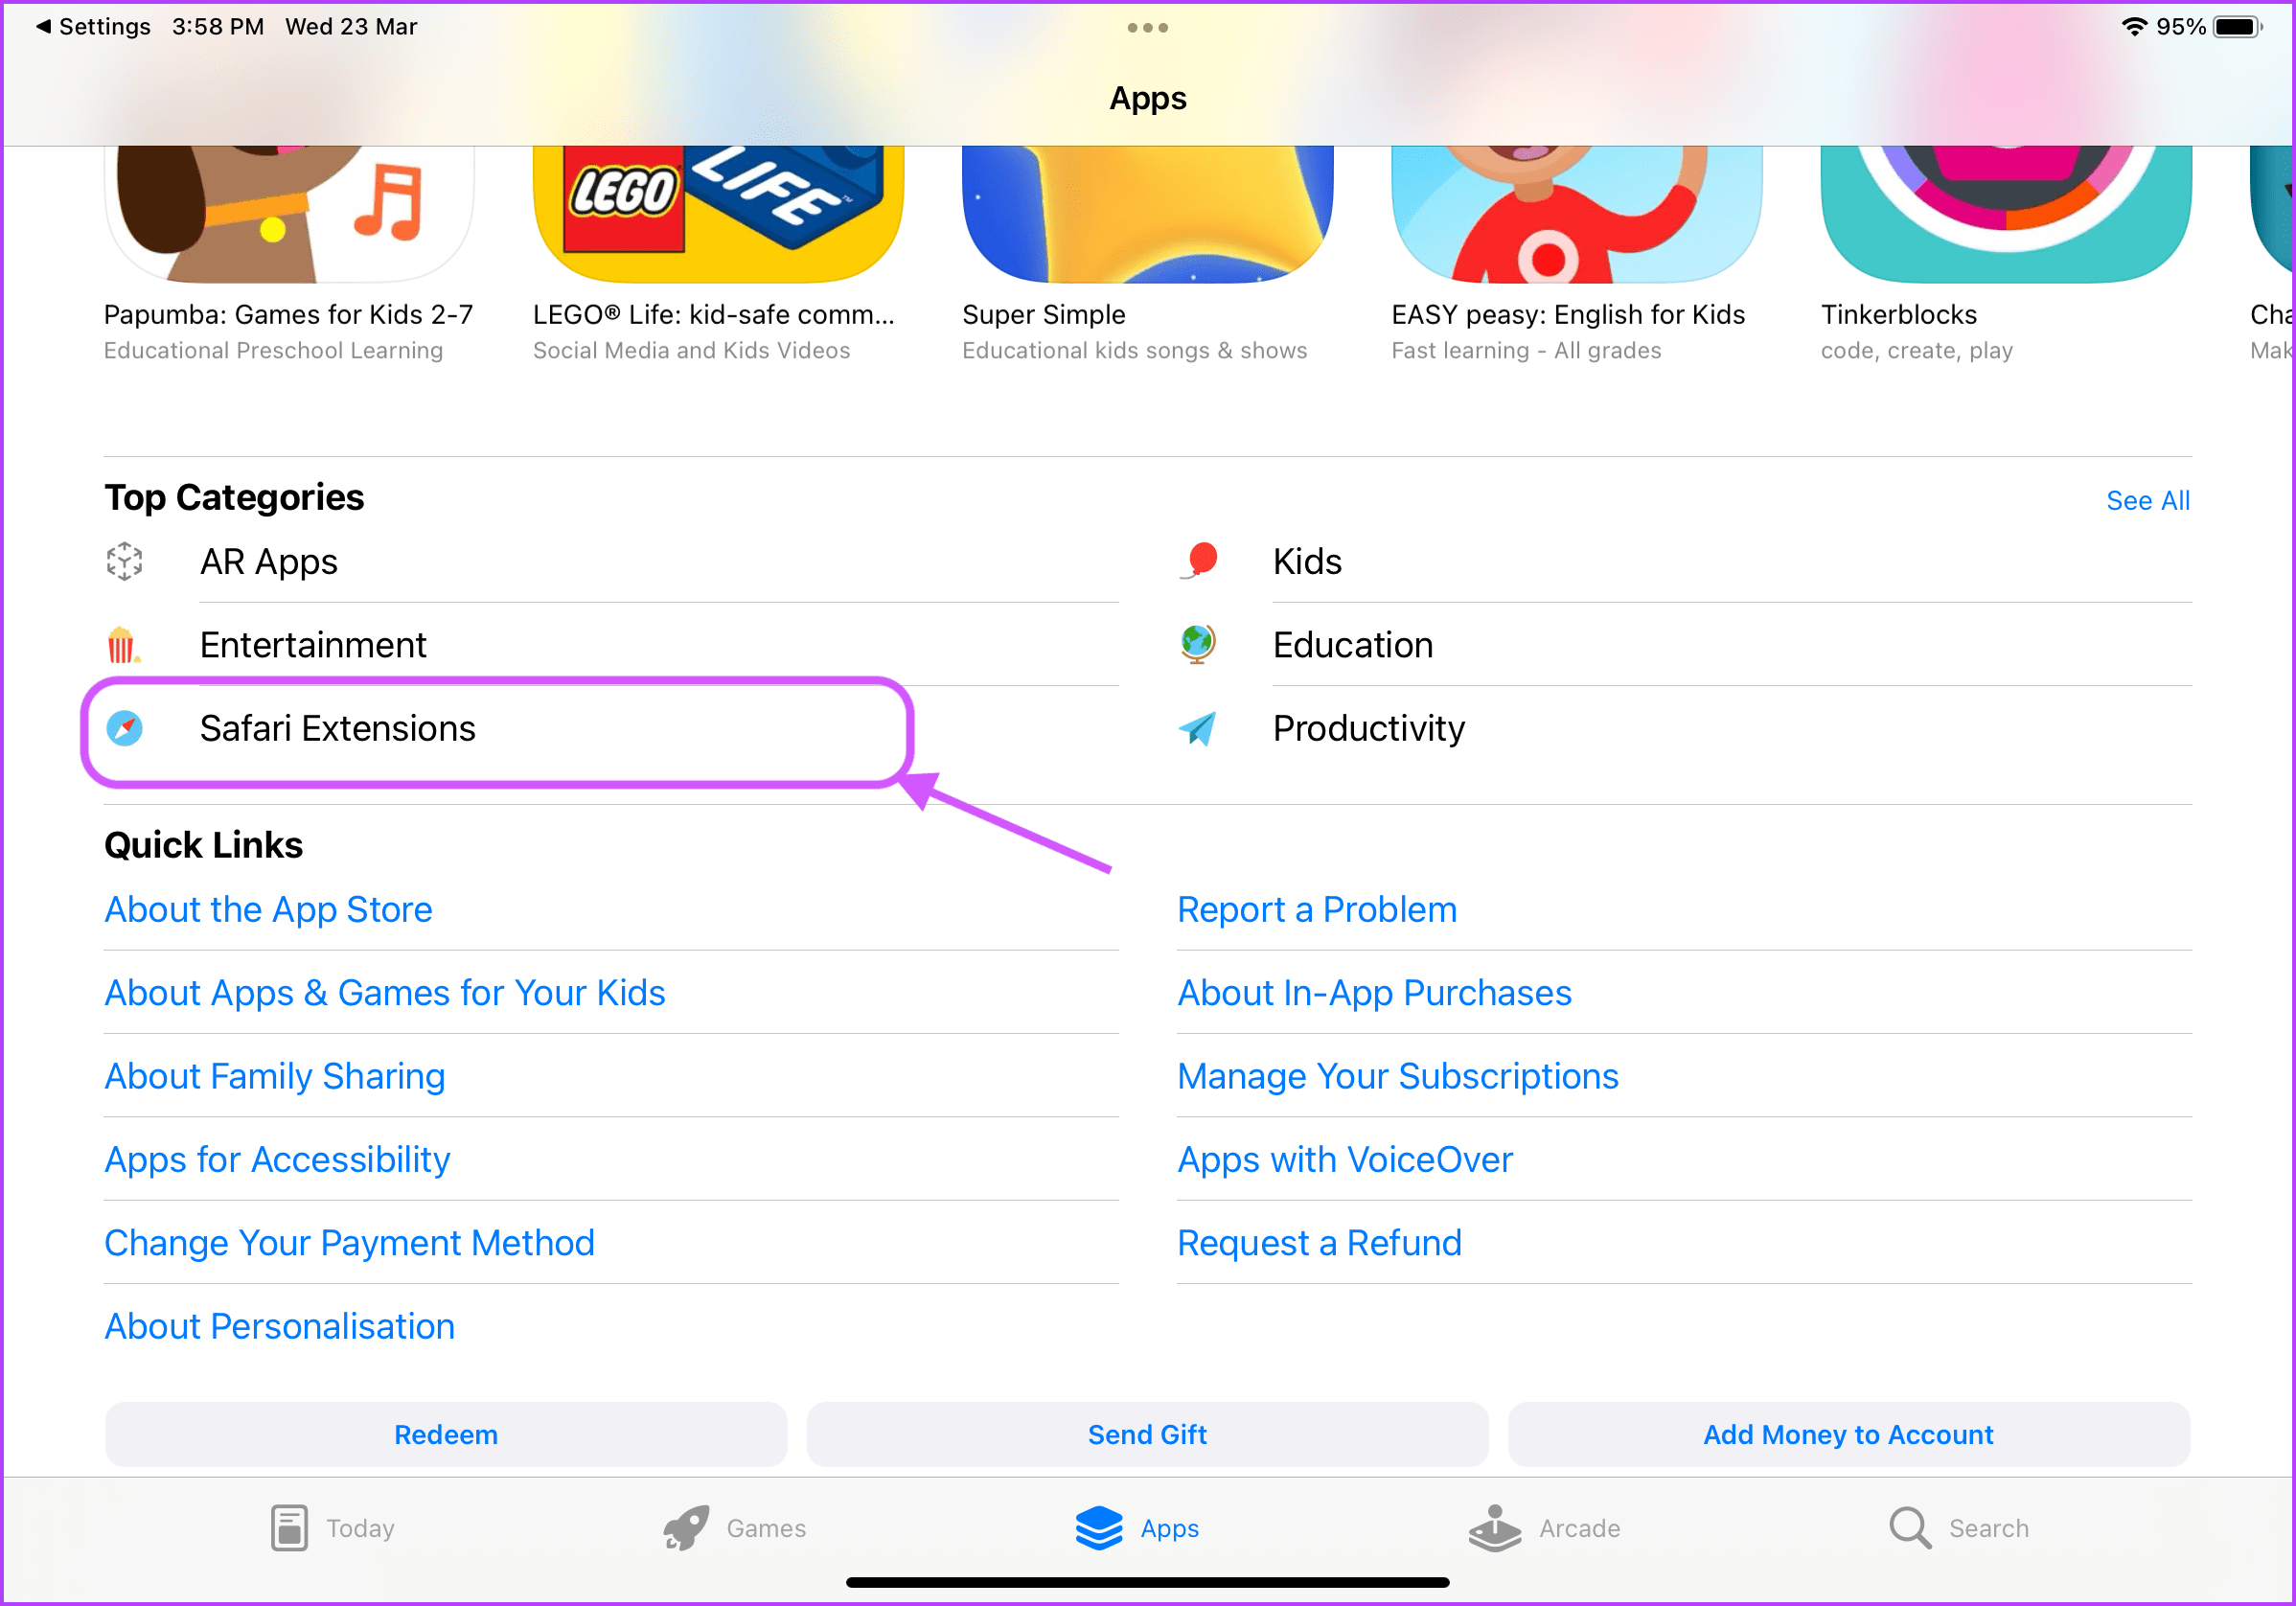
Alternatively, launch the App Store and scroll down to find Top Categories. Now, tap on Safari Extensions.
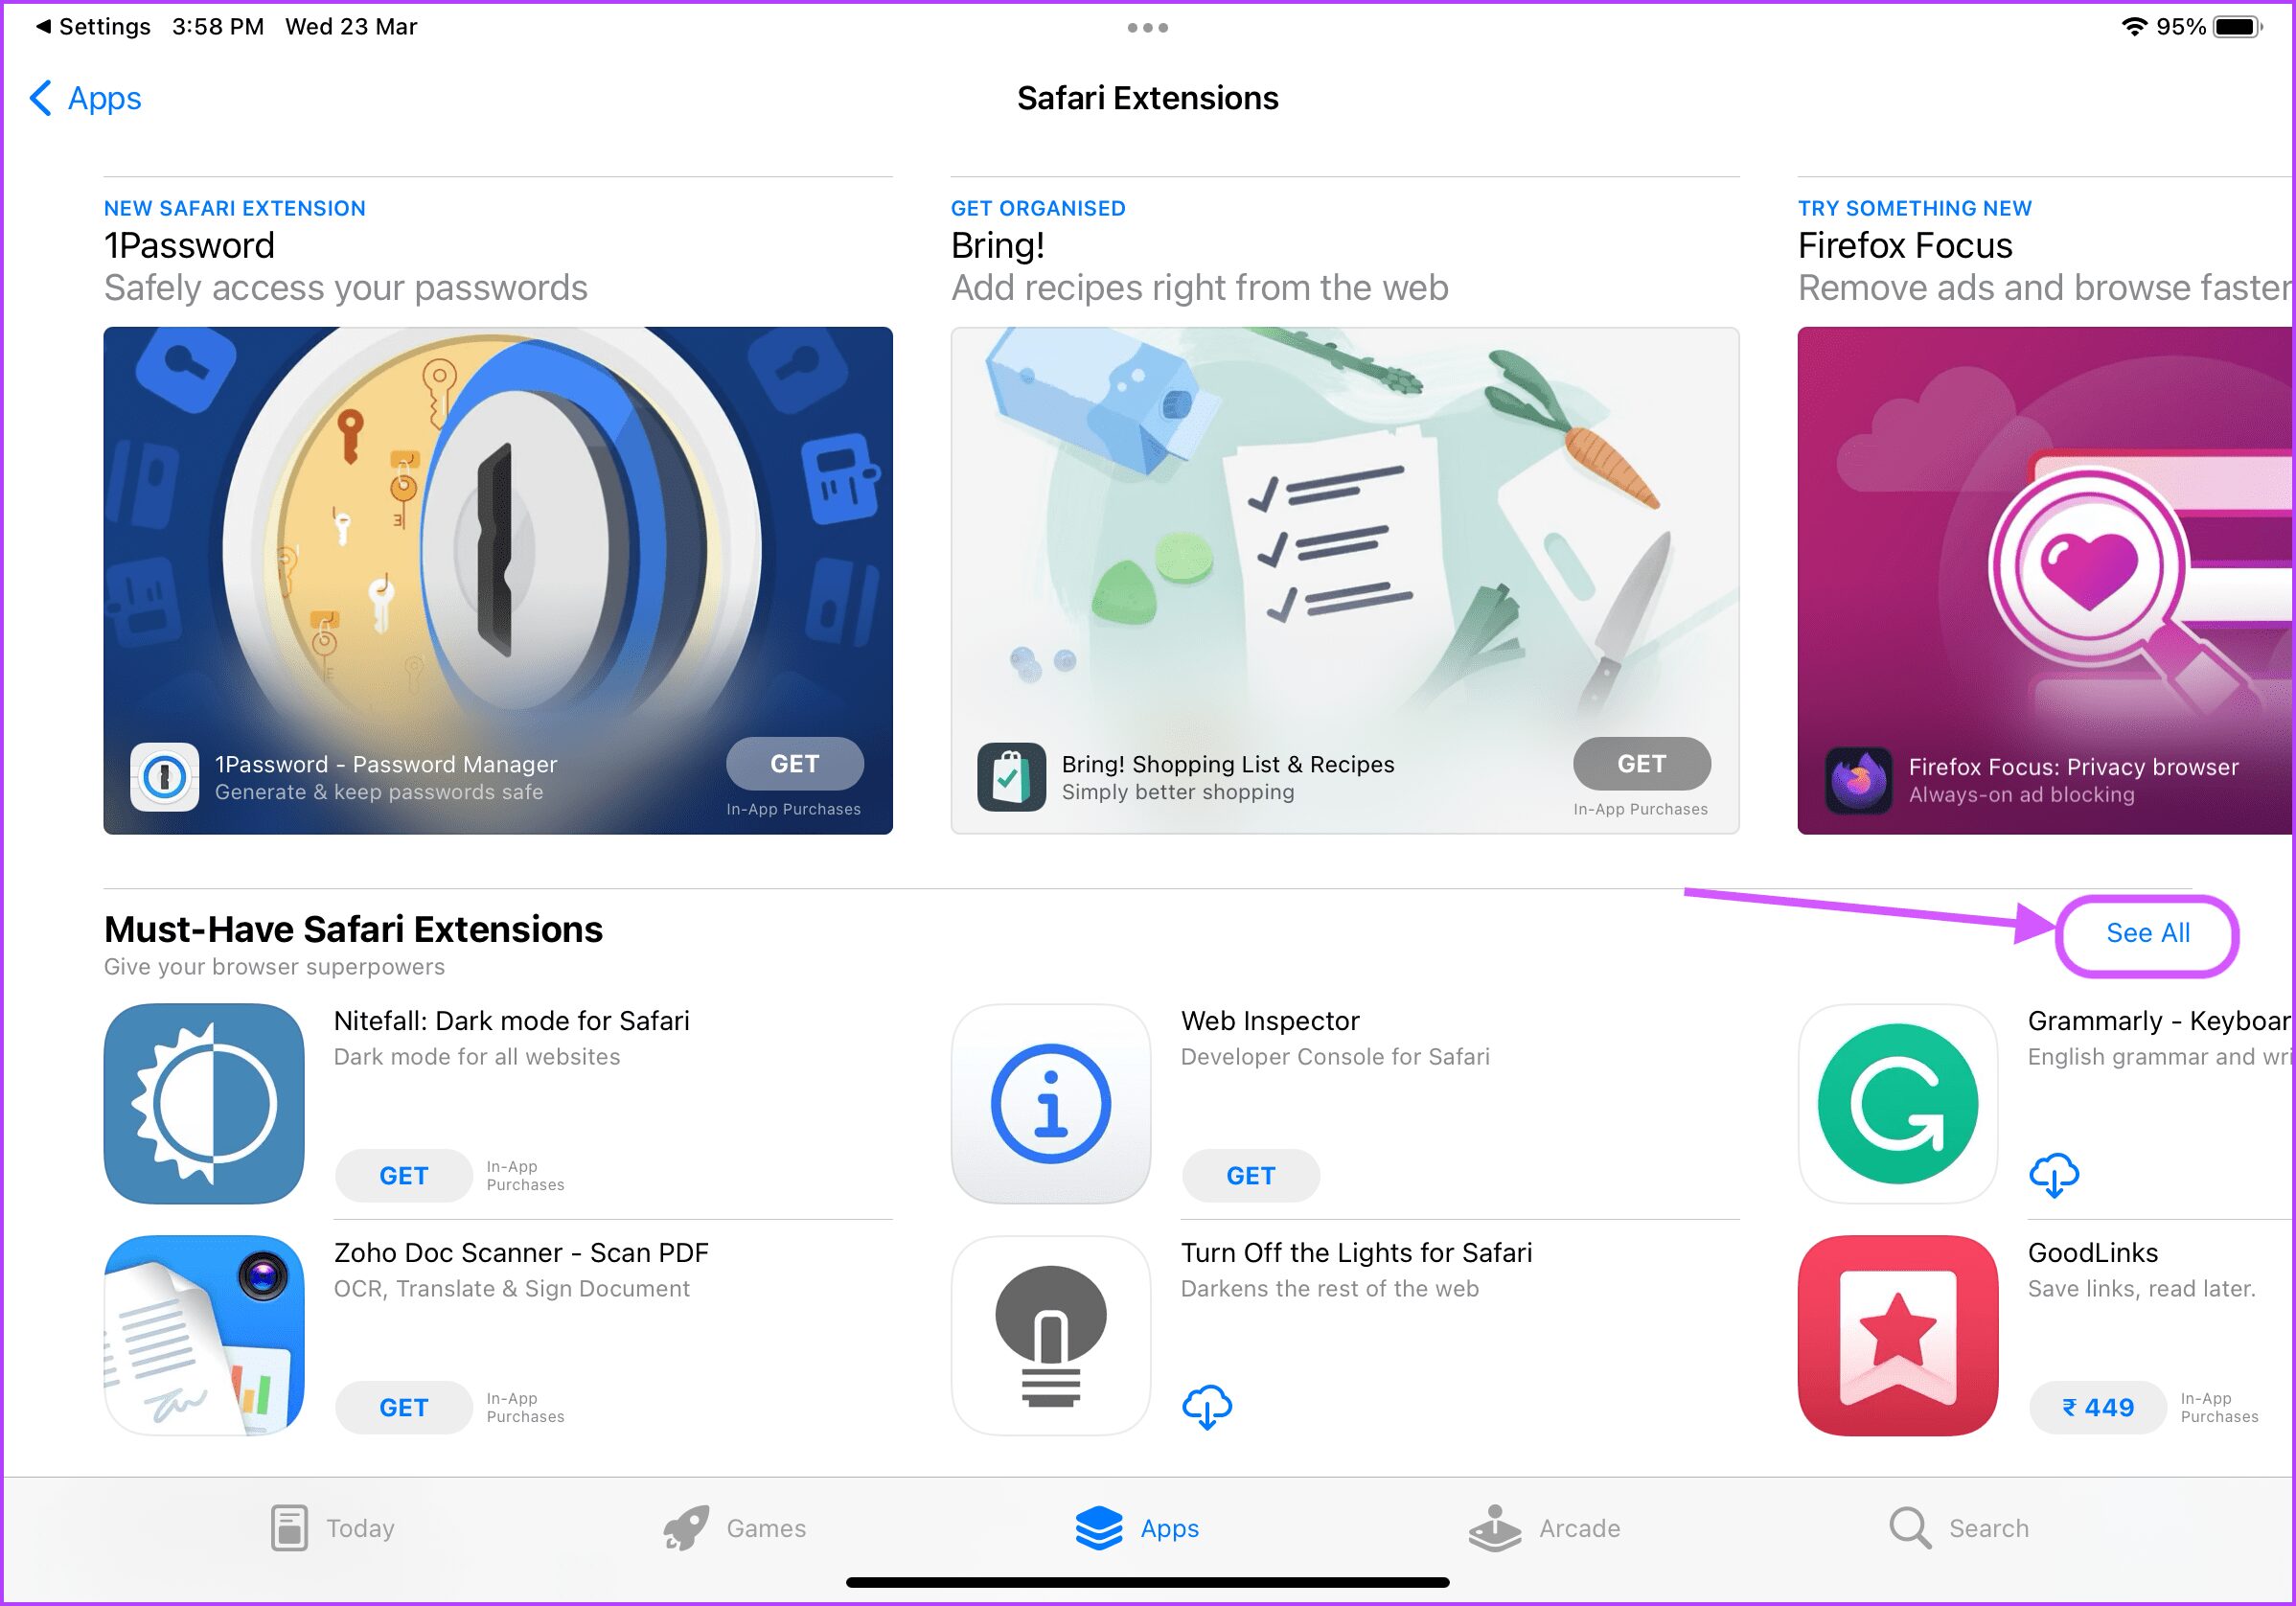
Step 5: If you don’t know which extensions to download, you can start by using the ‘Must-Have Safari Extensions’ category. Tap on the See All button to see the curate list of extensions.
For this guide, we’ll download and install the Grammarly Safari extension.
Enable and Disable Safari Extensions
After you download and install Safari extensions, you need to enable them to use them inside Safari. Yes, it isn’t so straightforward like using them in Safari on a Mac. Step 1: Open the Settings app on your iPad.
Step 2: Scroll down to navigate to Safari and tap on Extensions.
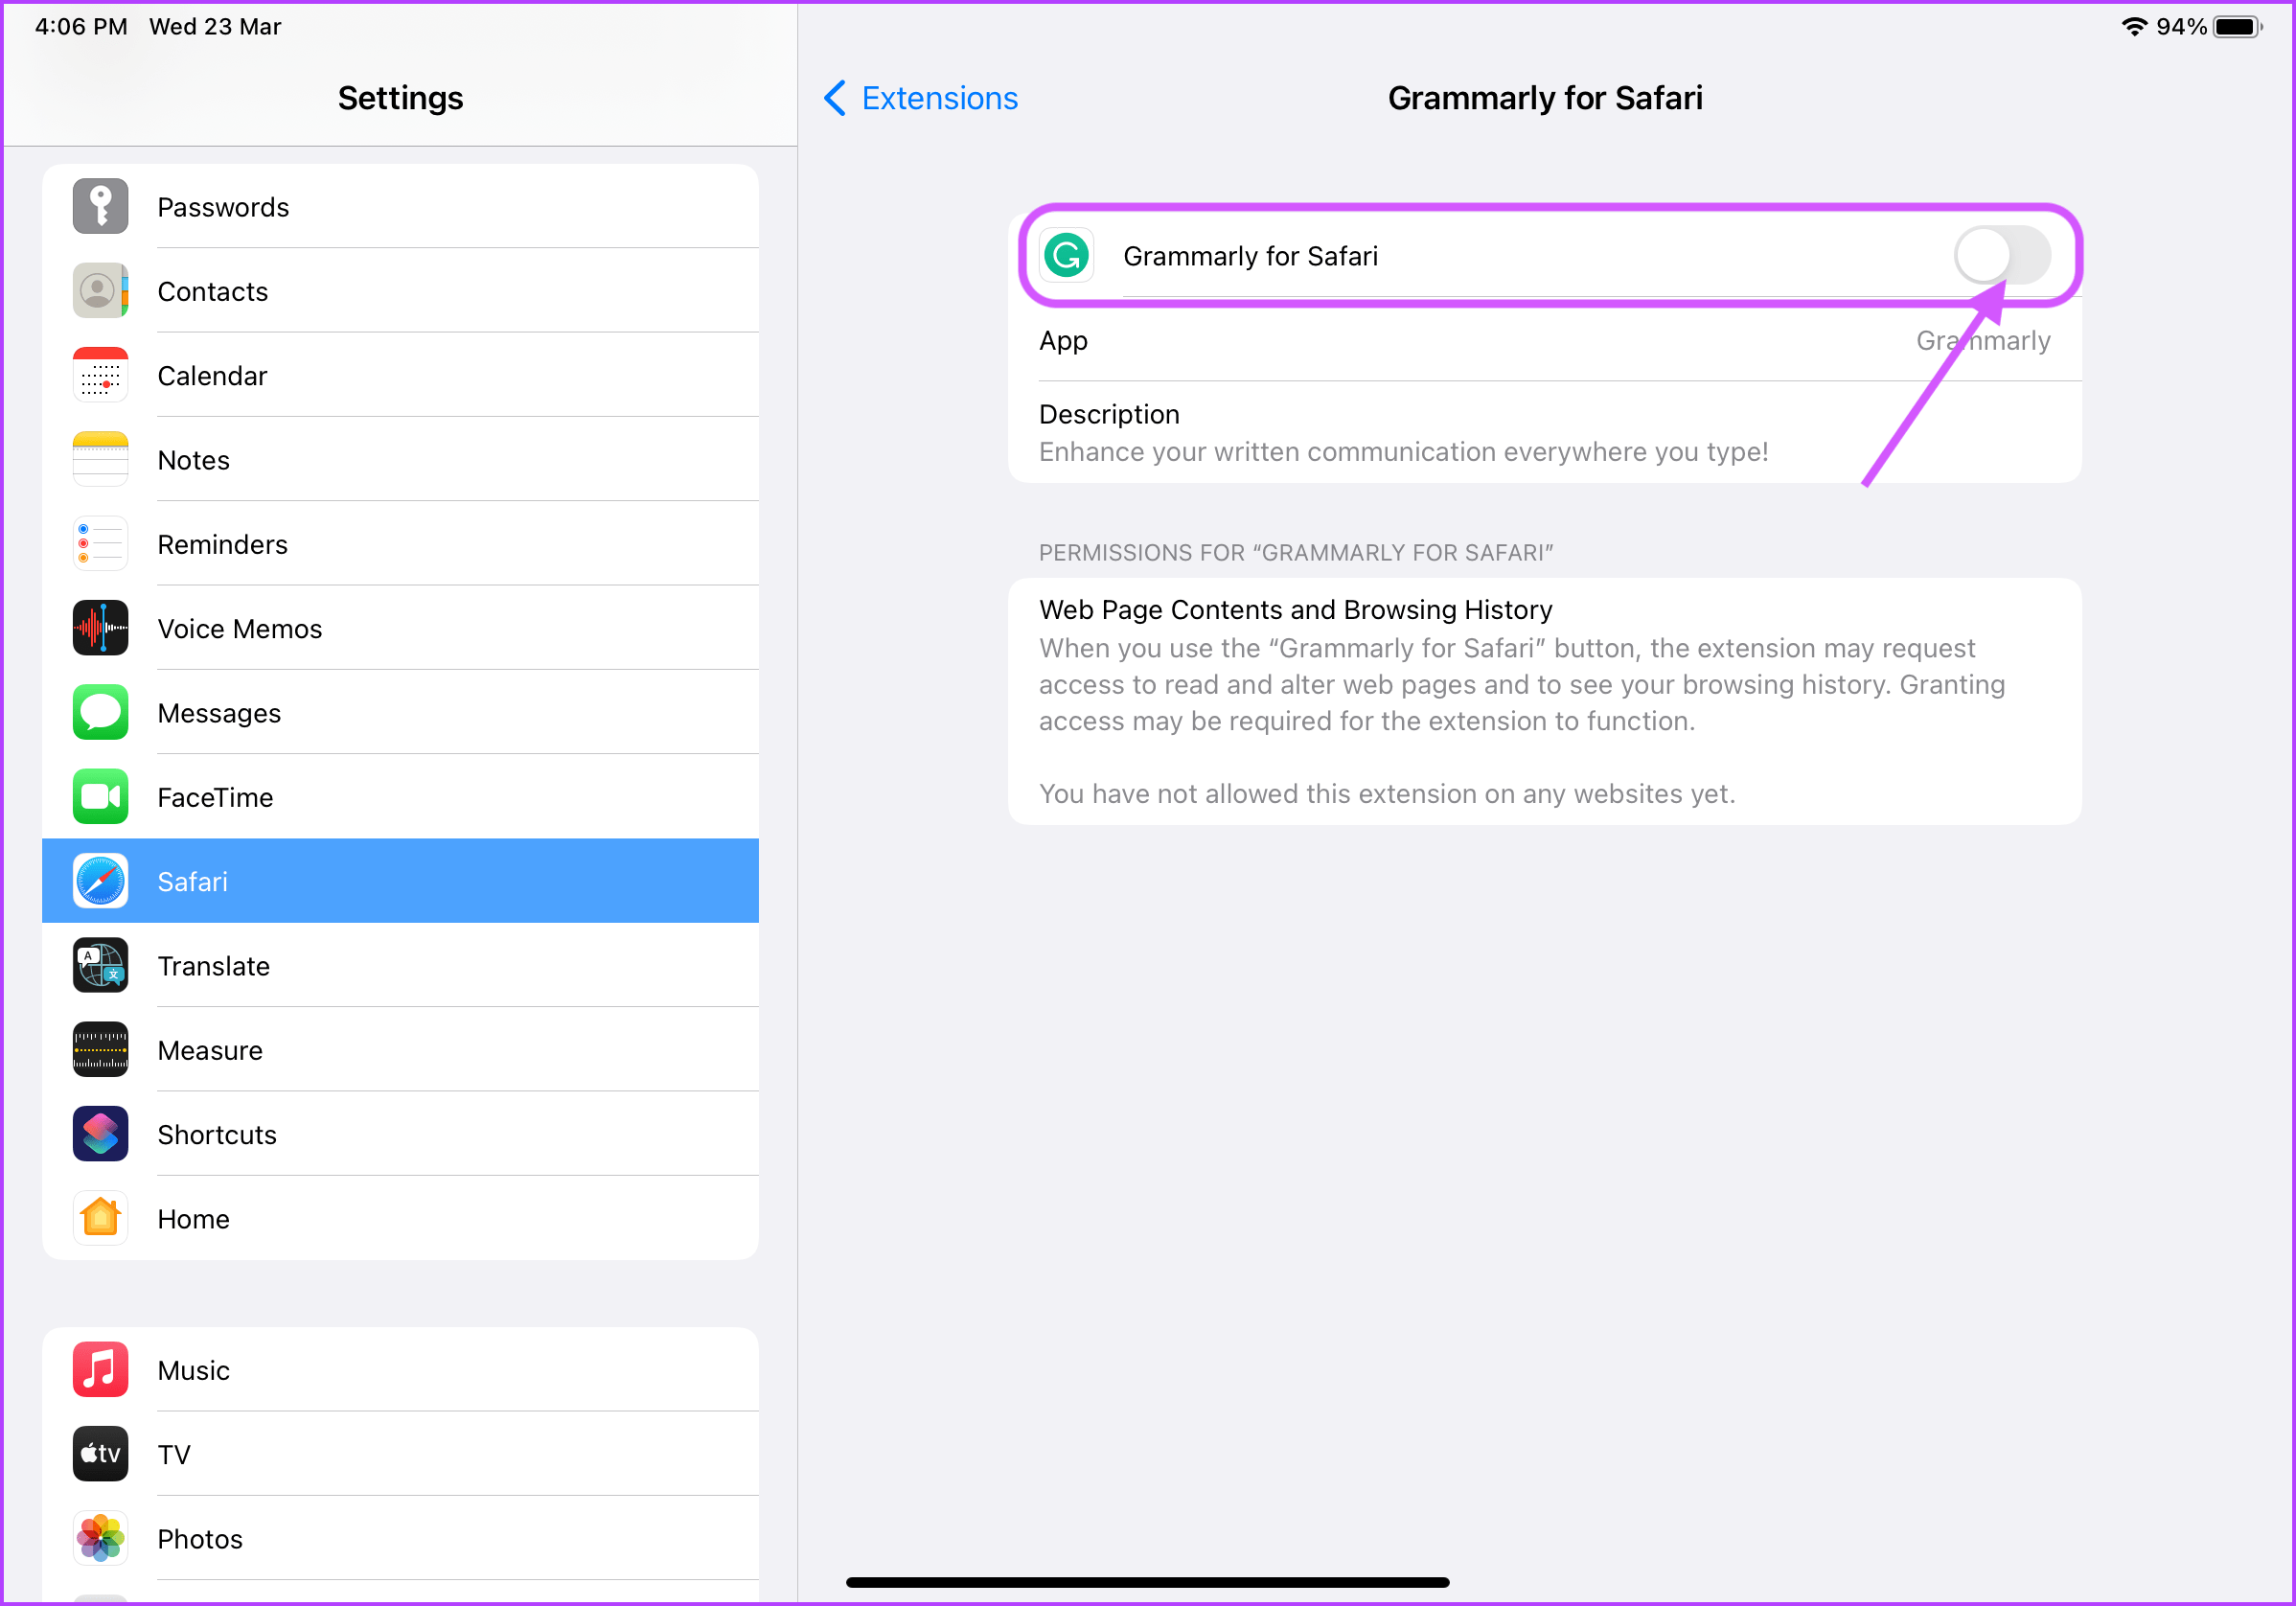
Step 3: Tap on the name of the extension you want to enable.
Step 4: Enable the toggle next to the extension name.
Step 5: To disable a Safari extension, follow the same steps and disable the toggle next to its name.
Manage Safari Extension Settings
Once you enable a Safari extension, you can manage its settings and permissions from inside the Safari app. Step 1: Launch the Safari browser.
Step 2: You will see any new extension that you have enabled asking for permission to run. Tap on the Review button and grant the necessary permissions.
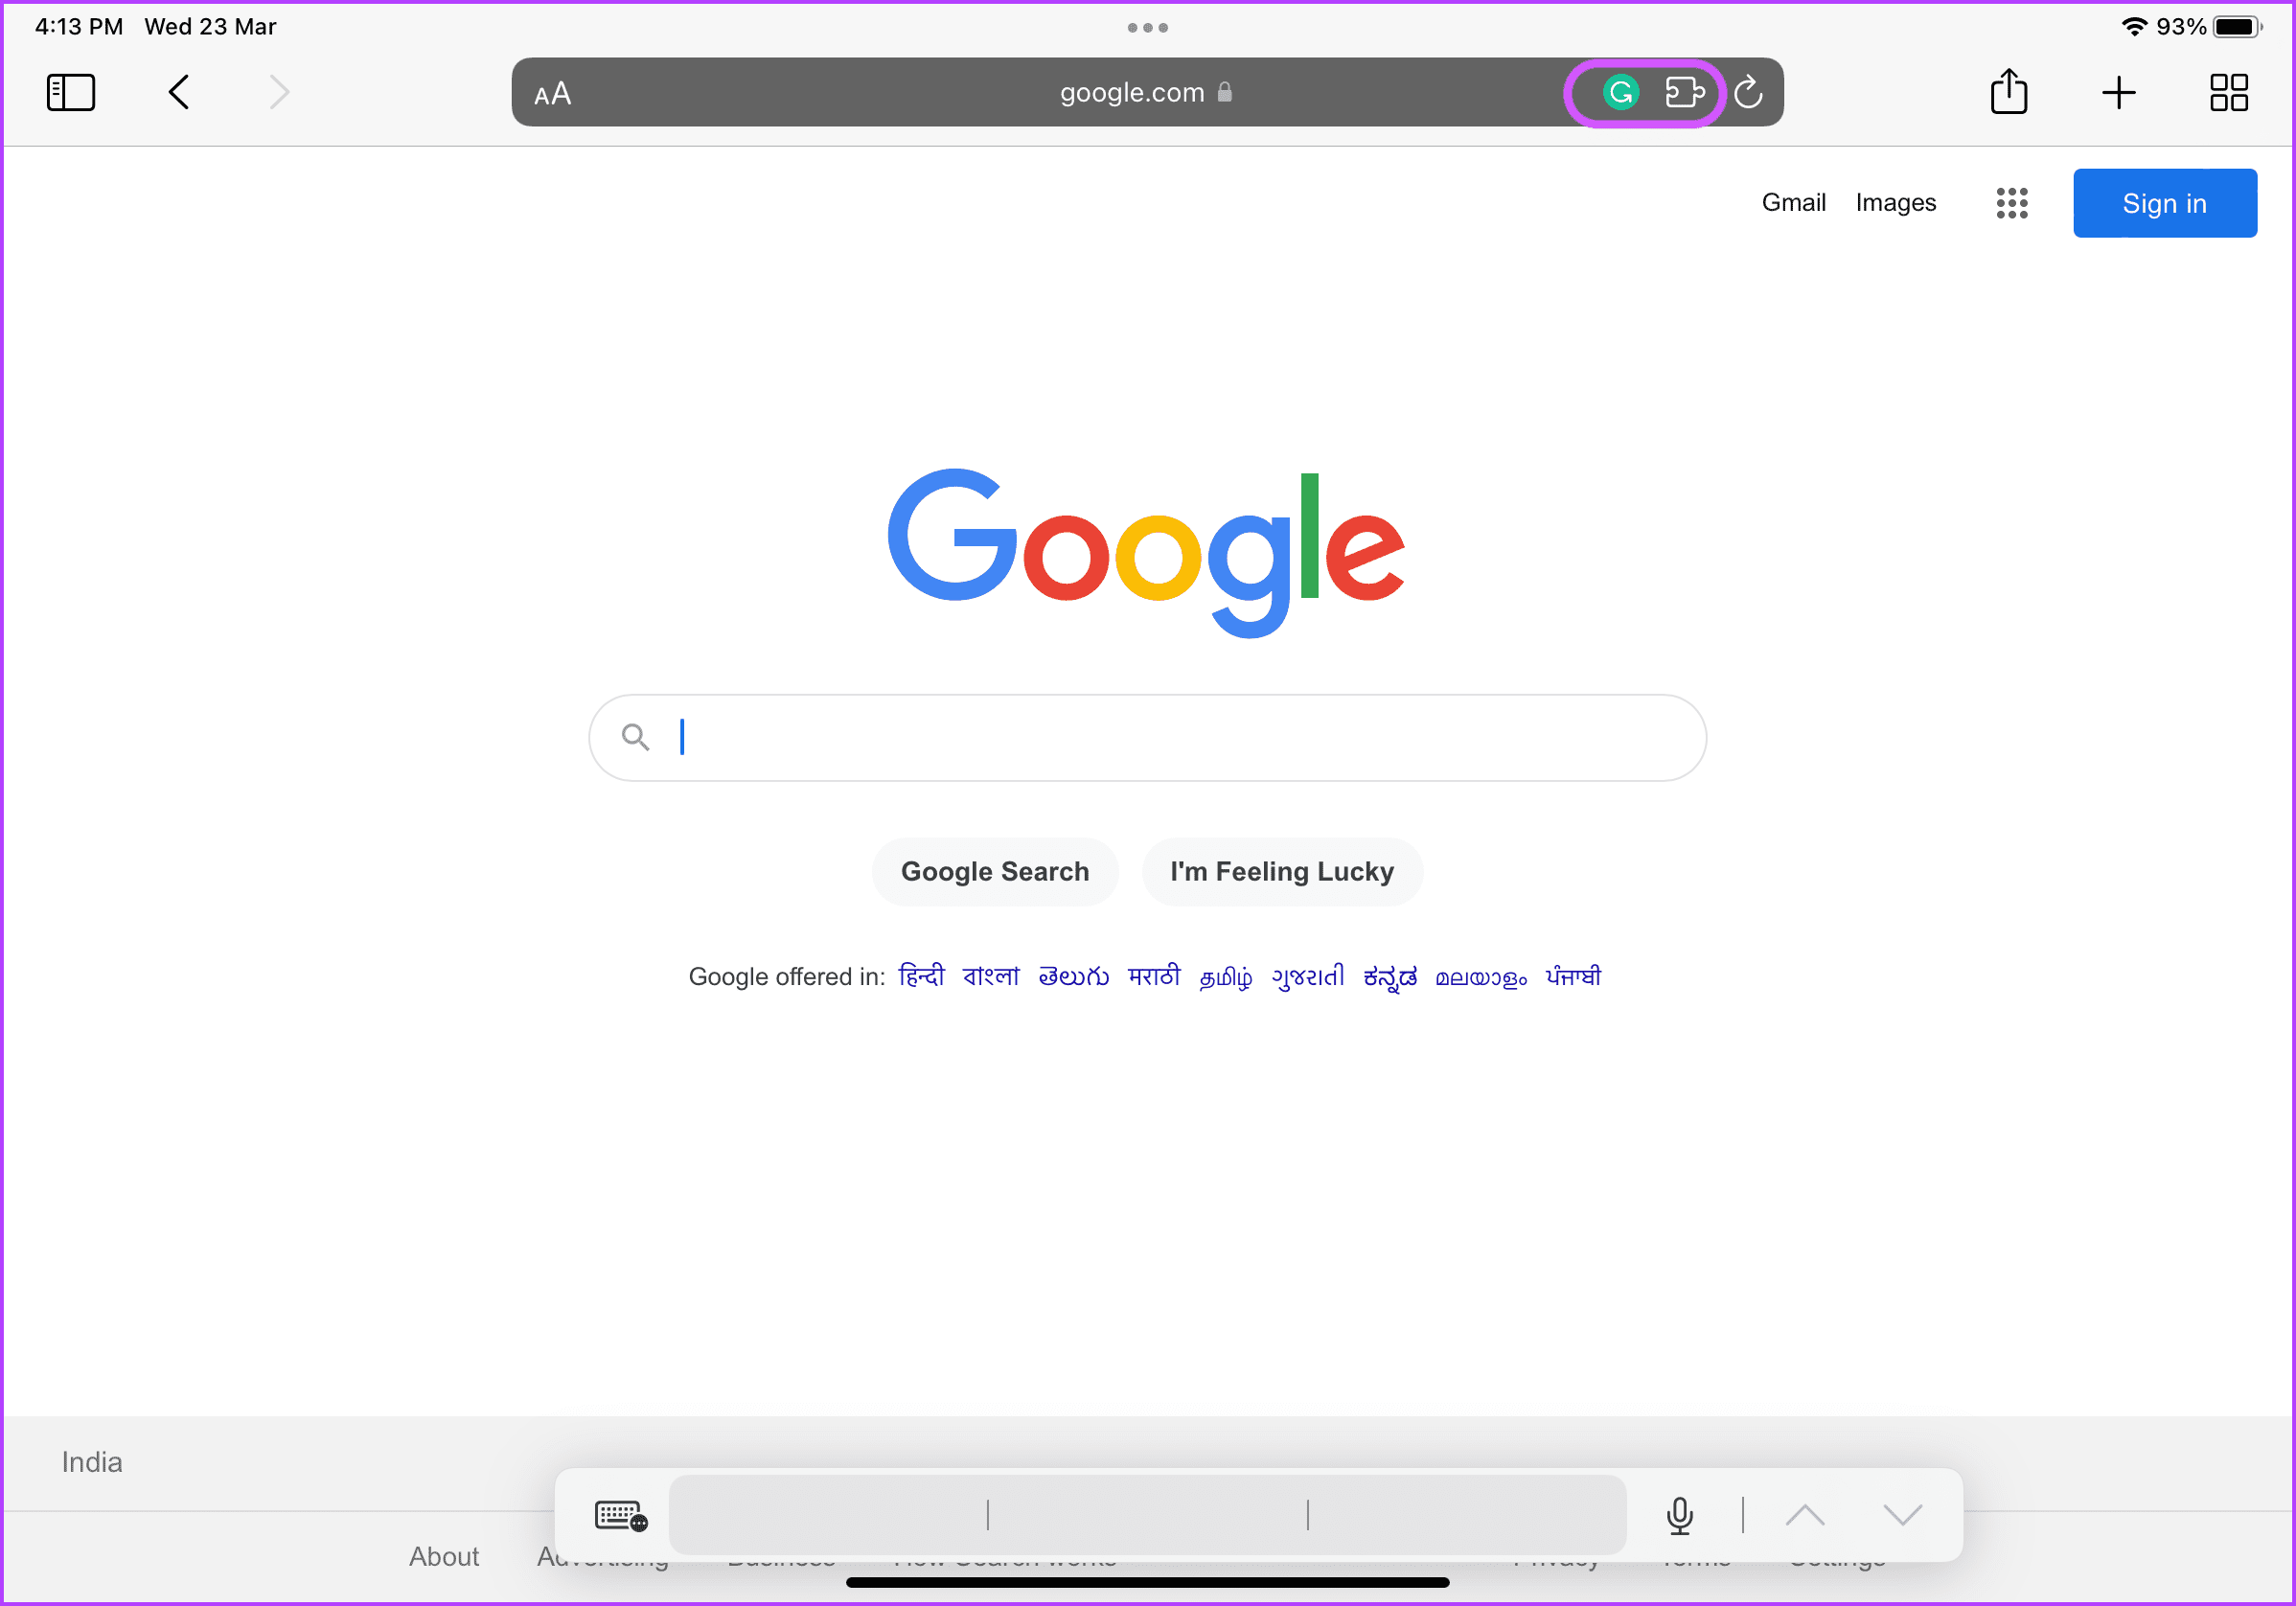
Step 3: You should now see your extension’s icon appearing in the top-right corner of the address bar.
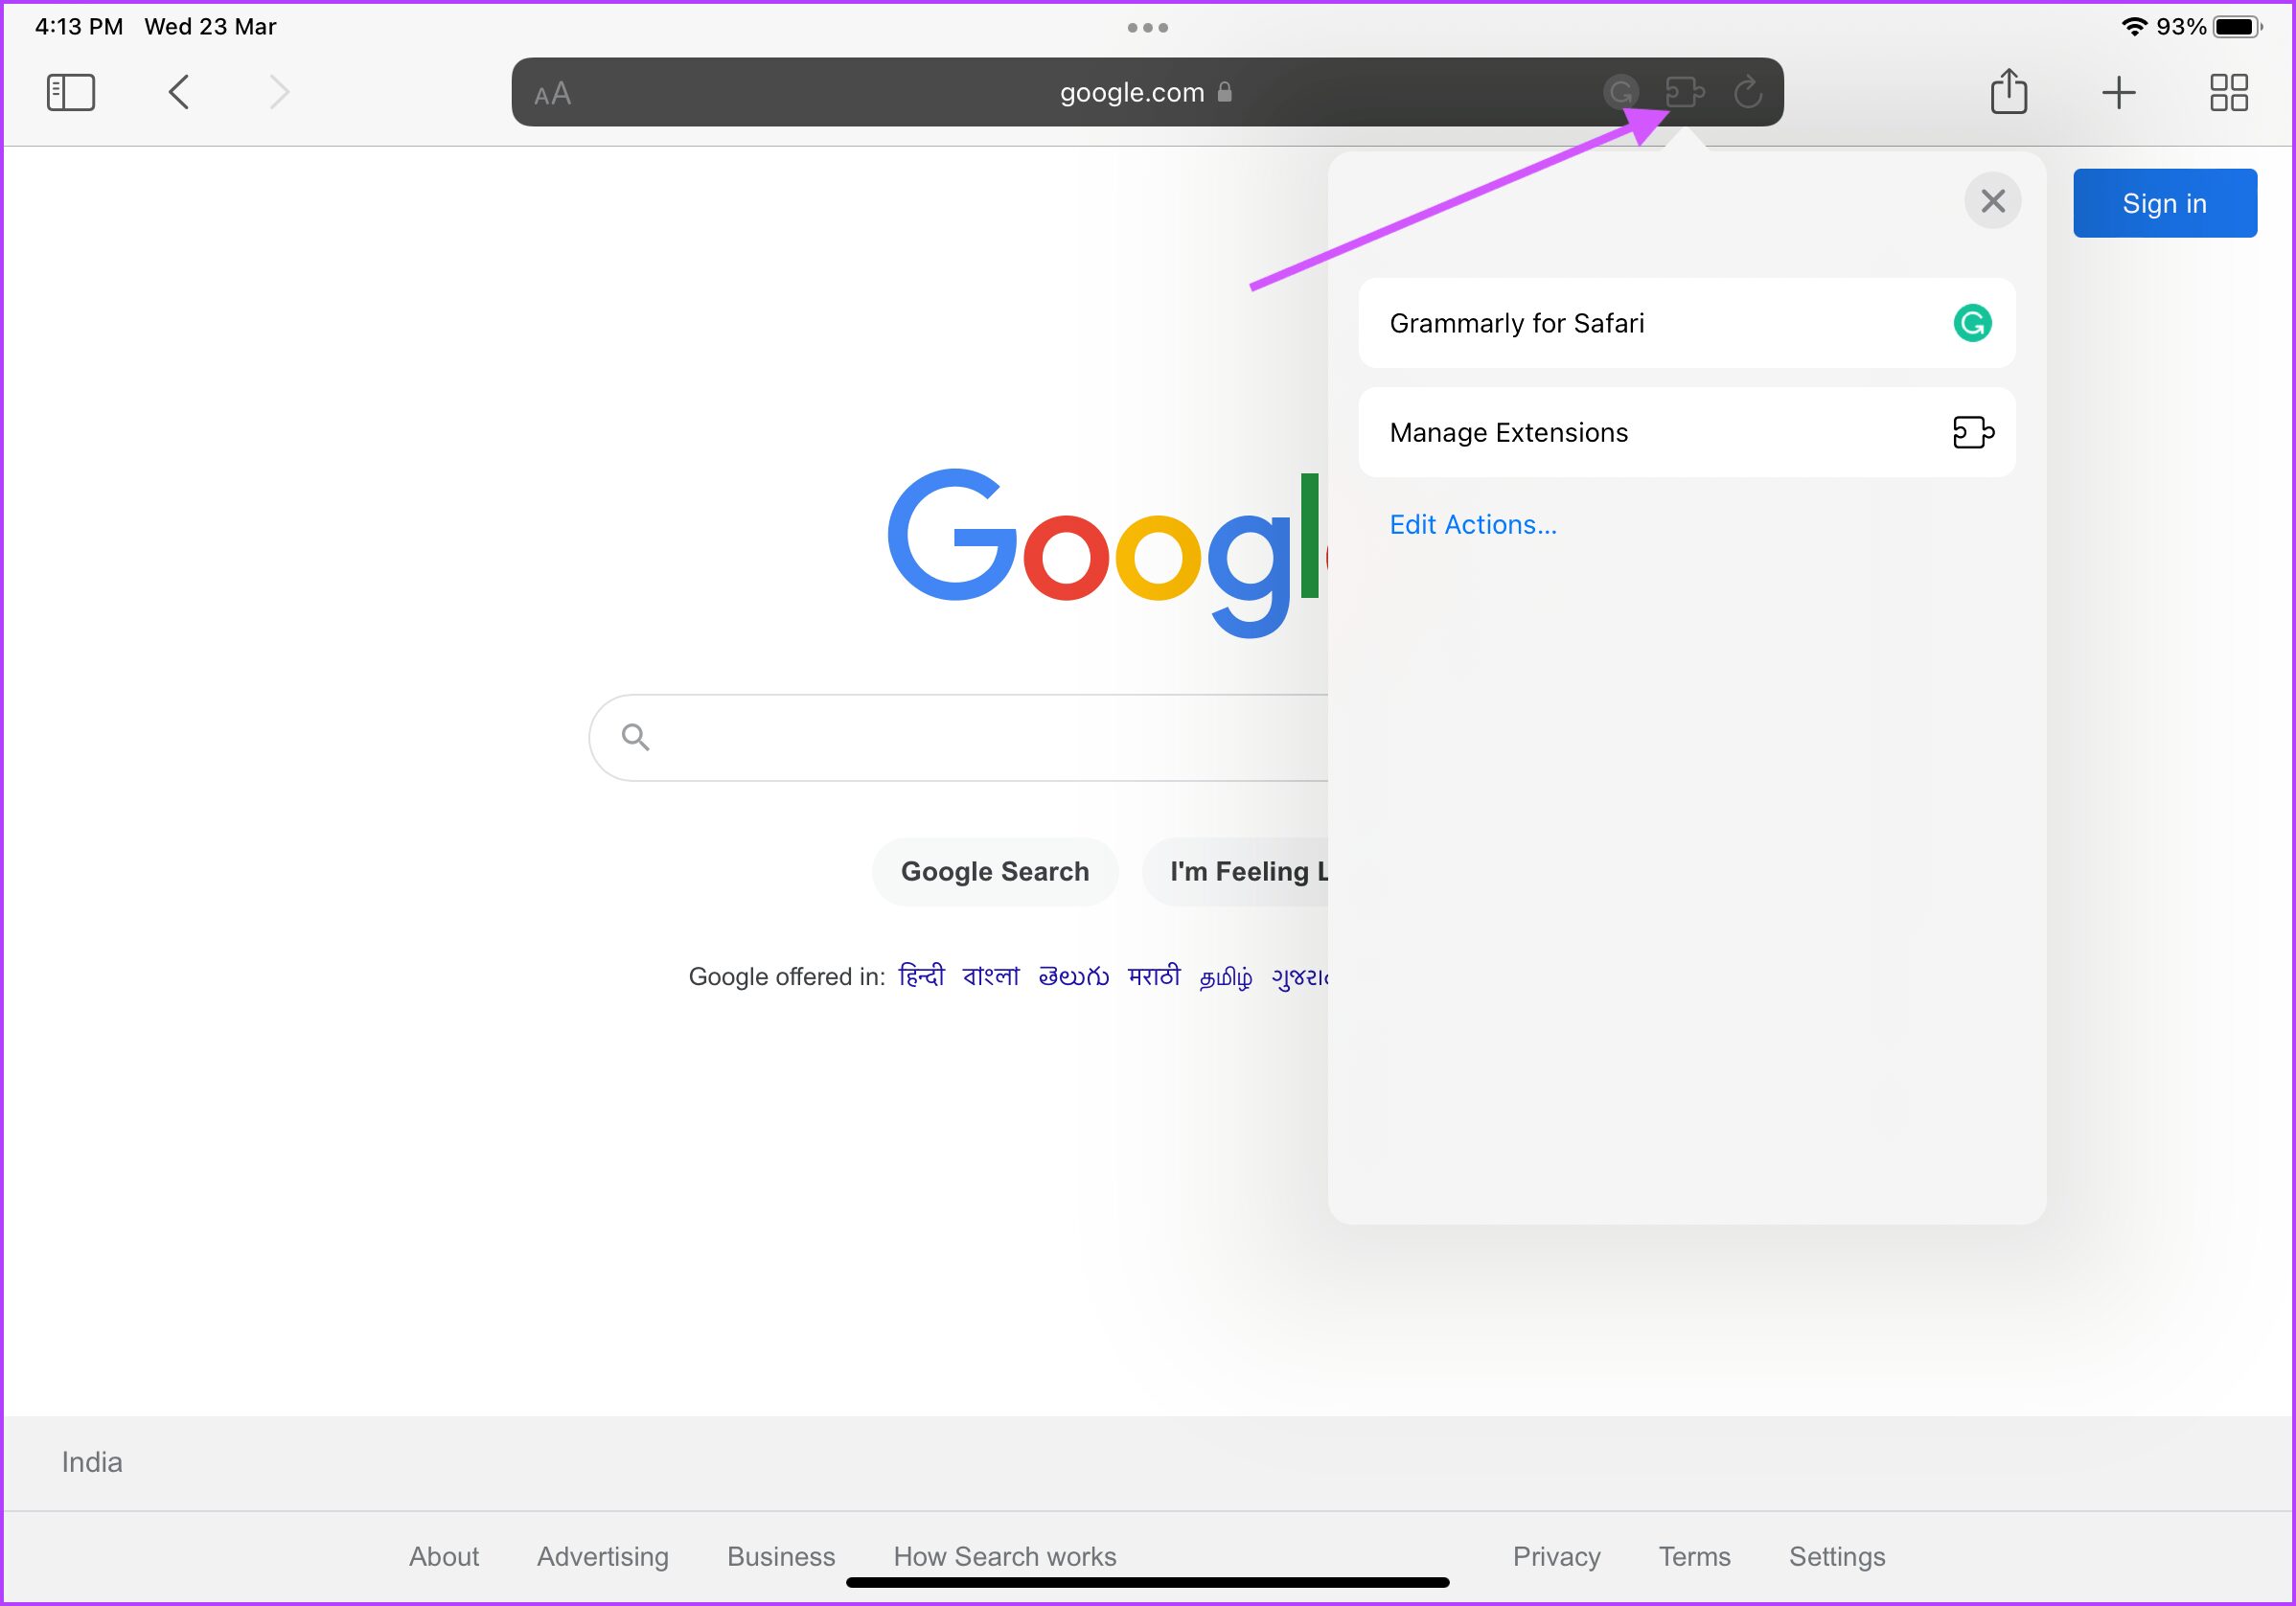
Step 4: To see the list of installed extensions, tap on the extension button.
Step 5: To manage an extension’s permission, tap on it.
Step 6: Now, you can select whether you want the extension to run on the currently opened website or not. If you do not want the extension to access the current website, disable its toggle.
Step 7: To disable an extension from running on Safari, tap on the extension button and then on Manage extensions.
Step 8: Turn off the toggle next to the name of the extension that you want to disable.
Remove Safari Extensions
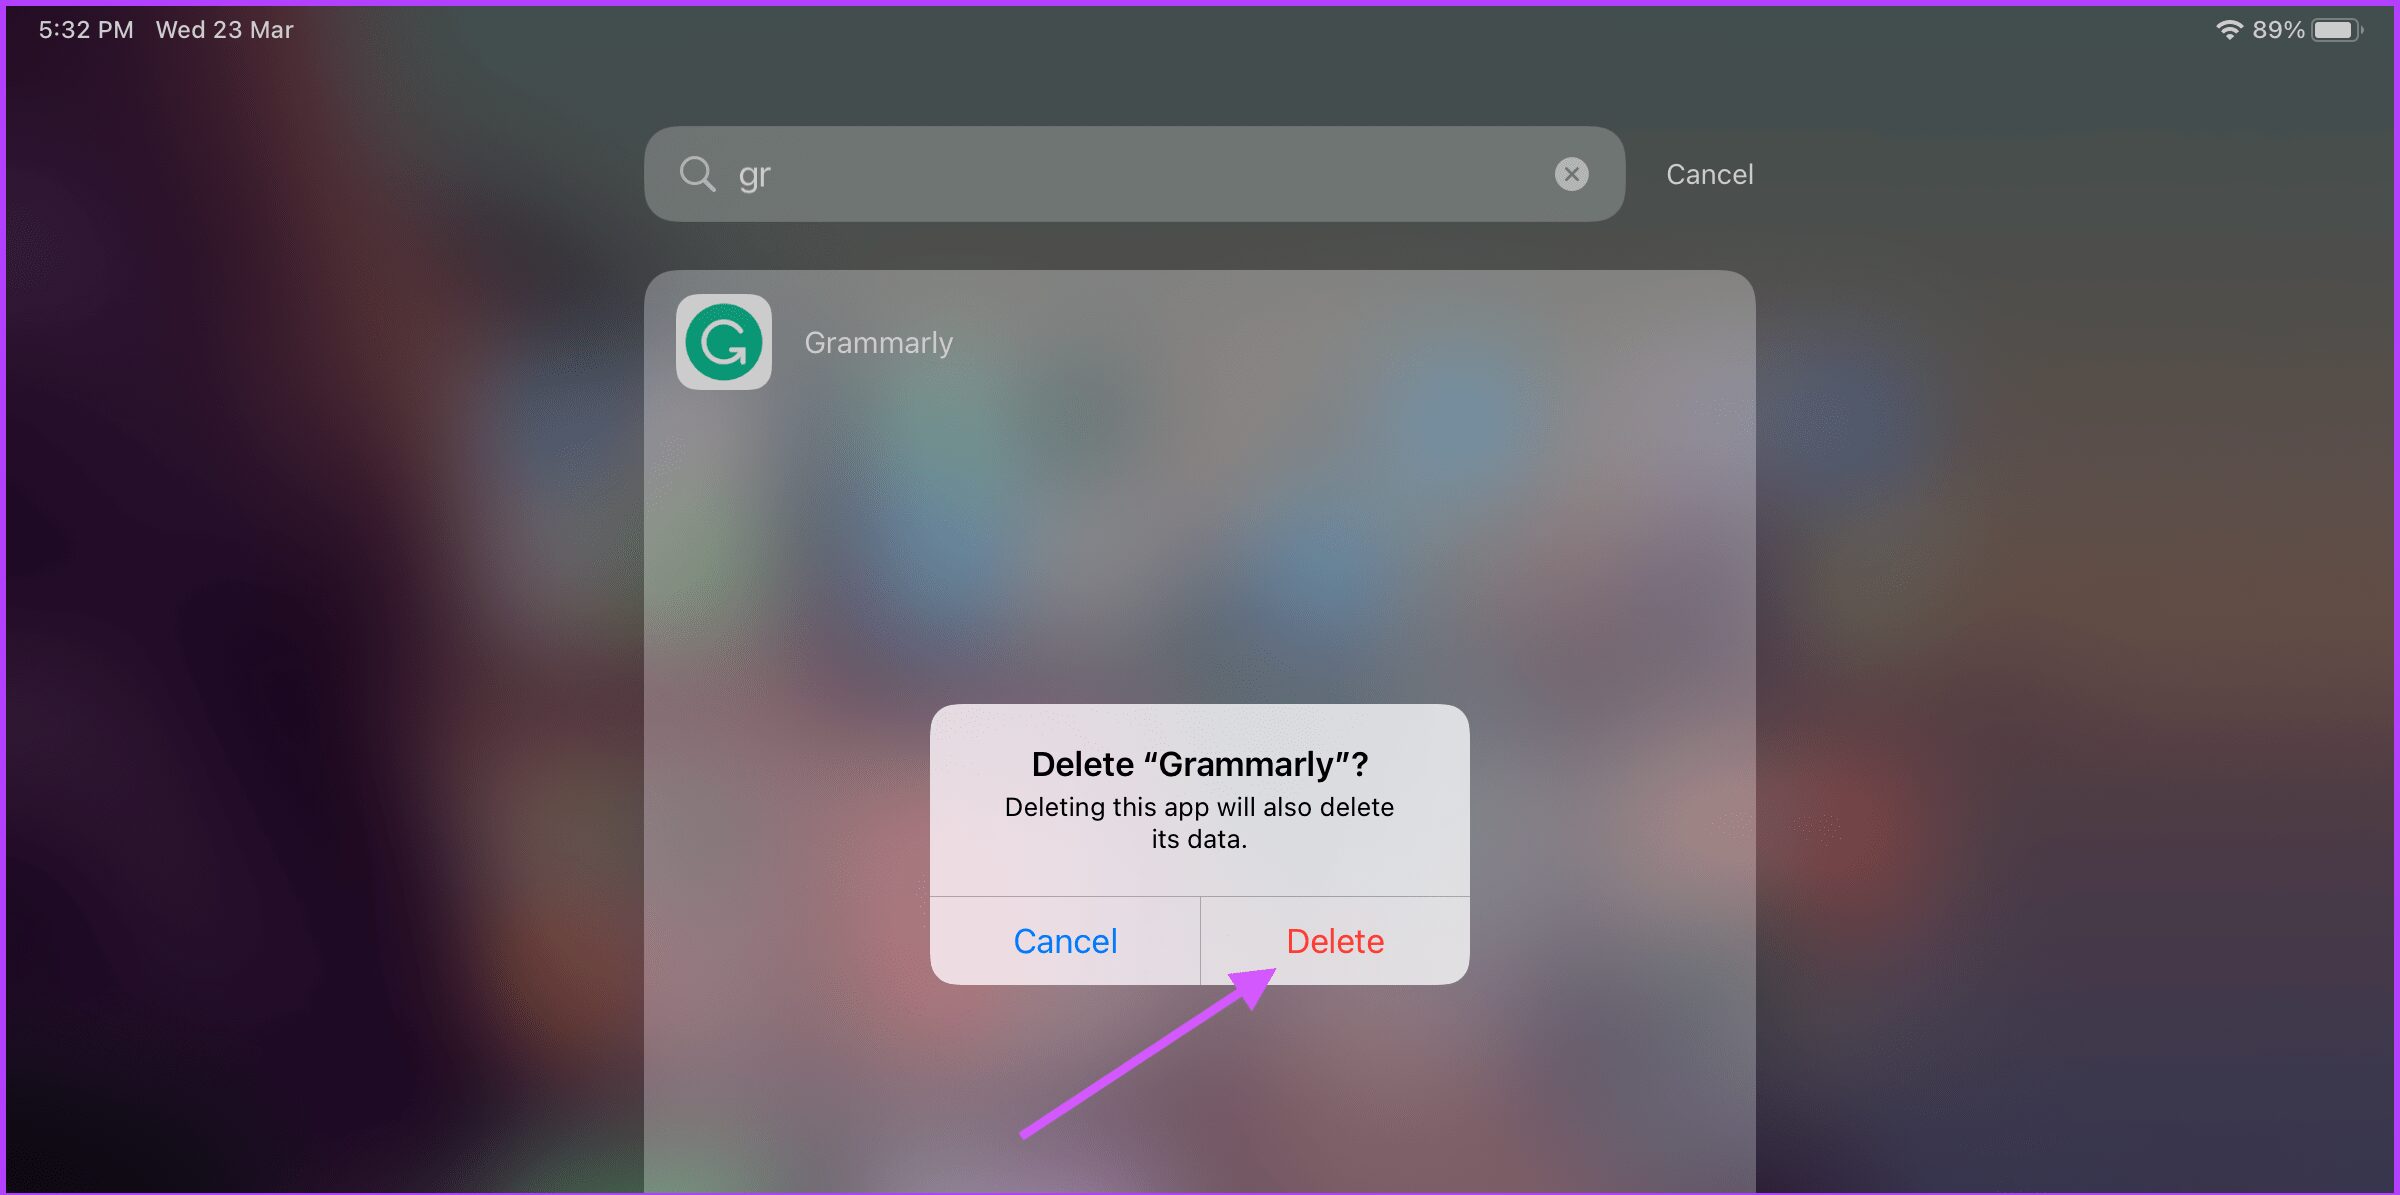
If you don’t want to use an extension, you can disable. But, sometimes you might want to remove an extension completely if you no longer plan to use it. To remove a Safari extension, you will need to delete it from your iPad. Interestingly, Safari extensions save as an app on the iPad. Step 1: Swipe down anywhere on the display to bring up the search bar. Then, search for the extension you want to delete. Tap and hold the app icon when it shows up in the search results and tap on the Delete App button.
Step 2: Tap on Delete to confirm deletion.
Use Safari Extensions on iPad to Enhance Your Browsing Experience
Safari extensions allow users to add more capabilities to the Safari Browser. You can start using extensions from Apple’s must-have Safari extensions list. Once you get familiar with them, you can search and install the extensions you need. Using the Safari extensions can easily help you get the desktop-like experience while taking a break from a computer. What are your favorite Safari extensions that you use on iPad or the ones you’d like to see there? The above article may contain affiliate links which help support Guiding Tech. However, it does not affect our editorial integrity. The content remains unbiased and authentic.