While the Notes app is great and boasts decent collaborative features, there was something a miss. To fill the vacuum and bring a wholesome whiteboard experience onboard, Apple has introduced the Freeform app for iPhone, iPad, and Mac. This guide has been created after hours of exploring and experimenting, so, expect many tips, tricks, and interesting observations coming your way.
What is Apple’s Freeform App on iPhone and iPad
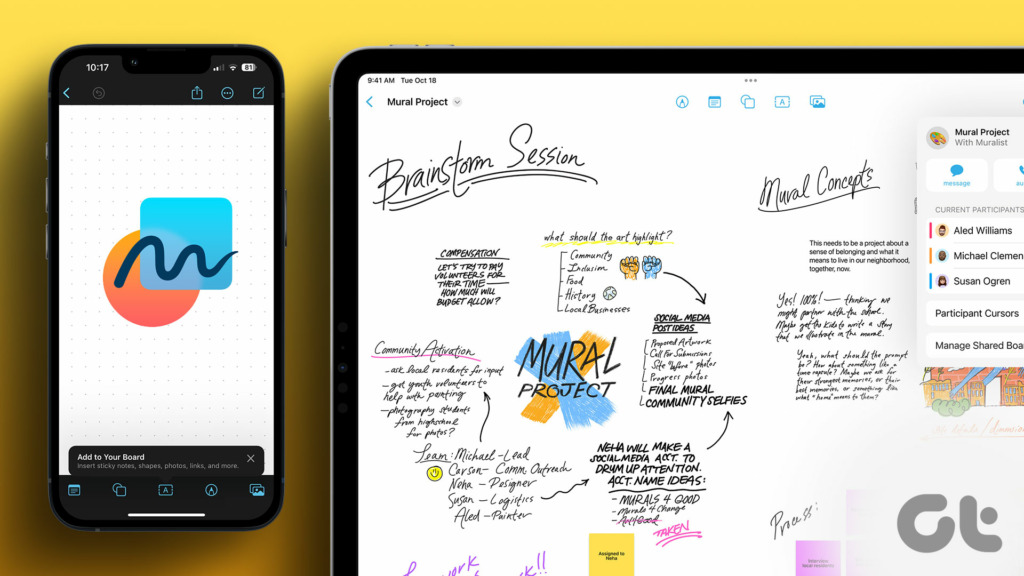
Freeform is Apple’s version of a digital whiteboard. You literally get a white seamless and neverending canvas to start with. Here, you can jot down ideas/observations, doodle, and add media like images, videos, or links. Simply put, you are free to paint the town i.e., the board any color you want. Furthermore, you can collaborate with friends, family, and colleagues, up to 99 people to work simultaneously on the board. Remarkably, all collaborators can stay connected in real time via iMessage or FaceTime.
Requirements to Use the Freeform App
You’ll need at least one of the following devices to use Freeform:
iPhone running on iOS 16.2 or later. iPad running on iPadOS 16.2 or later. Mac running on macOS Ventura 13.1 or later.
Creative Ways You Can Use Apple’s Freeform App
While we are going to take you through a step-by-step guide on how to use Freeform on your iPhone and iPad, let’s first see some of its amazing use cases.
Create a virtual vision board – Ditch that third-party graphic design app, instead make your vision board come alive on Freeform’s whiteboard. Add images, videos, links, post-its, doodles, and whatever more you need. Moreover, you can access it on any device, thanks to iCloud sync.
Brainstorm ideas – Whether you’re going solo or with a team, simply pen down, doodle, or import your ideas, observations, and inspirations on Freeform. What’s more, the collaboration features allow you to view what others are doing in real time and discuss things simultaneously on FaceTime or Messages.
Make travel plans – Instead of exploring Google My Maps or any other third-party apps, try Freeform to build and manage your travel itinerary. Why? Because you can, Attach details of your flight, hotel/hostel stays, required documents, and lists for travel and packing essentials, shopping, and more. Furthermore, you can even add ref images for clothes to wear, photo ops, transition videos, etc., so you don’t miss out on anything. Last but not least, you can easily convert this itinerary into a travel journal for all the memories you created.
And this is just the start, you can explore more freeform examples here. Now that we’ve given you a glimpse of what can be done, here’s a guide on how to do it.
How to Use Freeform on iPhone and iPad
Before we start, it’s wiser to check whether Freeform is enabled and synced with your iCloud.
Enable Freeform on iPhone and iPad
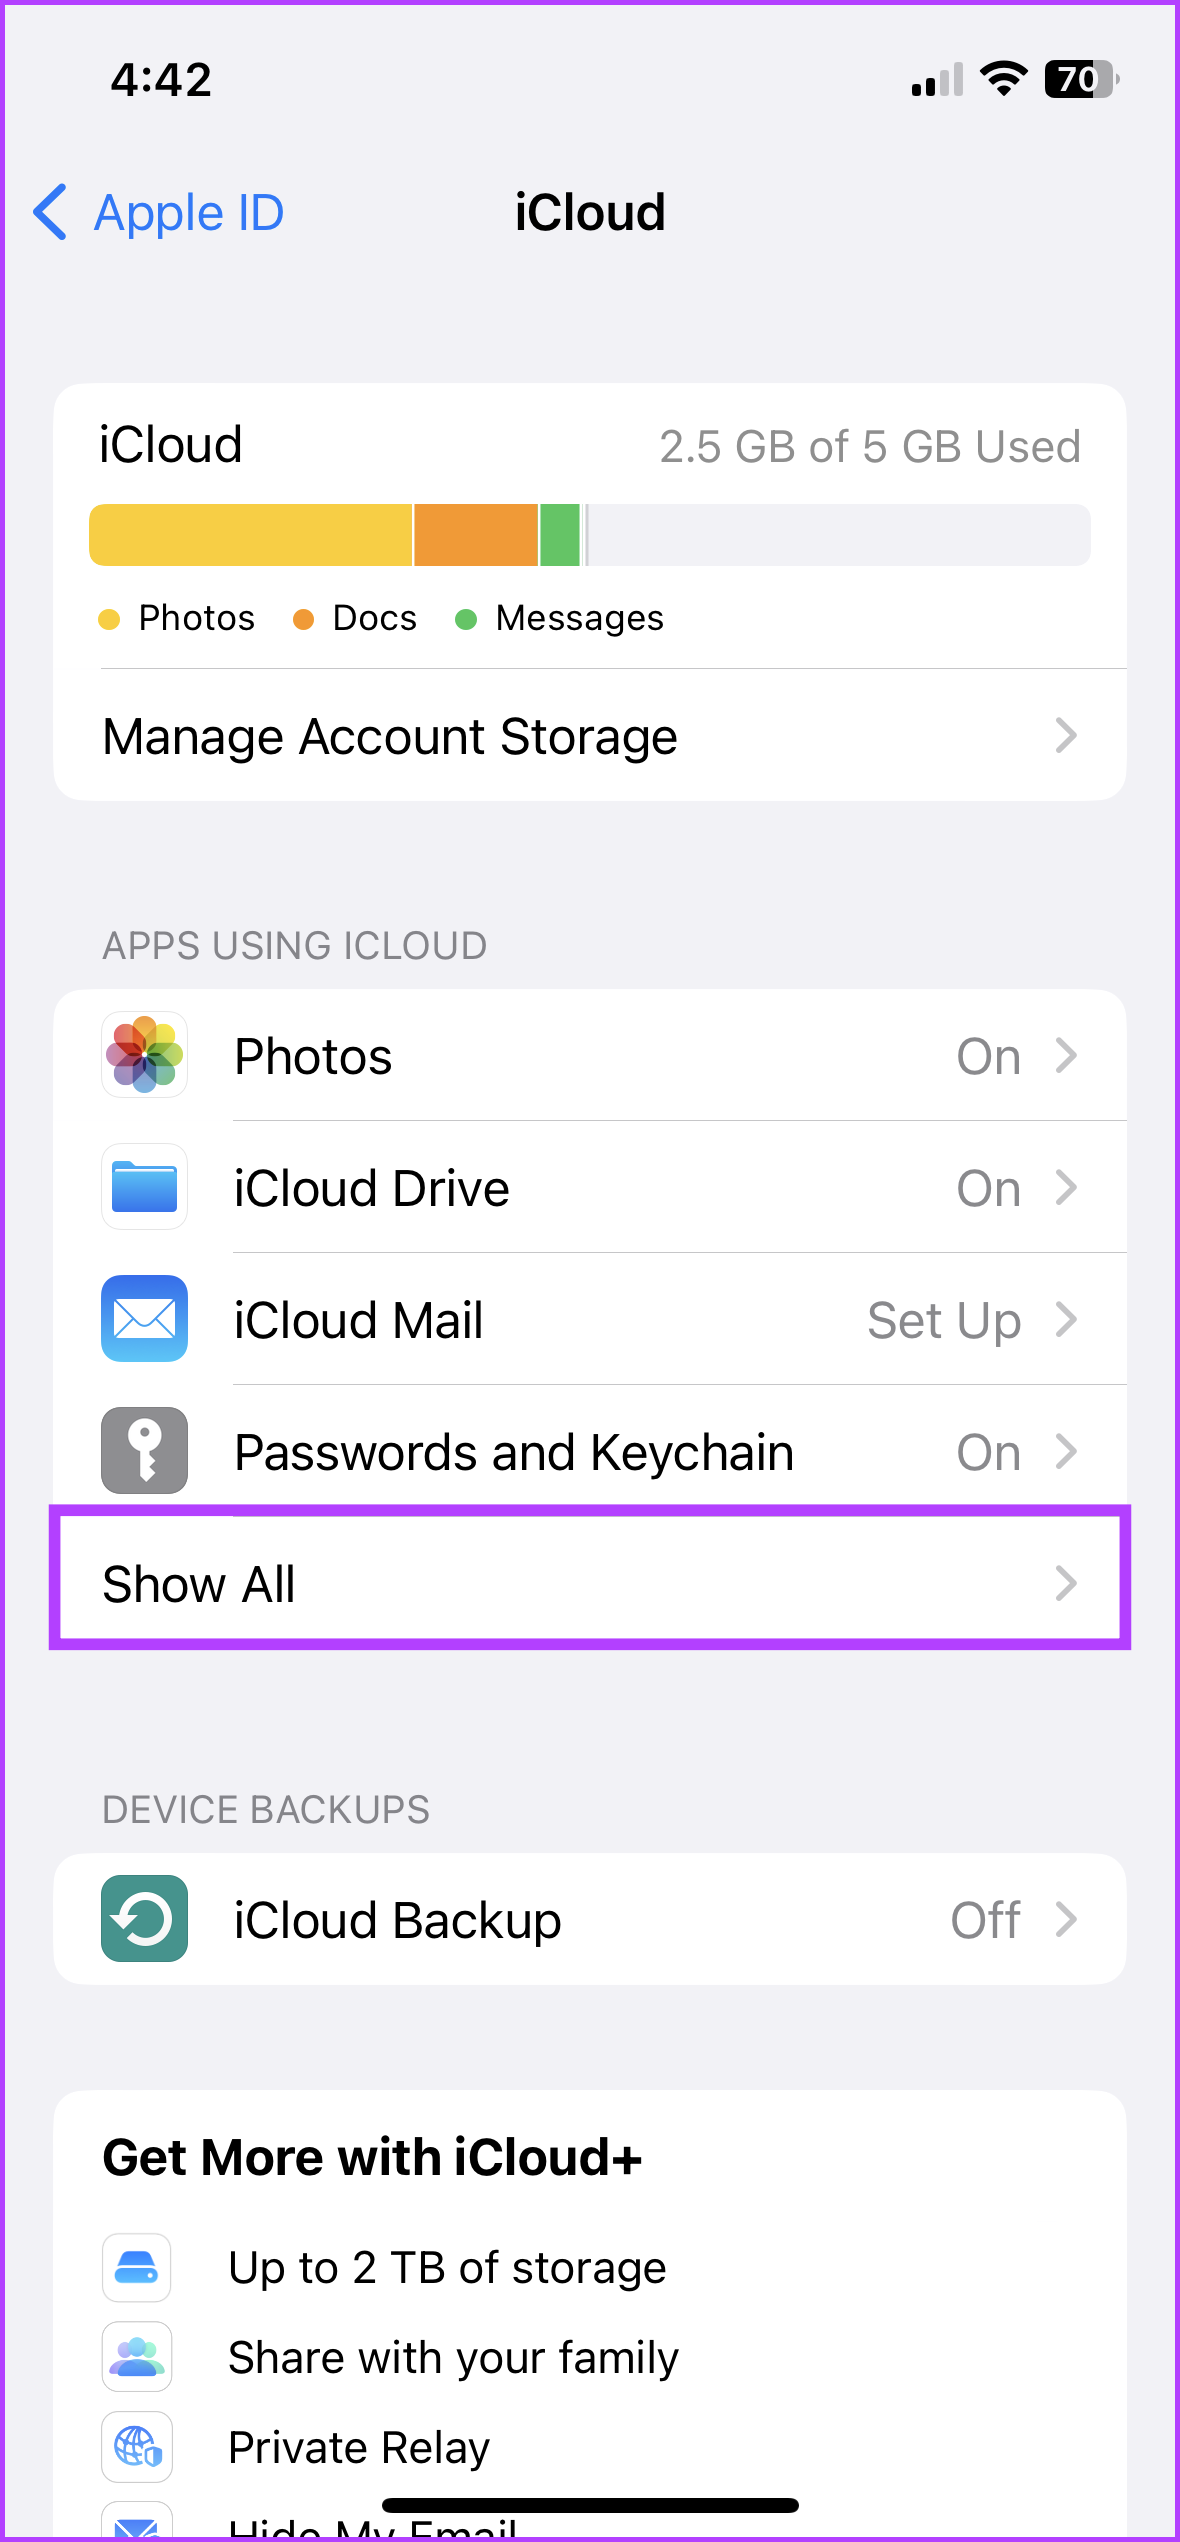
Step 1: Launch the Settings app and tap your name/display picture. Step 2: Tap iCloud. Step 3: Here, select Show All (under the App Using iCloud section). Step 4: Scroll down and turn on the toggle for Freeform. Note: If you use Apple Pencil, go to Settings → Freeform → under the Apple Pencil section, toggle on Select and Scroll.
Start a Board in the Apple Freeform App
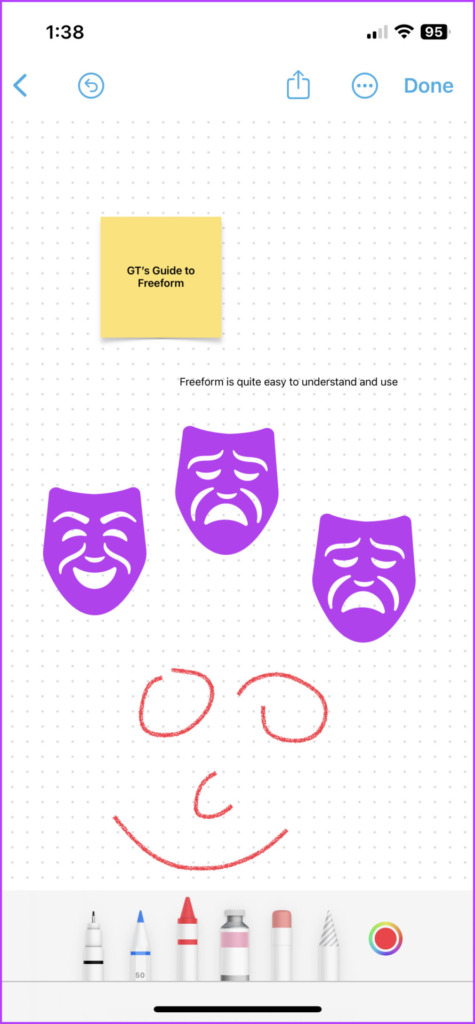
The Freeform app should automatically show up on the Home Screen or App Library of the compatible device. Although, if you can’t find it, download it from the App Store using the link below. Download Freeform from App Store When you open the app for the first time, a welcome message will show up. Tap Continue to create your first board. And here’s where all the magic happens; the canvas where you can make notes, pen down plans and collaborate with others. By default, the board, page, or project (whatever you want to call it) has grids. You can zoom in or out to your heart’s content. As you can see from the above screenshot, the board boasts a toolbar at the bottom of the page and some tools on top, so let’s explore each feature in detail.
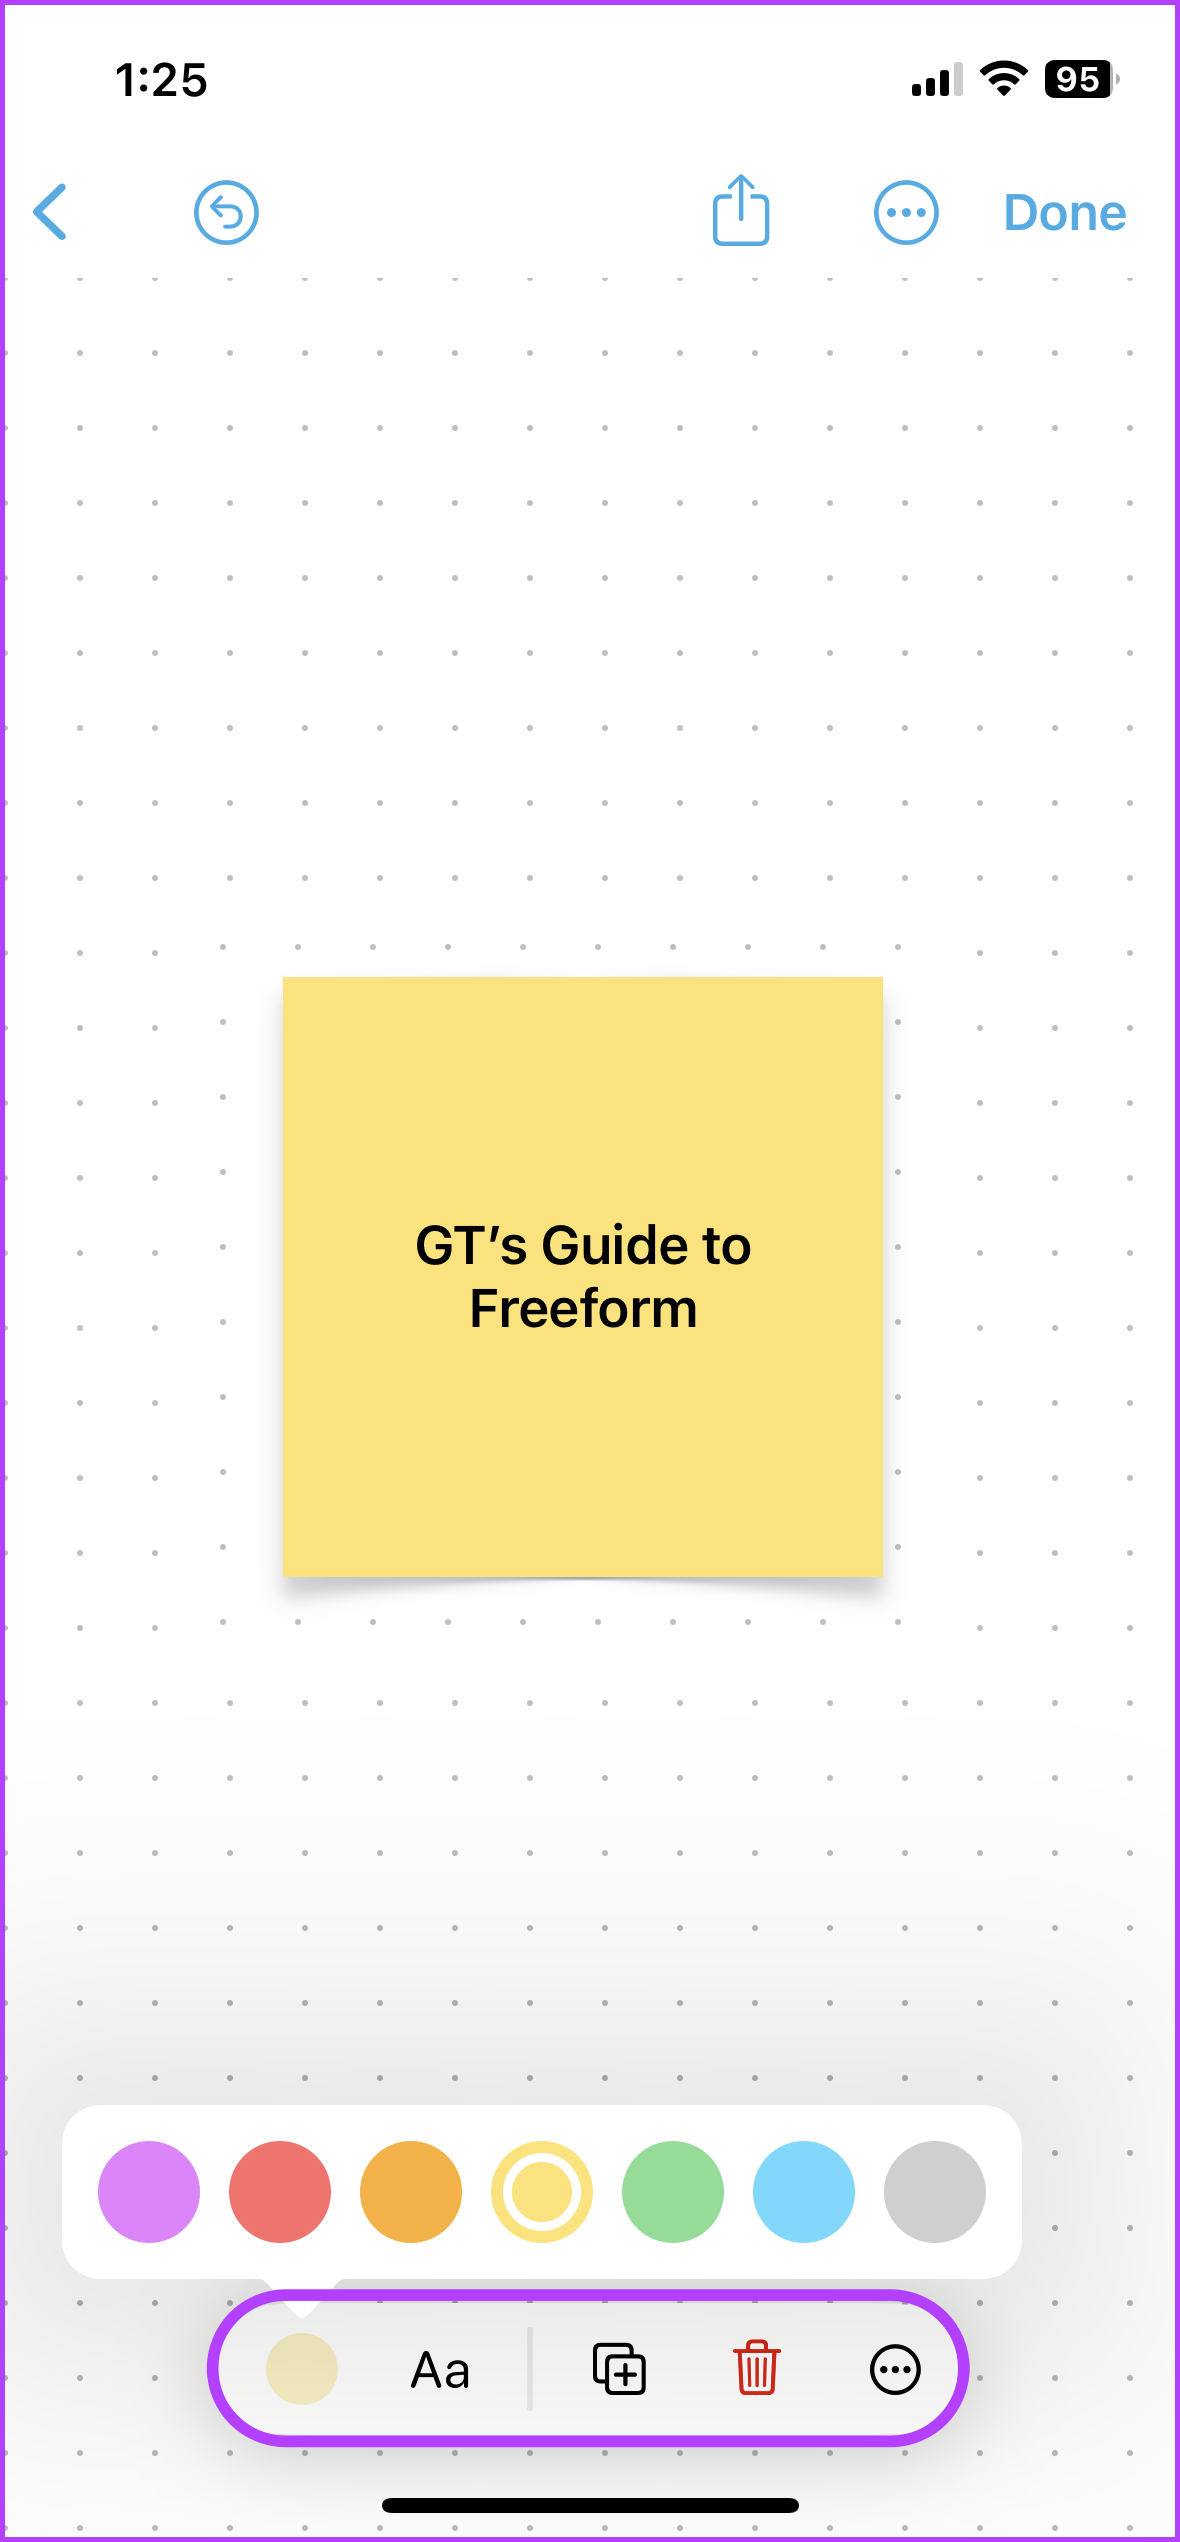
Insert a Colorful Note Into Your Freeform Board
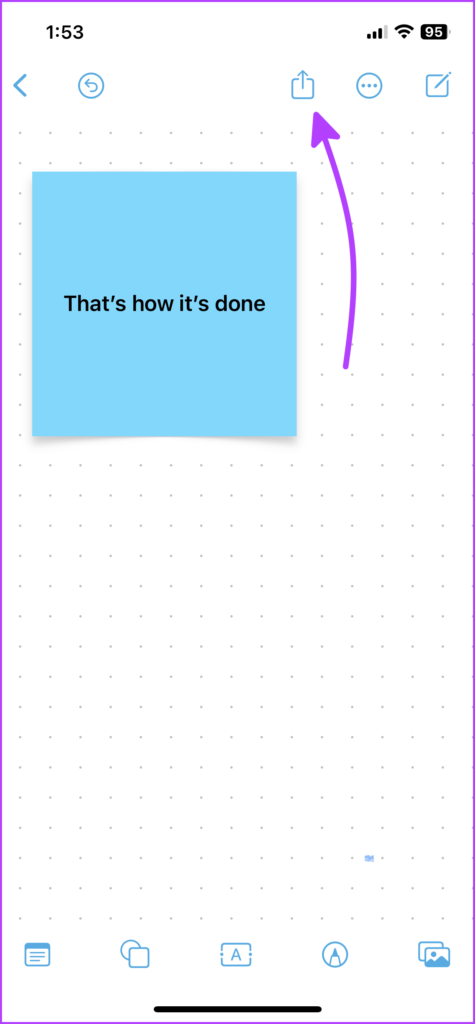
In your board, press the Note icon (bottom-left corner). A colorful square note will instantly pop up. Enter text: Double-tap it to start typing. You can manage the font size, style, and text alignment from the toolbar bar above the keyboard. Moreover, you can also make lists if needed. Tap return once you’re done writing. Resize the note: Tap the note, then hold the blue dot from any corner and pull out or in to increase or decrease the square’s size. Move the note: Press, hold, drag, and drop the note at any desired location. Edit the note: Tap it to bring up a host of editing options. Here, you can,
Change the color of the note. Edit the font size and style. Duplicate. Delete. Tap More (three-dotted icon) for more options like: Manage layers (Bring the note in front or send it back) Cut or Copy Lock (you won’t be able to move it across the board) Style (copy/paste the style of the note) Description (can be used by assistive technology for voice-over)
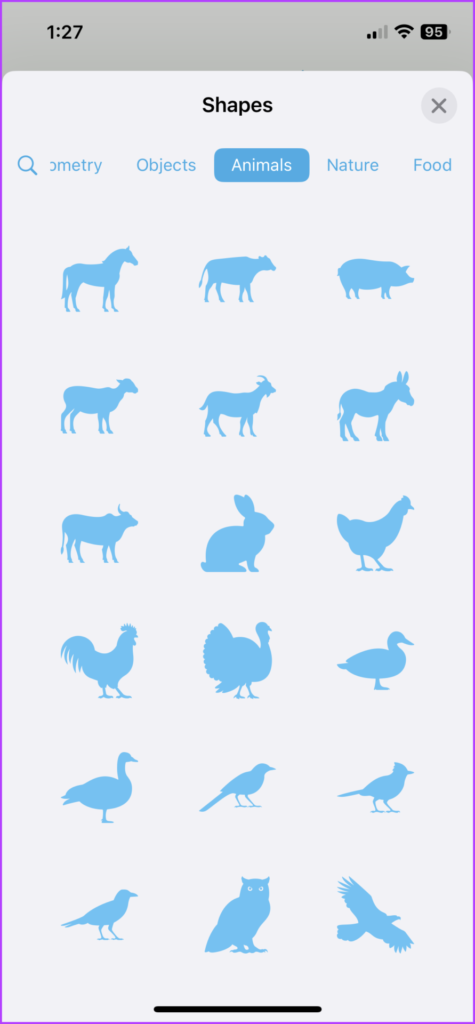
Add Shapes to the Freeform Board
Tap the Shape (second icon) to find an extensive variety of shapes and icons, neatly tucked under an array of categories. If you’ve something particular in mind, tap the search icon and type away. Select the shape you like and drop it on the board. Tap and pull the blue dots to resize it. Add text: Double-tap any shape and start writing. Edit the shape’s appearance: Tap the Shape icon and then you can,
Change its color (you can even use the picker tool for the desired tool). Add a border of the preferred color and thickness. Adjust the text size, color, alignment, etc. Duplicate. Delete.
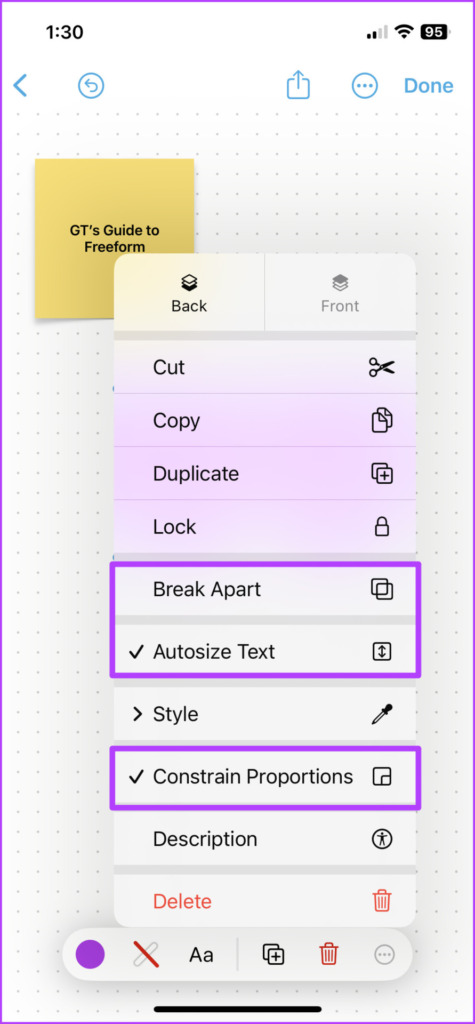
The more menu: When you tap the three-dot icon, tools similar to notes pop up. Although, three interesting and useful options are also available in the mix:
Break Apart Autosize Text Constrain proportions
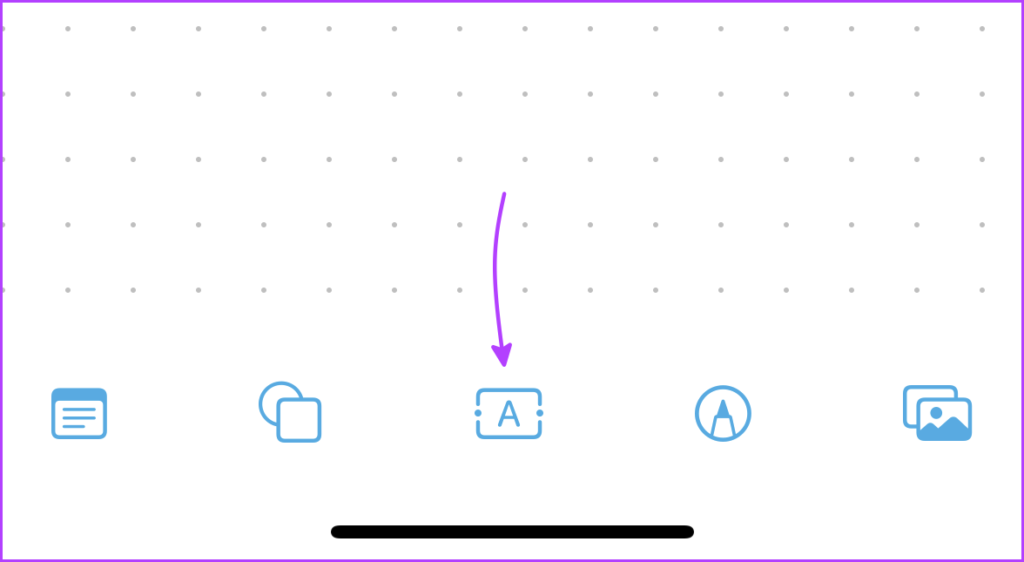
How to Add Text Box In Freeform
This one’s pretty basic. Tap the Text box (center icon) and place the box in the desired place. Next, pull in/out the blue dots to resize and double-tap to enter text. Tap on the text box for more options to:
Change text color Text style Font size Duplicate Delete
The more menu has regular options.
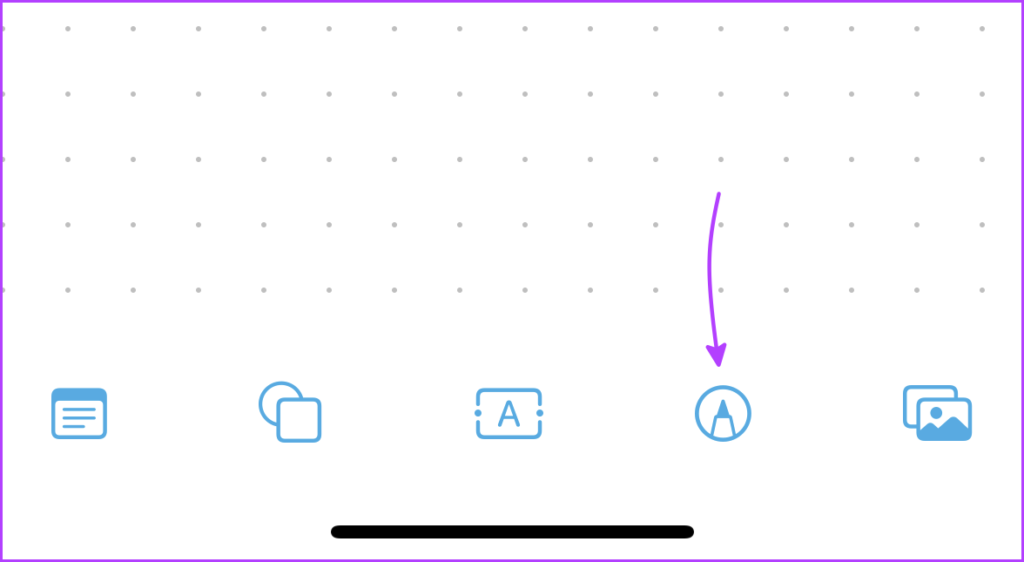
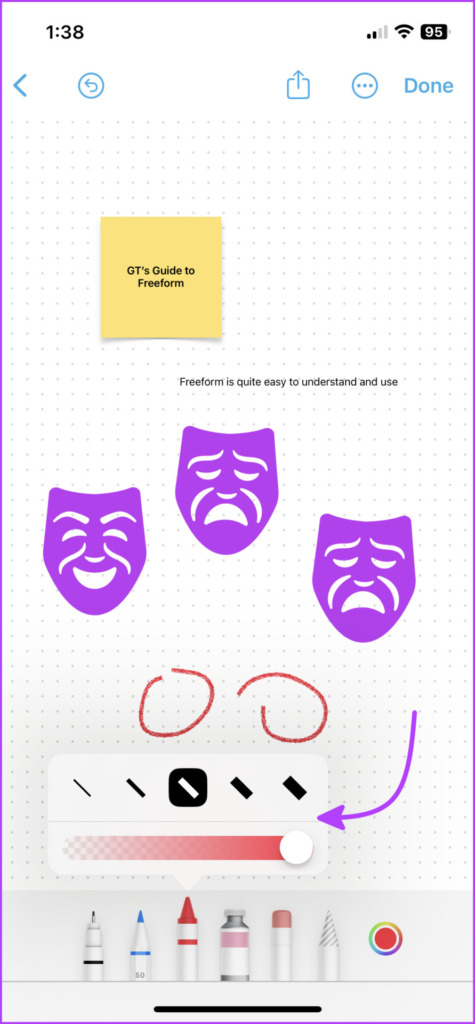
How to Draw In Freeform on iPhone and iPad
Tap the Markup (second last) icon from the bottom. The usual set of tools will be for your perusal (except you can’t sign documents here). Select the tool of your choice and draw. To change the size of the pen/brush/eraser or change the opacity, long-press the tool. If you want to change color, tap the color wheel. Once finished, press Done. If you want to edit something, tap the drawing. Select the desired tool and edit away.
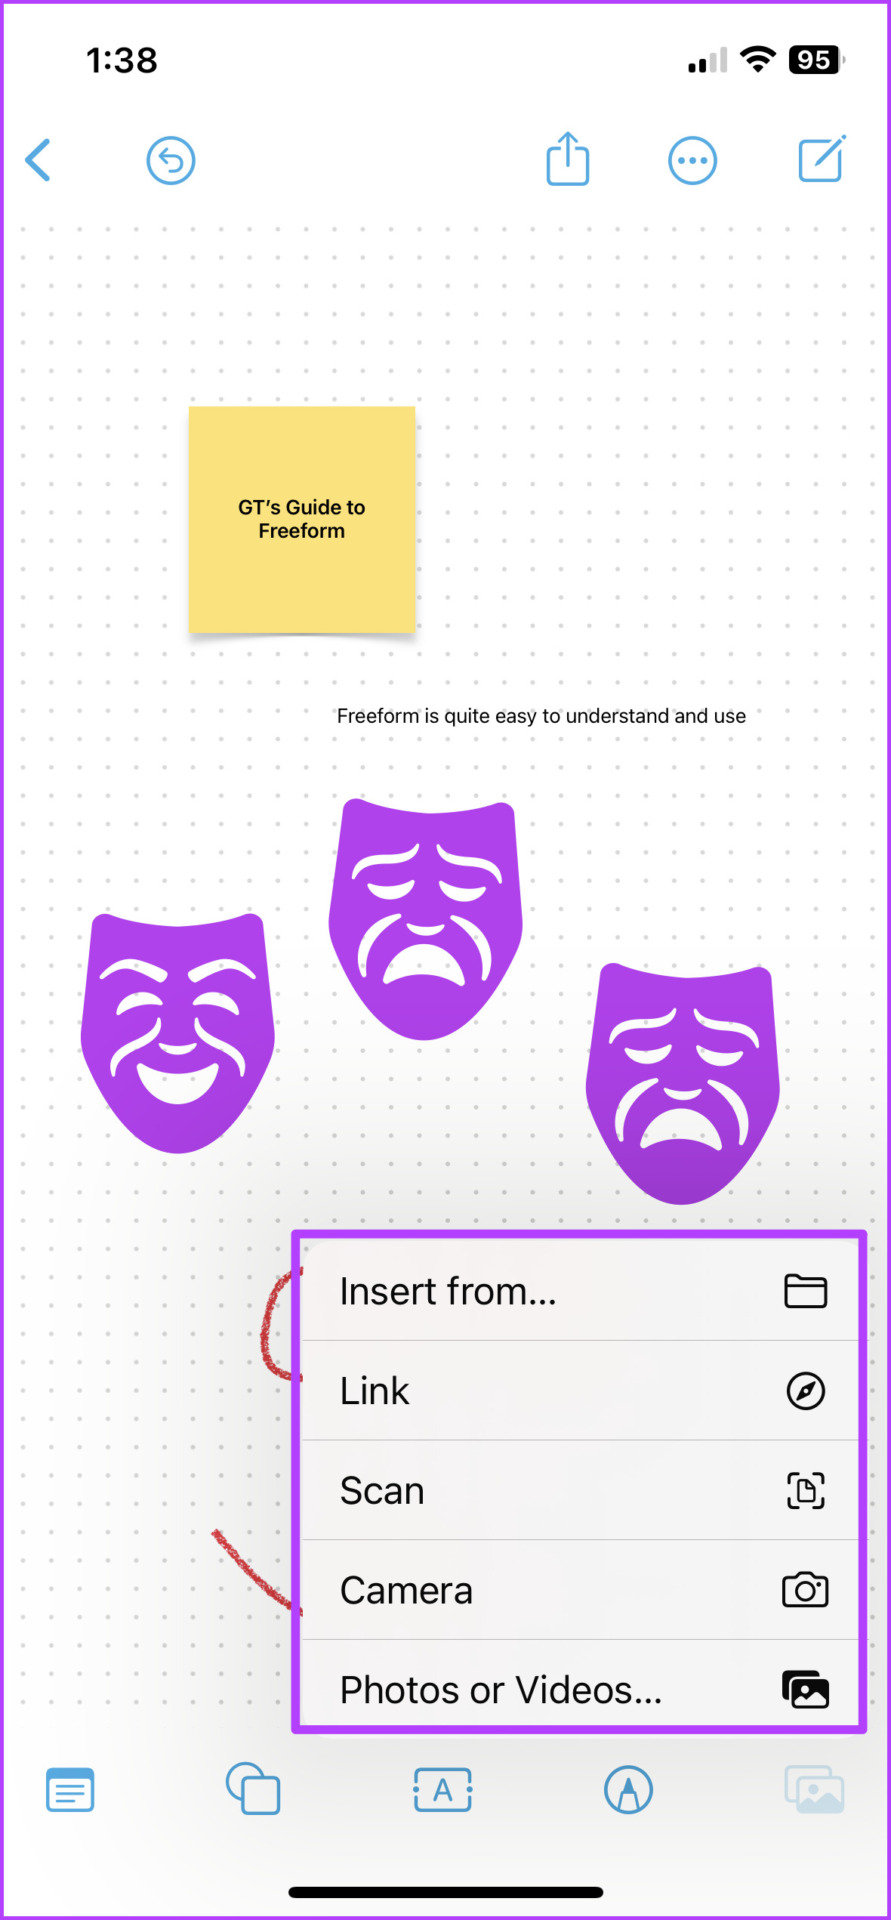
How to Insert Photos, Videos, Documents, and Links Into a Freeform Board
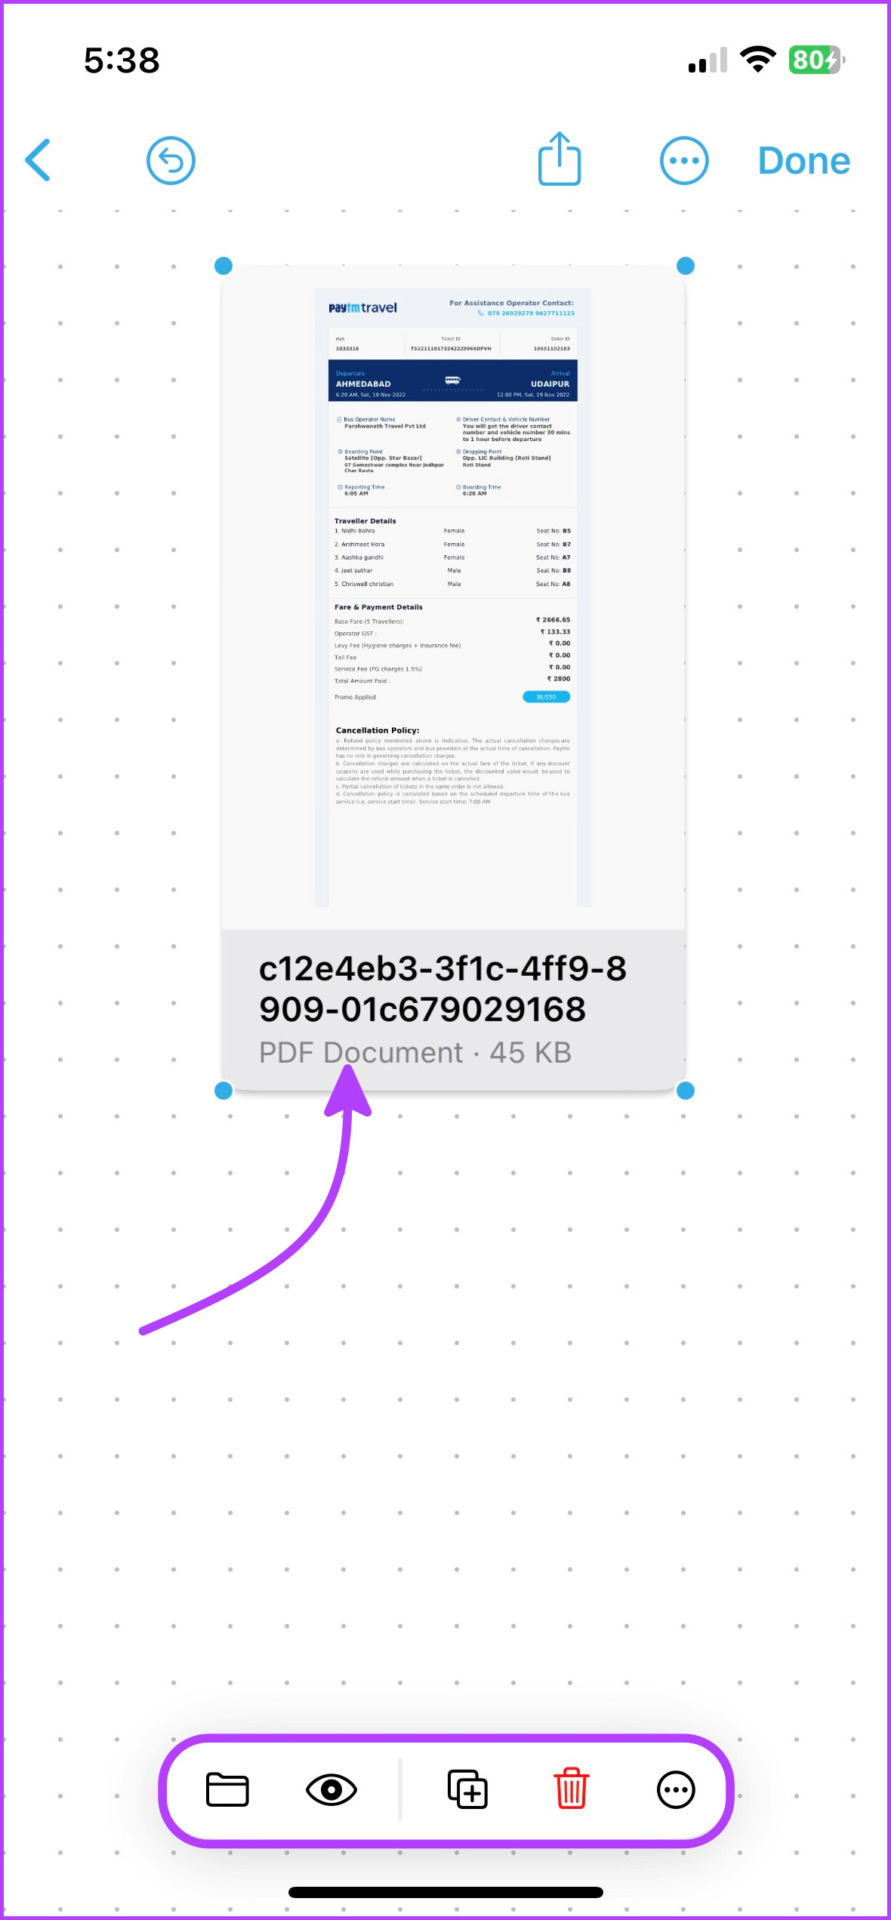
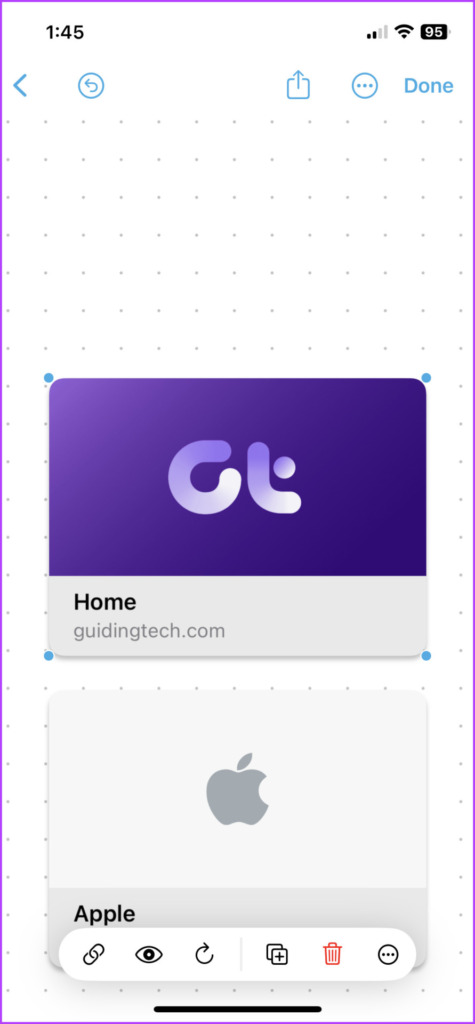
Tap the last icon from the bottom toolbar, and from here, you can insert the following objects: Insert from: It opens into the Files app and you can insert almost any type of file from documents and PDFs to photos, videos, and beyond. Tap the File icon to replace the file and the Eye icon to view it. You can also share or save the file from here. Link: Type or paste the link and tap insert. Tap the link icon to edit the link. And to open it tap the Eye icon; it will open in iPhone or iPad’s default browser. Scan: Use the built-in scanning feature of iPhone and iPad to scan and insert a document into the board. Again tap the Eye icon to view, share, or save the document. Camera: For real-time updates, use the camera to capture and insert photos or videos into the board. You can replace, crop, view fullscreen, duplicate, or delete the media file from its accompanying toolbar. Note: The photos clicked within Freeform aren’t saved in the Photos app. Tap the photo → Eye icon → Share icon → Save Image. Photos or Videos: The last option allows you to insert saved photos/videos from the camera roll. Almost the same tools as above are available for this section.
Freeform Tips and Tricks
While we were exploring the Freeform board, we noticed some hidden tricks. Enjoy! Remove background from photos: You can use Apple’s latest background-removing feature in Freeform as well. Add and tap the image → tap the Eye icon → tap and hold the subject → leave a white line that appears → select Copy. You can paste this image anywhere on the board. Naturally, we had to test the Live Text feature and it also worked surprisingly well. Shadows and round corners: By default, the media files in the board sport rounded edges and shadows. To remove, tap the More (three-dot) icon and uncheck Shadow and Round Corners. Video playback speed: Tap the video and select the Eye icon. Here, tap the More icon → Playback Speed and select the desired speed. You can also extract the text from the video, AirPlay, and mute it from here. Select multiple objects:
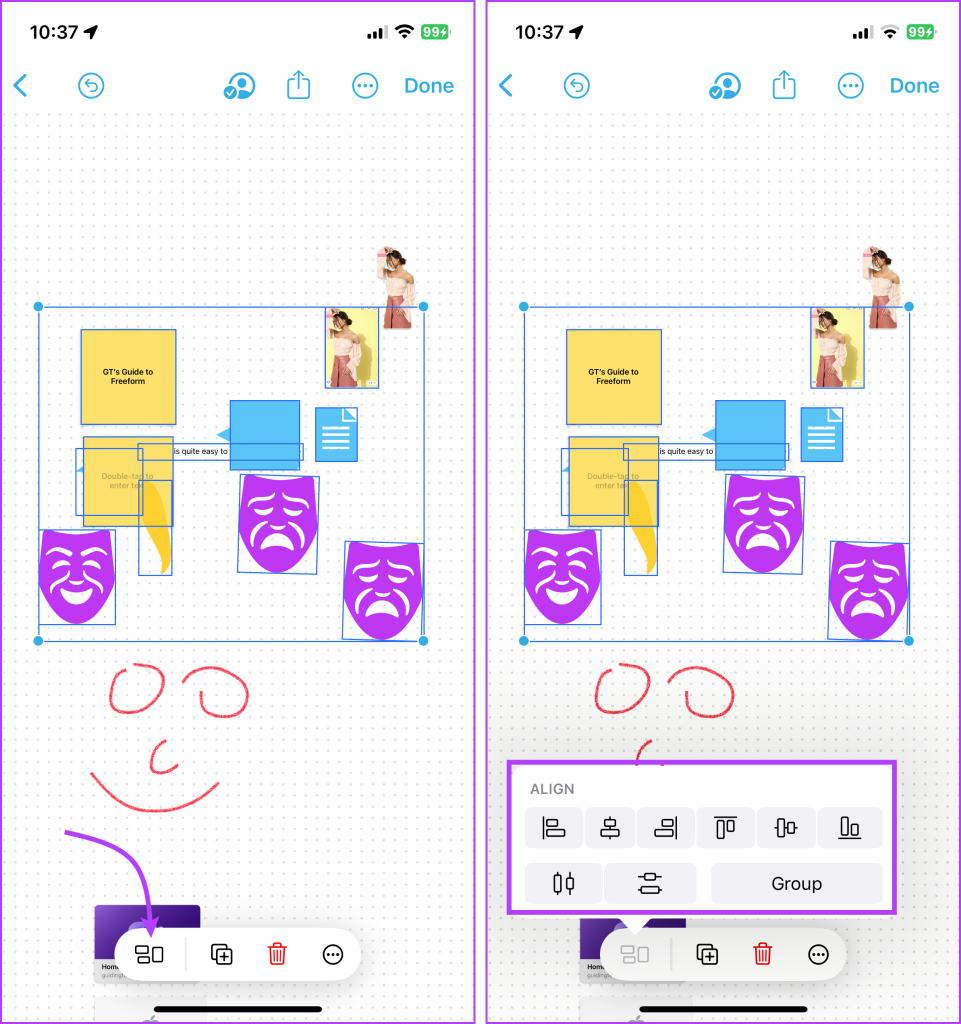
Tap and hold an item with one finger and use another finger to tap other items. Long-press the canvas and drag your finger to create a box around the items you want to select. Tap any empty space on the board → select Objects. Now, either Select All objects on the board or tap the once you want.
Once the desired objects are selected, you can move, rotate or resize them as per need. Align and group multiple items: Select the items → tap the Group icon from the bottom bar → tap Group or any alignment option of your choice.
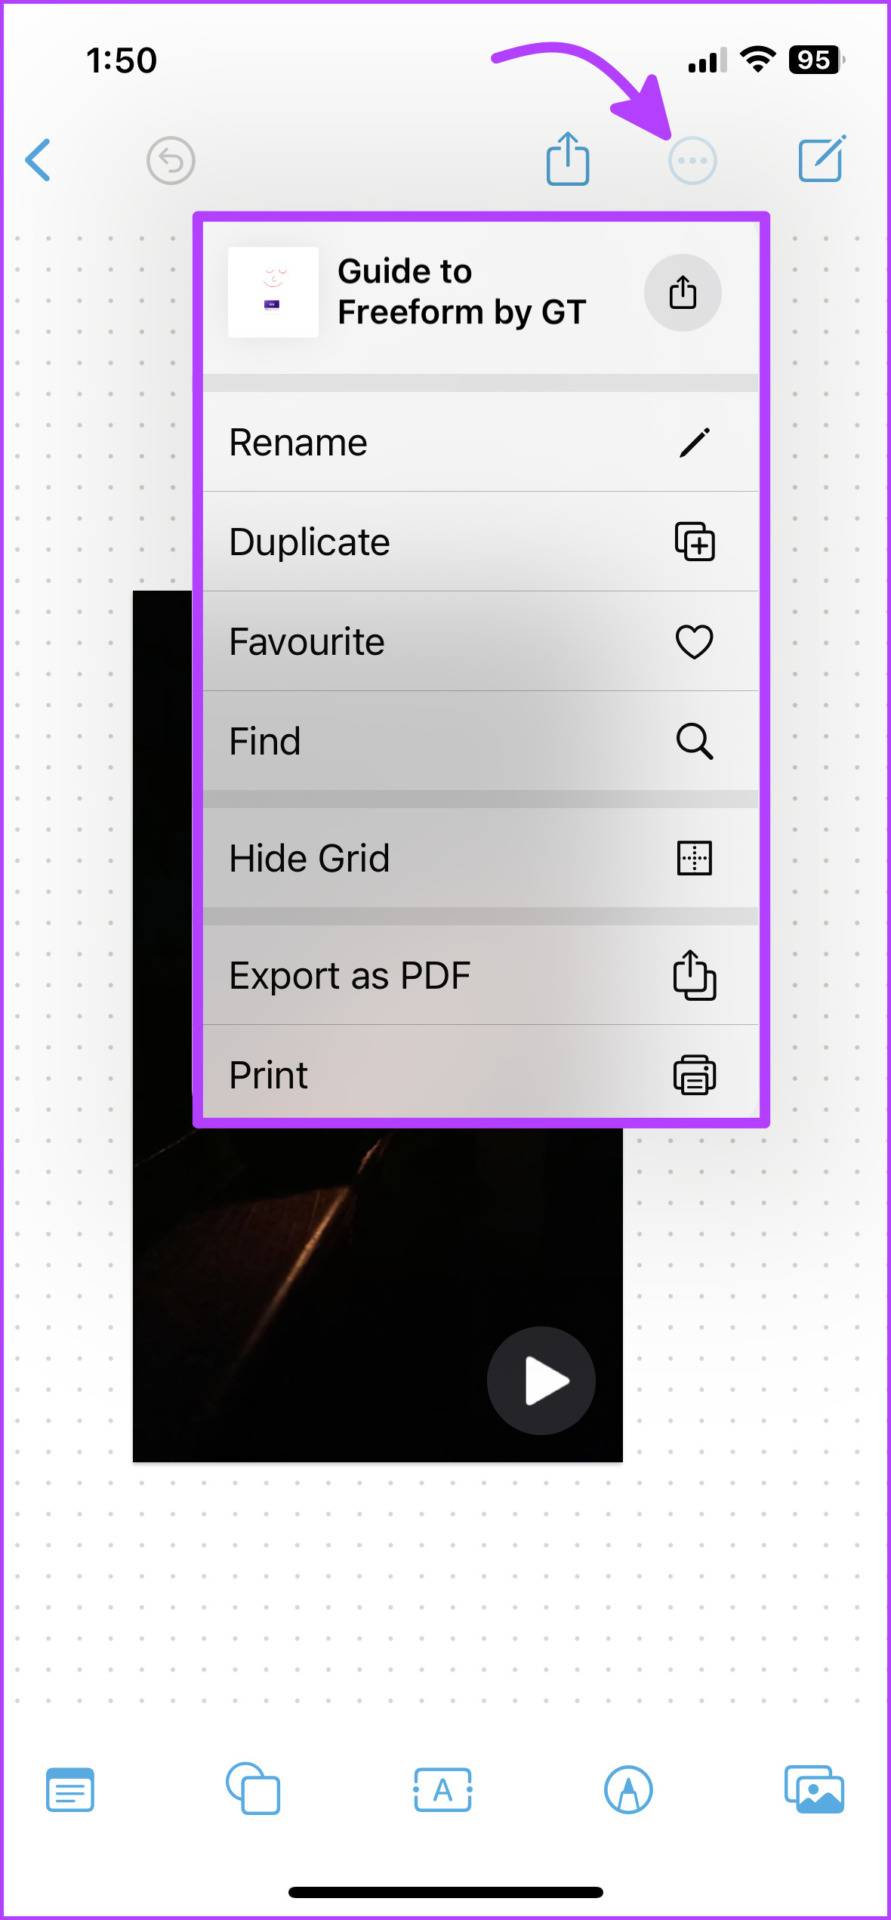
Rename, Duplicate, Print, or Export Freeform Board
While limited, Freeform offers some potent setting options to manage and organize the board. Tap the More icon from the top bar to,
Rename or duplicate the board. Add the board to Favorite. Find something on the board. Hide or show the grid Export the Freeform board as PDF. Print the Freeform board.
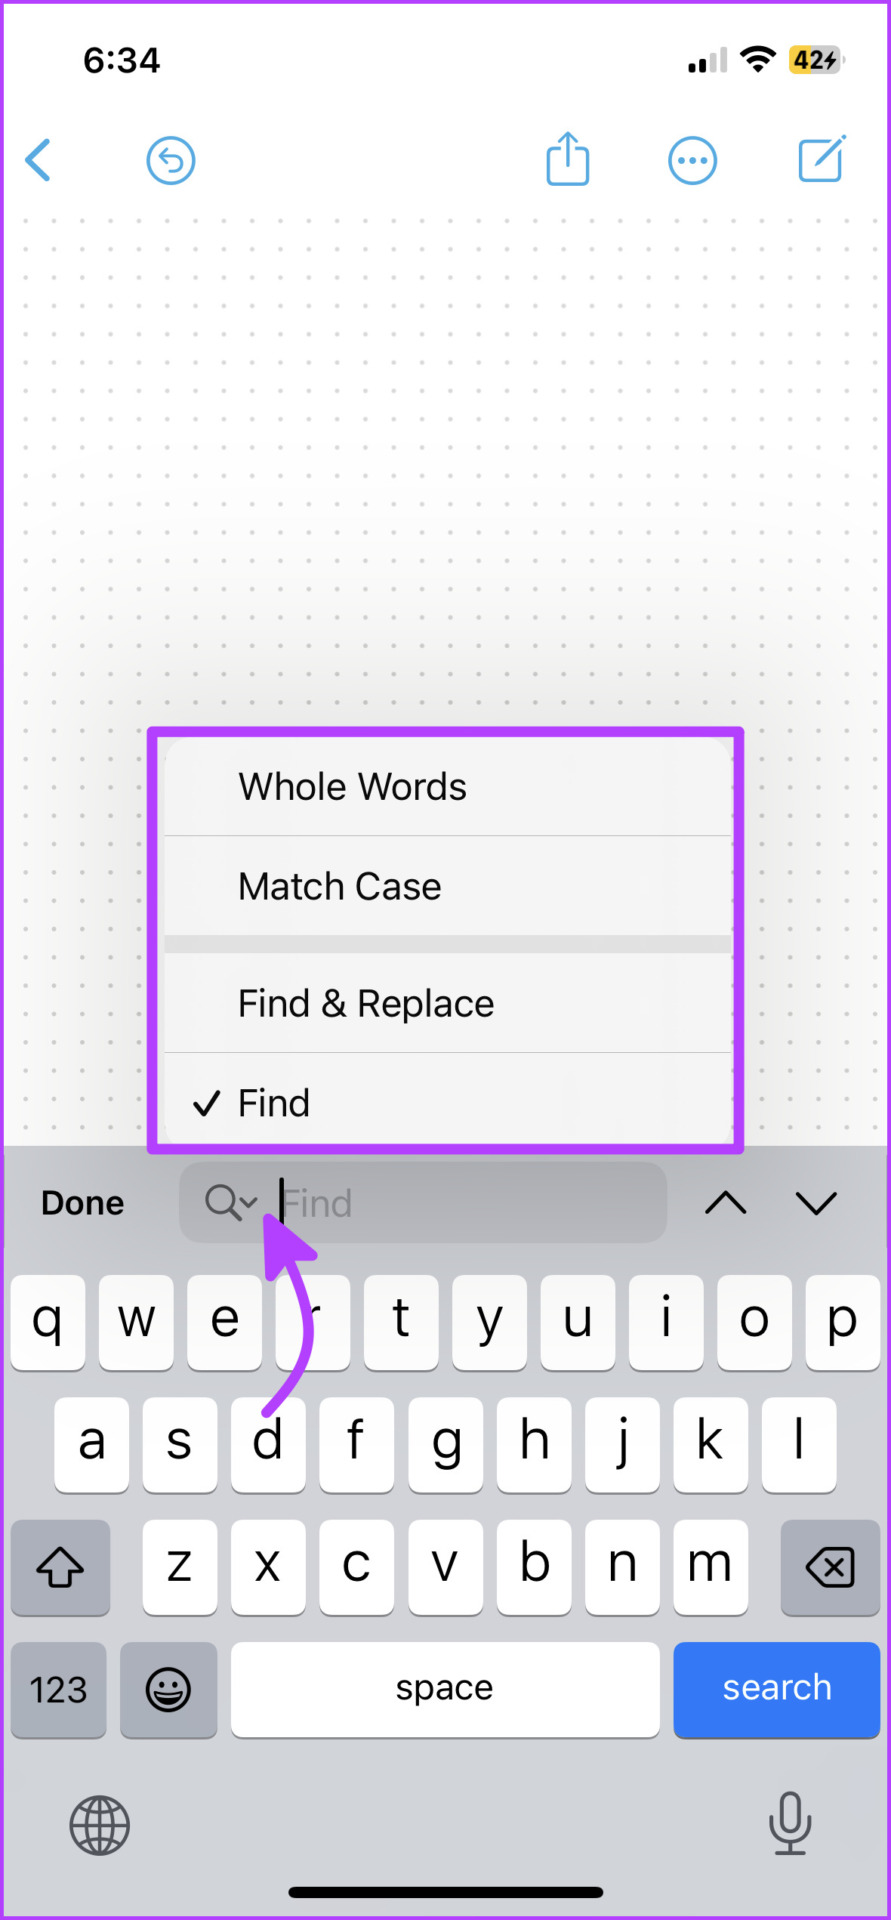
Tip: You can not only search text across the board but also replace it. When you tap Find from the option, a search bar pops up. Select the down arrow next to the Search icon and you’ll get these options shared in the screenshot on the right.
How to Turn On or Off the Alignment Guides
Freeform also offers alignment guides, when enabled that help in precise item placement. They act as visual cues and become visible as you drag an item on a board, automatically aligning with other items. Notably, you can enable or disable these guidelines as per need. To do so, go to Settings → Freeform → Toggle on/off the following options,
Center Guide Edge Guide Spacing Guides
That’s how you can create and manage the board. Next up, let’s learn how to invite others to collaborate with others on any Freeform board.
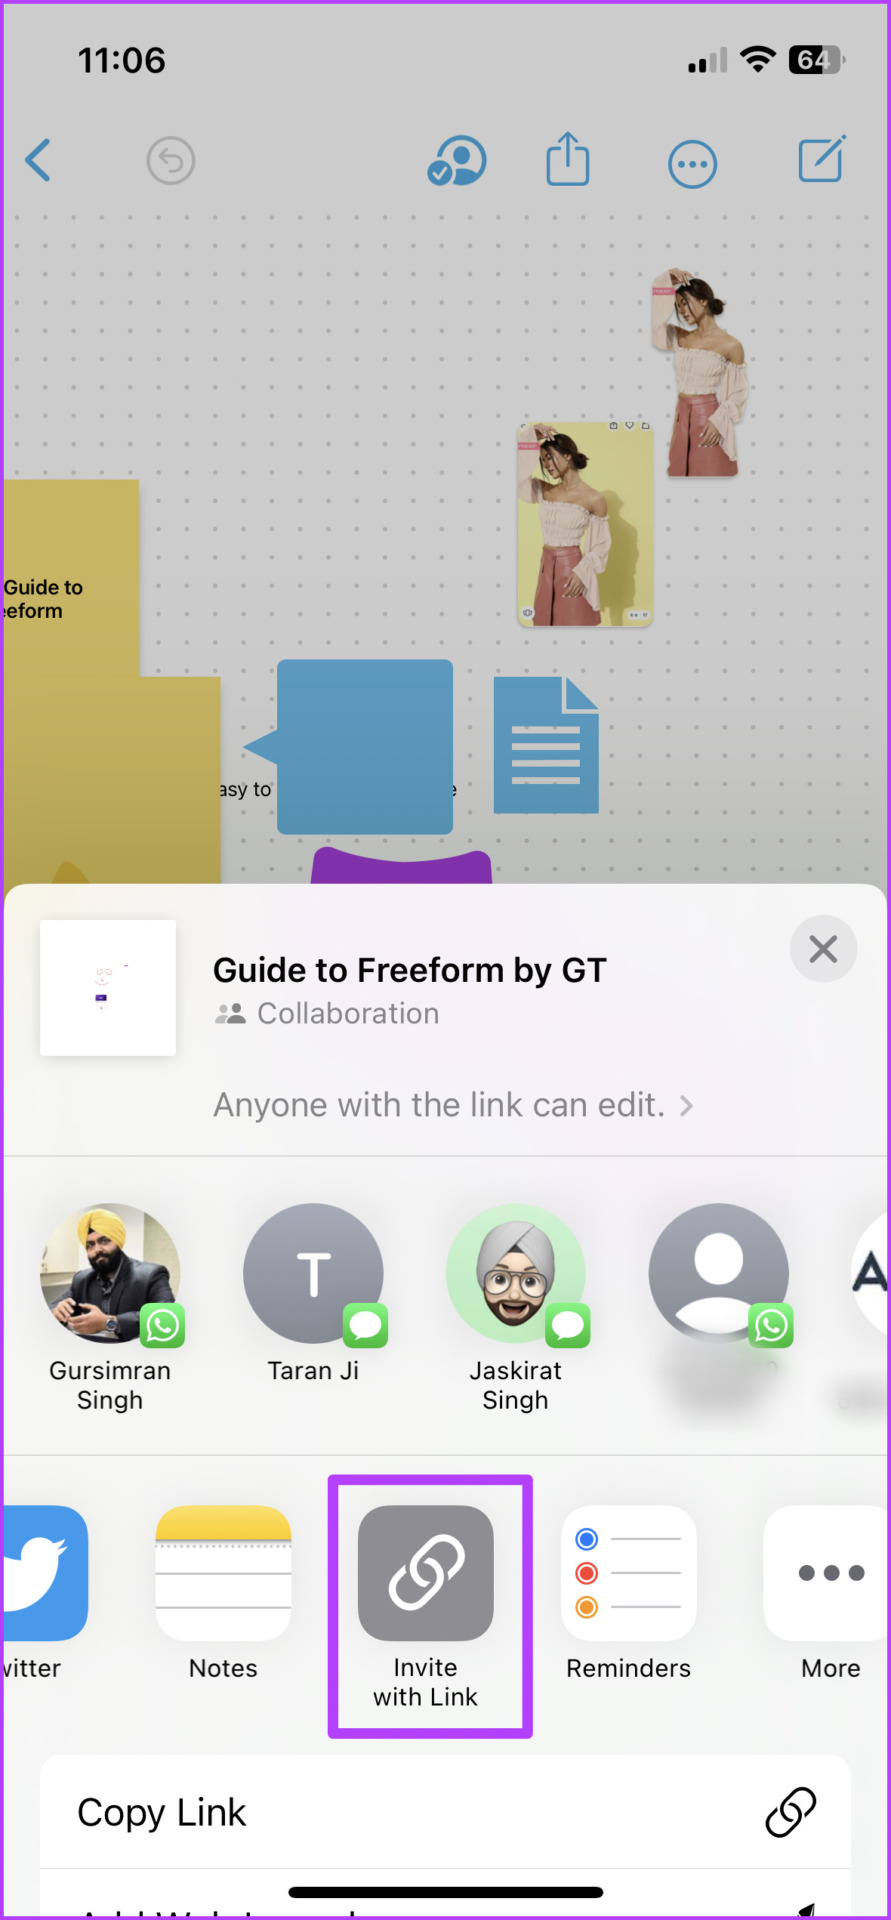
How to Share and Collaborate on Freeform Boards
The basic premise is quite like sharing Notes on iPhone and iPad. You can invite your friends, family, or colleagues to collaborate on the board. Moreover, decide who can view and edit the board with ease. Step 1: Open the Freeform board you want to share. Step 2: Tap the Share icon from the top bar. Step 3: To manage the collaboration setting, tap ‘Only invited people can edit’ under Collaboration. Step 4: Here, check suitable options for Who Can Access and Permissions. Step 5: Further, toggle on/off ‘Allows others to invite’ and tap Done. Step 6: You can either select the contacts from the share sheet or slide the apps menu to find and tap Invite with Link. You’ll be notified when the recipient accepts the request. Moreover, thanks to Apple’s latest project collaboration via Messages, you can also receive updates when someone makes changes on the board. Interestingly, each collaborator on the board will sport a unique cursor. This allows you to see who’s working on what in real-time.
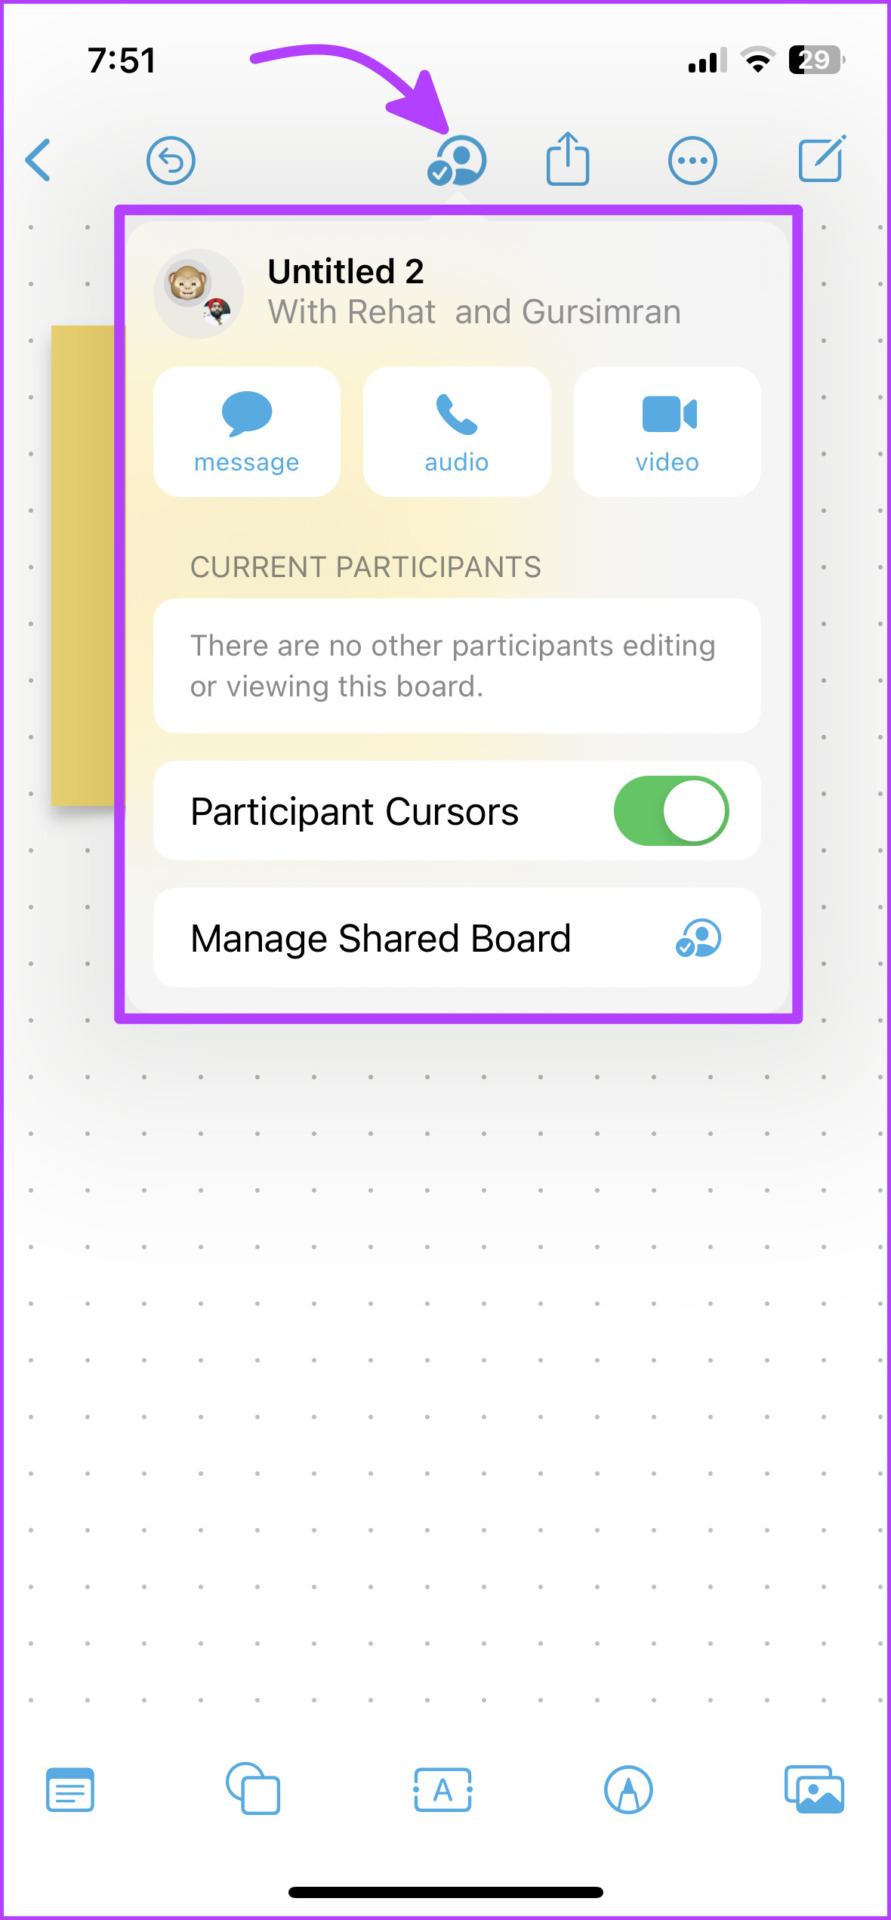
Modify Freeform Board’s Sharing Options
Once the board is shared, a Collaboration icon will appear on the top bar. Tap it to reveal a host of options. You can Message, Voice, or Video call (FaceTime) any one or all collaborators right from here. Additional options appear when you tap the Manage Shared Board option. From here, you can:
See who has access to the board, with viewing or editing rights. Re-adjust the sharing options if needed. Copy link. Stop sharing.
How to Open or Manage Boards on Freeform
Freeform restarts from the last closed board/window. So, you can lift off from where you left off or navigate the app for what you need.
Manage All Boards
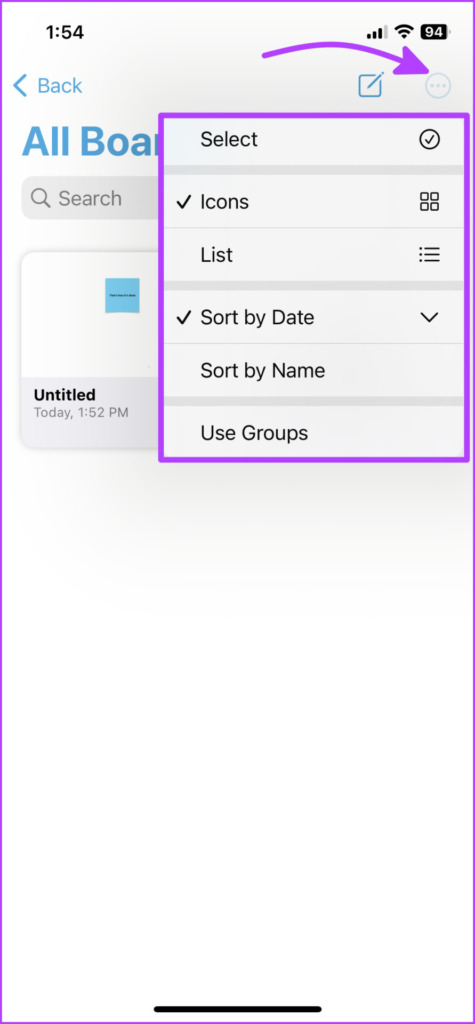
If you’re stuck on a board, tap < (back) from the top bar to view All Boards. Here, you can create a new board or tap the More icon to:
Select one or more boards to Duplicate or Delete. Adjust the viewing options – Icons or List. Change sorting order – Sort by Date or Name. Arrange the boards in groups or not.
You can also search all boards here, it will show all the boards containing the searched text.
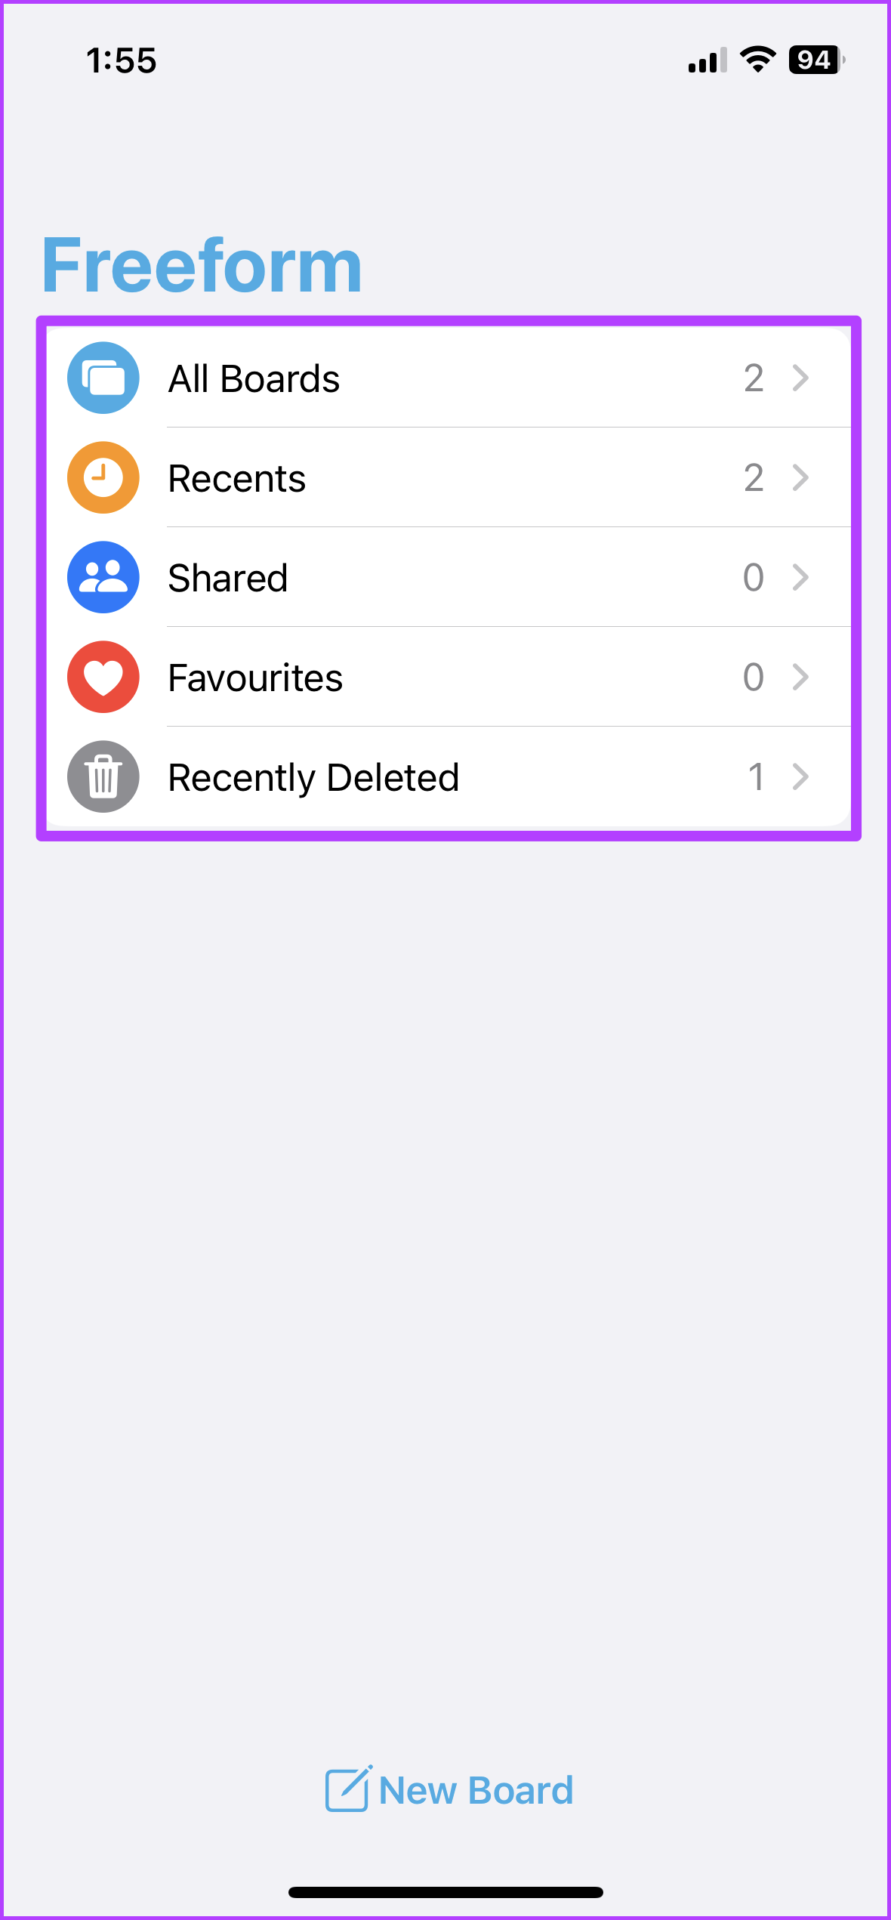
Navigate to the Home Page
While you’ll spot it instantly on the iPad (in the sidebar), tap < Freeform from the All Boards page to view the Home Page of the app. The UI here is pretty similar to the Notes or Reminders app on iPhone and iPad. The Home Page is divided into multiple sections as seen in the screenshot below.
Things We Wish Would Come to the Apple Freeform App Soon
We know there are a lot of features in Freeform to start with, but a heart wants what it wants, right? And while the app is impressive, little things like tags, mentions, smart folders, etc., everything we love in Notes and Reminders, is sorely missed. Have you tried Freeform yet? Is it the best whiteboard app for iPad and iPhone? What other features would you love to incorporate in Freeform? Share in the comments below. The above article may contain affiliate links which help support Guiding Tech. However, it does not affect our editorial integrity. The content remains unbiased and authentic.