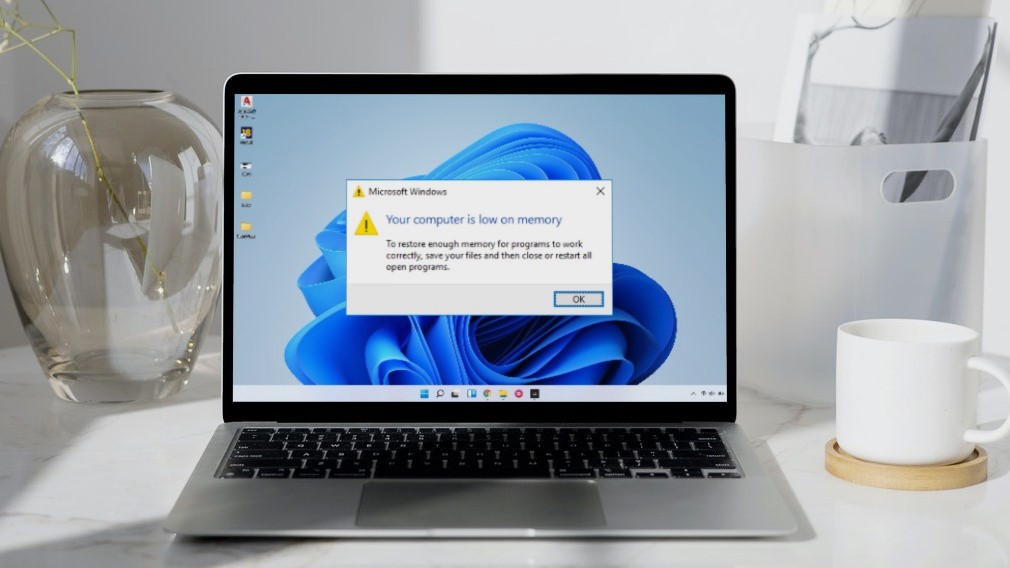
Removing RAM modules from desktops is easy, but not possible from modern laptops. But before you physically inspect them, Windows includes the Windows Memory Diagnostic Tool to troubleshoot memory-related issues on your PC. Here’s a guide to everything you need to know about using the Windows Memory Diagnostic Tool on Windows 11.
How to Use the Windows Memory Diagnostic Tool
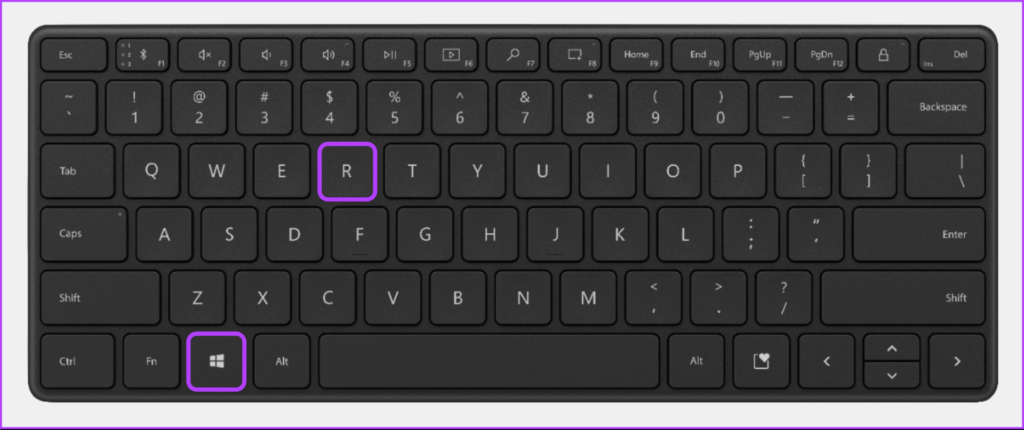
Like other tools on Windows, there are numerous ways to access the Windows Memory Diagnostic Tool. However, to keep things simple and easy to understand, we will look at how you can easily access the Windows Memory Diagnostic Tool using the Run utility, followed by how you can use it on your PC. Step 1: Press the Windows + R keys together to access the Run utility. Step 2: When a Run dialog appears on your screen type mdsched.exe. Then click on OK. Step 3: You should see a Windows Memory Diagnostic Tool window pop up on your screen with two options:
Click the ‘Restart now and check for problems (Recommended)’ option if you want to reboot your PC and troubleshoot memory-related issues immediately.Click the ‘Check for problems the next time I start my computer’ option if you want to schedule the Windows Memory Diagnostic Tool to run the next time your PC starts.
We selected the first option; you can choose the second option if required. Whichever option you may choose, once your PC restarts, the Windows Memory Diagnostic Tool will automatically start scanning your system for memory-related issues in Standard mode. Running a two-pass scan in Standard mode should be enough to discover any memory error in most cases. However, if you want to change the scan options to Basic or extended and change the number of scan passes, press the F1 key on your keyboard to access more Options. Do note that you will have to press the Tab key on your keyboard to cycle through the different scan options, F10 to Apply the new changes, or Esc to go back and Cancel the changes.
How to Check the Memory Diagnostic Results
After the scan completes, your PC will restart, and a pop-up notification showing the results should appear in the bottom-right corner of the desktop view. However, it’s a bit hit or miss and doesn’t give you a detailed look at the scan results. In such cases, you’ll need to check the Event Viewer. Here’s how you can check the results from Windows Memory Diagnostic Tool using the Event Viewer: Step 1: Press the Windows + S keys to launch Windows Search and type Event Viewer. Then from the result that appears, click on Open. Step 2: When an Event Viewer window opens, click on Windows Logs followed by System. Then click on Find from the right most pane. Step 3: When a Find dialog pops up on the screen, type MemoryDiagnostics-Results. Then click on Find Next. Clicking on Find Next Will help you find the most recent Memory Diagnostic Report. If you want to find older reports keep clicking the Find Next Button. Step 4: When you find the relevant report using the Find Next button, click Cancel. Step 5: You’ll see the Windows Memory Diagnostic Tool scan result on your screen. Furthermore, you can click on the Details tab to find even more in-depth results for the scan. If the memory installed on your system has no issues, you will get a message saying The Windows Memory Diagnostic tested the computer’s memory and detected no errors. But for errors are detected, you’ll find details about the problem with the RAM installed on your system. You may clean and reseat the RAM sticks. Then run a Windows Diagnostic scan again to check if the problems are fixed. If that doesn’t help, it might be time to replace the old RAM on your system. To replace or upgrade the RAM on your PC, check our guide on how to find available RAM slots on Windows 11 alongside the four best ways to check the RAM size on Windows 11.
Diagnose and Fix RAM-Related Issues on Your PC
That’s all. After following all the steps above, you should be able to quickly troubleshoot memory leaks or other RAM-related issues on your Windows 11 PC using the Windows Memory Diagnostic Tool. The above article may contain affiliate links which help support Guiding Tech. However, it does not affect our editorial integrity. The content remains unbiased and authentic.