High CPU usage can make your computer feel sluggish and unusable. In this post, we’ve compiled a list of solutions to fix the Windows Explorer high CPU usage problem on Windows 11.
1. Restart Windows Explorer Process
The most effective solutions sometimes appear too simple to be true. There’s a chance that Windows Explorer’s high CPU usage is a one-time glitch. Hence, it’s the first thing you should do restart the Windows Explorer process. Press Ctrl + Shift + Esc on your keyboard to open the Task Manager. Under Processes, right-click on the Windows Explorer process and select Restart.
The Taskbar will disappear for a brief moment and then reappear. After that, see if the issue occurs again.
2. Run System Maintenance Troubleshooter
The System Maintenance troubleshooter can detect and fix any irregularities with desktop shortcuts, disk volume, file paths, etc. Although Windows runs this tool regularly, you can also run it manually to fix Windows Explorer’s high CPU usage issue. Here’s how. Step 1: Press the Windows key + R to open the Run dialog. Type control panel in the box and press Enter.
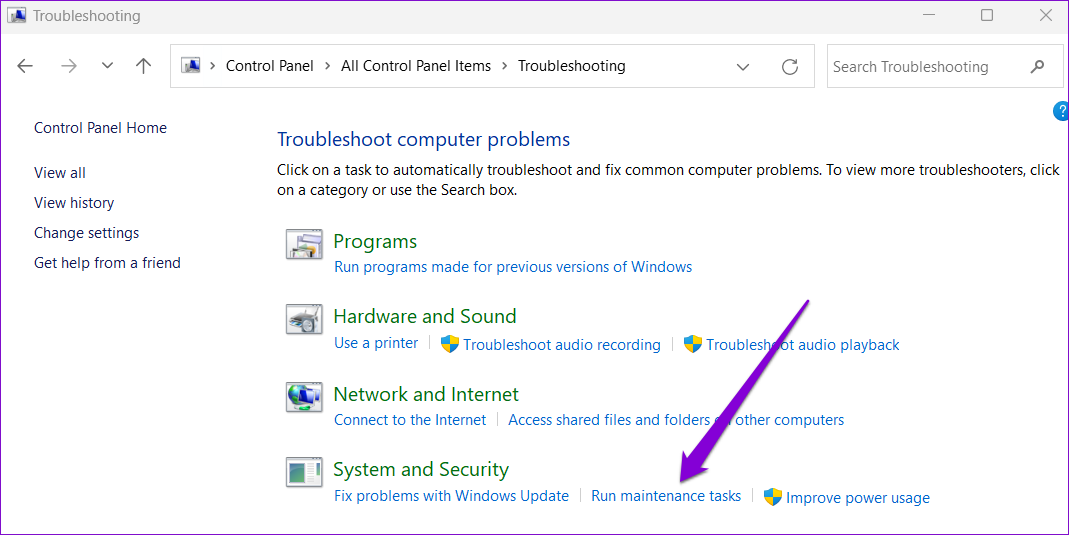
Step 2: In the Control Panel window, change the view type to Large icons, and go to Troubleshooting.
Step 3: Under System and Security, click the Run maintenance tasks option.
From there, follow the on-screen prompts to run the troubleshooter and restart your PC.
3. Delete Temporary Files
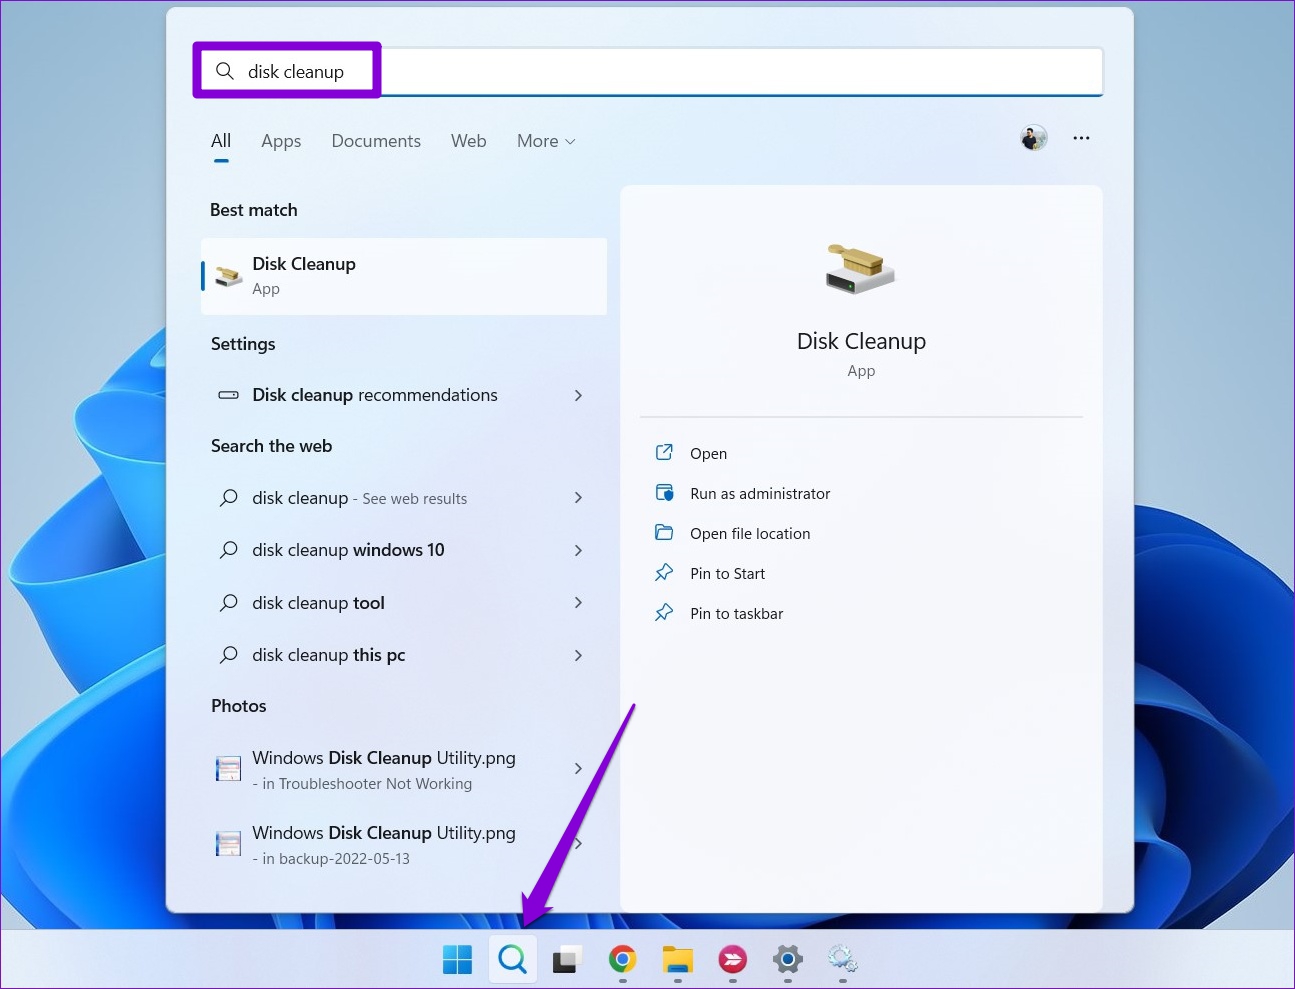
Sometimes, old temporary files on your system can also cause high CPU usage issues. Thankfully, getting rid of temporary files on Windows is easy. Here are the steps you can follow. Step 1: Click on the Search icon on the Taskbar, type in disk cleanup, and press Enter.
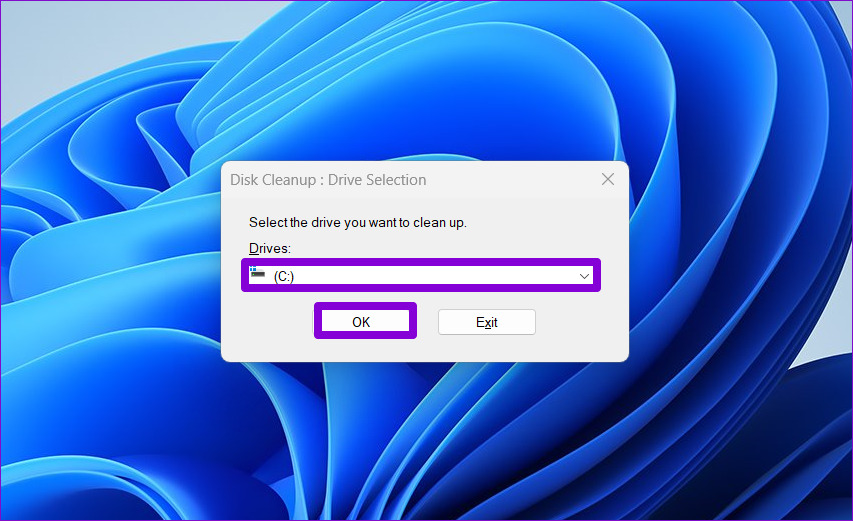
Step 2: Use the drop-down menu to select your primary drive and click on OK.
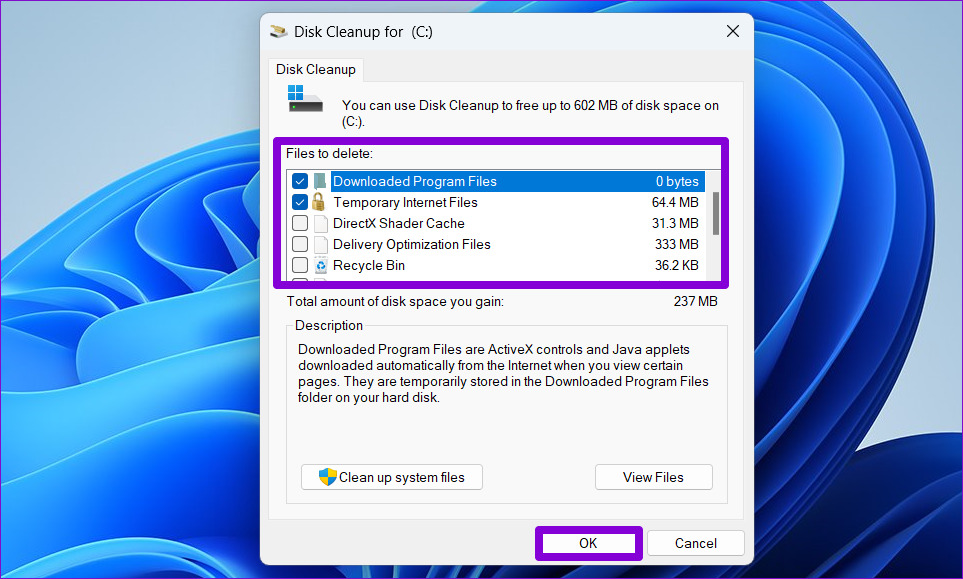
Step 3: Under Files to delete, use the checkboxes to select temporary files. Then, click on OK.
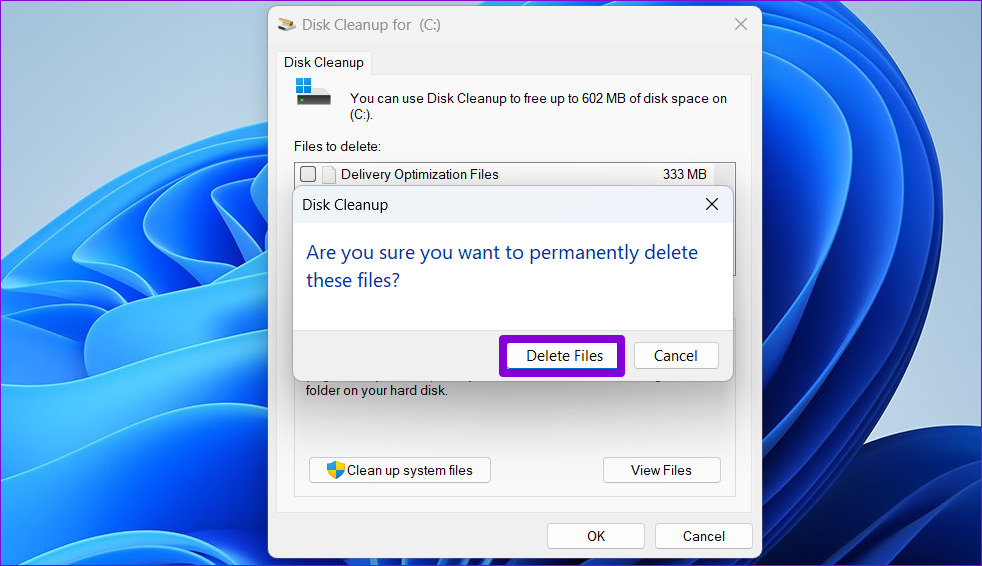
Step 4: Choose Delete Files when prompted.
4. Unlink Your OneDrive Account
Windows 11 lets you manage your OneDrive files and folders directly from File Explorer. Windows Explorer CPU usage may also increase when File Explorer is syncing files with your OneDrive account. One way to avoid this issue is to disconnect your OneDrive account from Windows. Step 1: Click the OneDrive icon on the Taskbar.
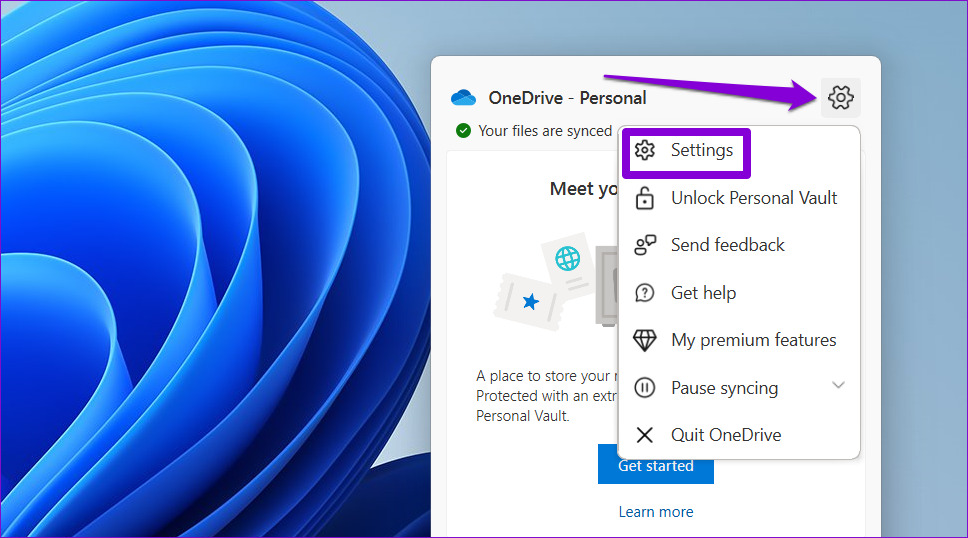
Step 2: Click the gear icon and select Settings from the list.
Step 3: Navigate to the Account tab and click on ‘Unlink this PC.’
Step 4: Select Unlink account to confirm.
5. Restore Power Plan to Default Settings
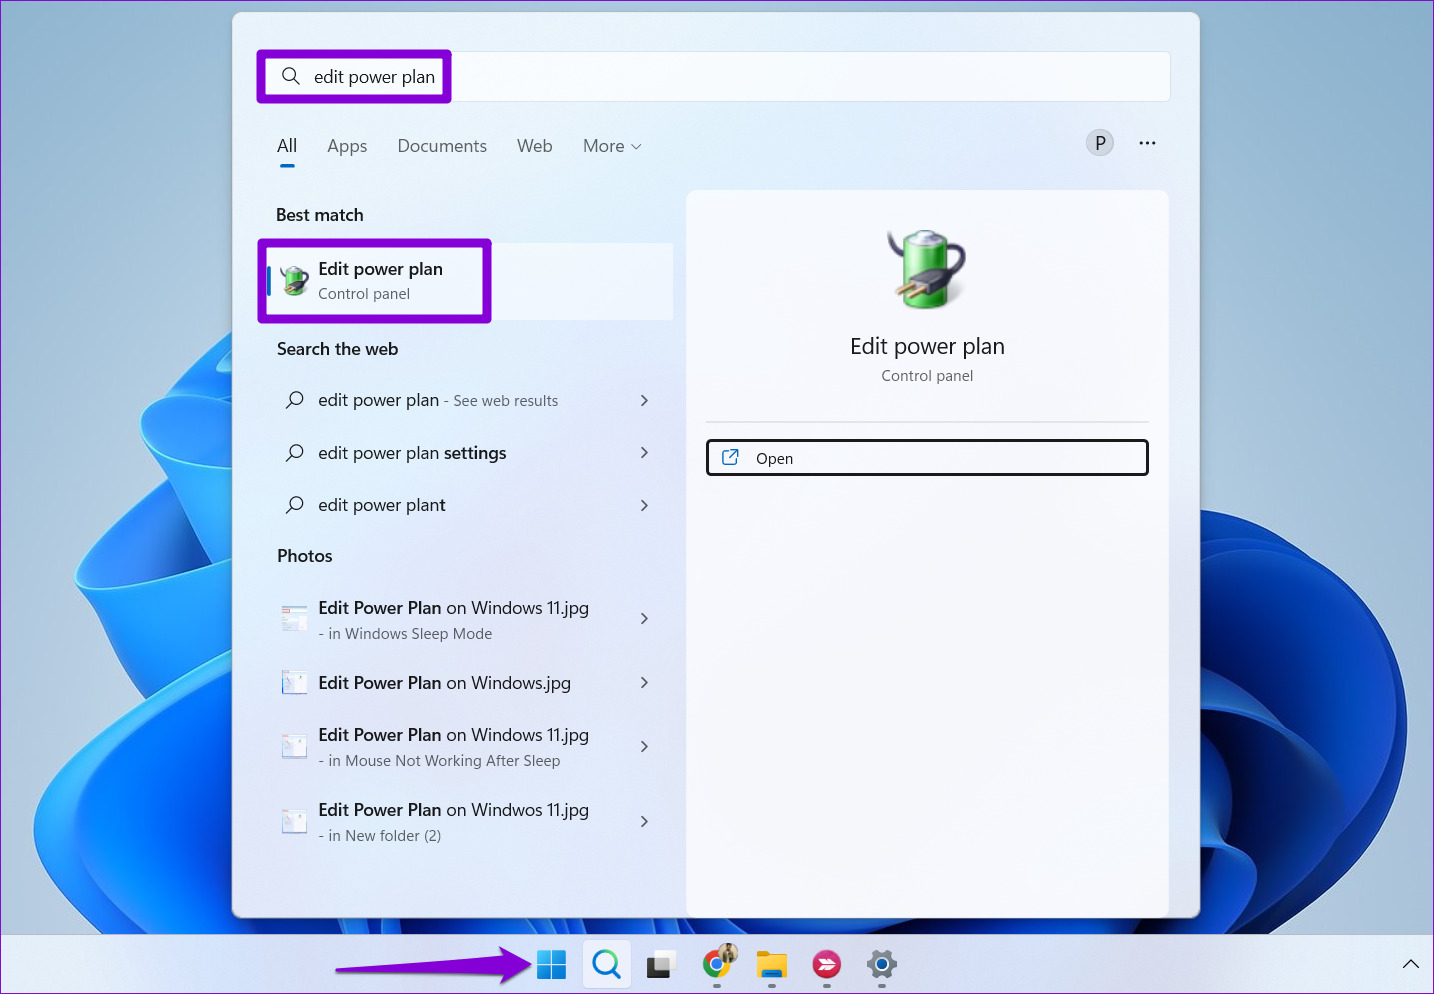
Choosing a stricter power usage profile on Windows can also cause performance issues. If that’s the case, resetting the power plan to its default settings should help. Here’s how you can go about it. Step 1: Press the Windows key + S to open Windows Search, type edit power plan in the box, and select the first result that appears.
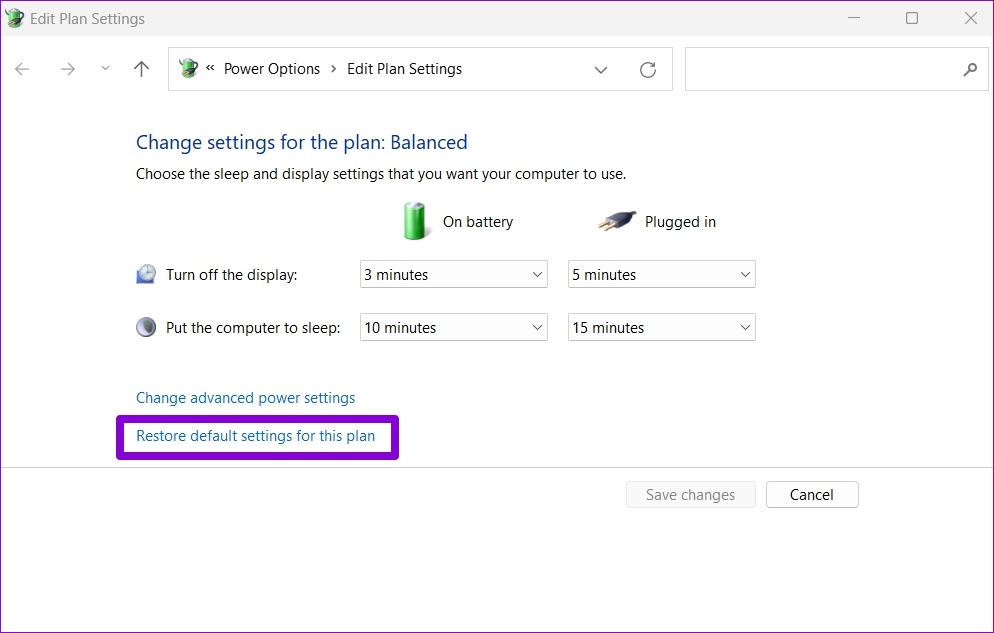
Step 2: Click on ‘Restore default settings for this plan’ at the bottom. Click Yes on the prompt that follows.
Restart your PC after this and see if the issue is still there.
6. Rebuild Windows Search Index
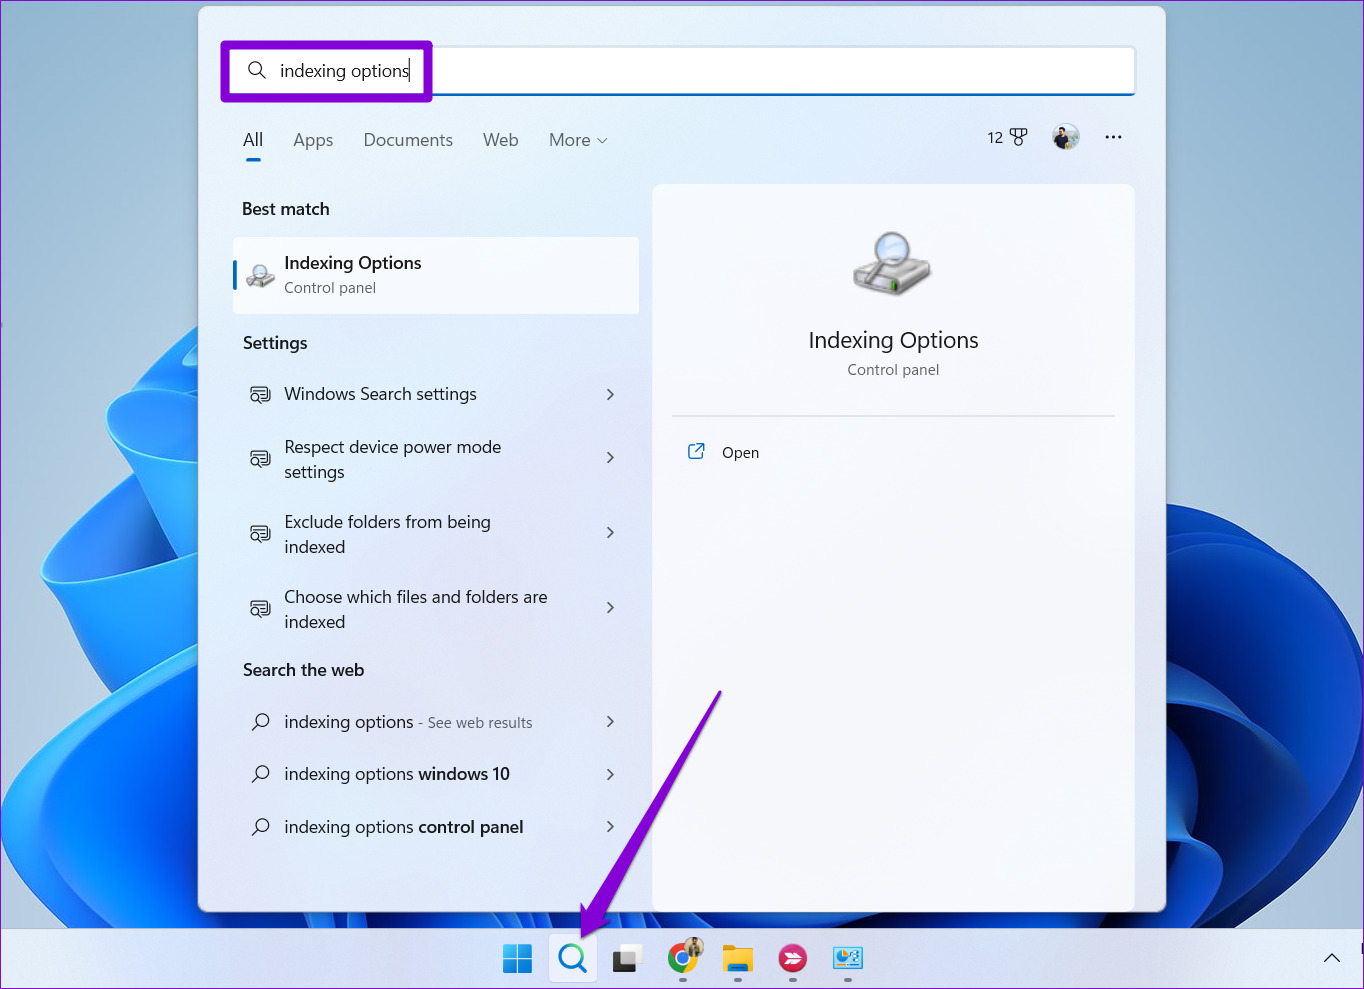
If the increased CPU usage problem only occurs when you search for files and folders in File Explorer, there might be a problem with the search index library on your PC. Here’s what you can do to fix it. Step 1: Click the search icon on the Taskbar, type indexing options, and press Enter.
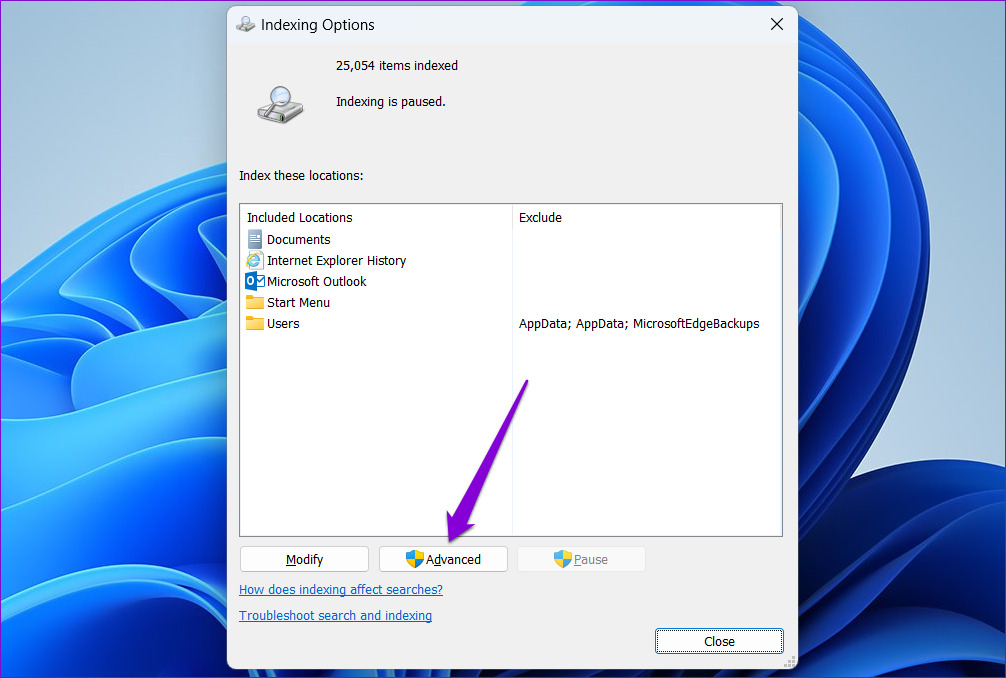
Step 2: Next, click on Advanced.
Step 3: Select Yes when the User Account Control (UAC) prompt appears.
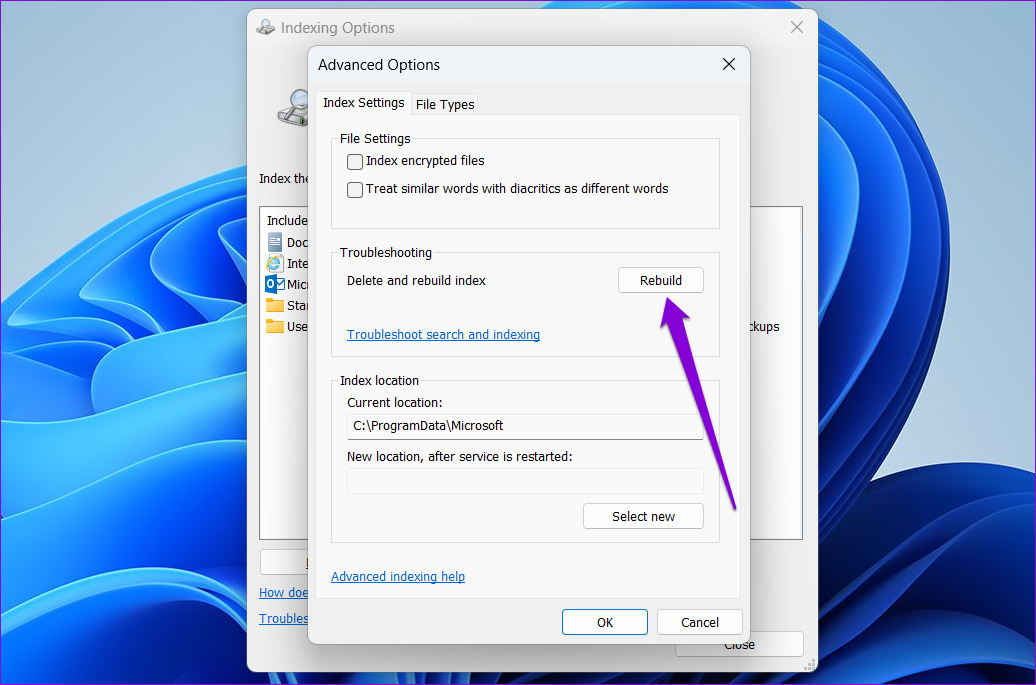
Step 4: Click the Rebuild button under Troubleshooting.
This process may take a few hours to complete, so be patient. Following that, the issue should no longer bother you.
7. Scan for Malware
If your computer is infected with malware, CPU usage may spike from time to time. To overrule this possibility, you can try scanning your PC with Windows Defender or a third-party antivirus program.
8. Install Pending Windows Updates
If nothing else works, you can check for any pending Windows updates. These system updates usually bring all kinds of performance improvements and bug fixes to Windows. Hence, it’s vital to pay attention to them. Press the Windows key + I to open the Settings app. In the Windows Update tab, click on Check for updates. Download and install any pending updates and see if it fixes the issue.
Keep It Under Control
When Windows Explorer uses much of your PC’s system resources, other apps and programs struggle to run smoothly. We hope you resolved the underlying issue using the solutions listed above and that everything is back to normal. Which one worked for you? Did you figure out another way to fix the problem? The above article may contain affiliate links which help support Guiding Tech. However, it does not affect our editorial integrity. The content remains unbiased and authentic.


![]()