For most devices, deleting something doesn’t mean that it has been permanently deleted from your device’s memory. They’re usually held in the trash folder for a set period if you change your mind. But what if you want to delete them permanently instead? How do you find trash on Android? Read on. Note: Unless manually deleted, Android’s trash folder usually holds deleted items for 30 days from the date they were initially deleted and can be restored if required.
1. Find Trash on Android Using the Phone Gallery
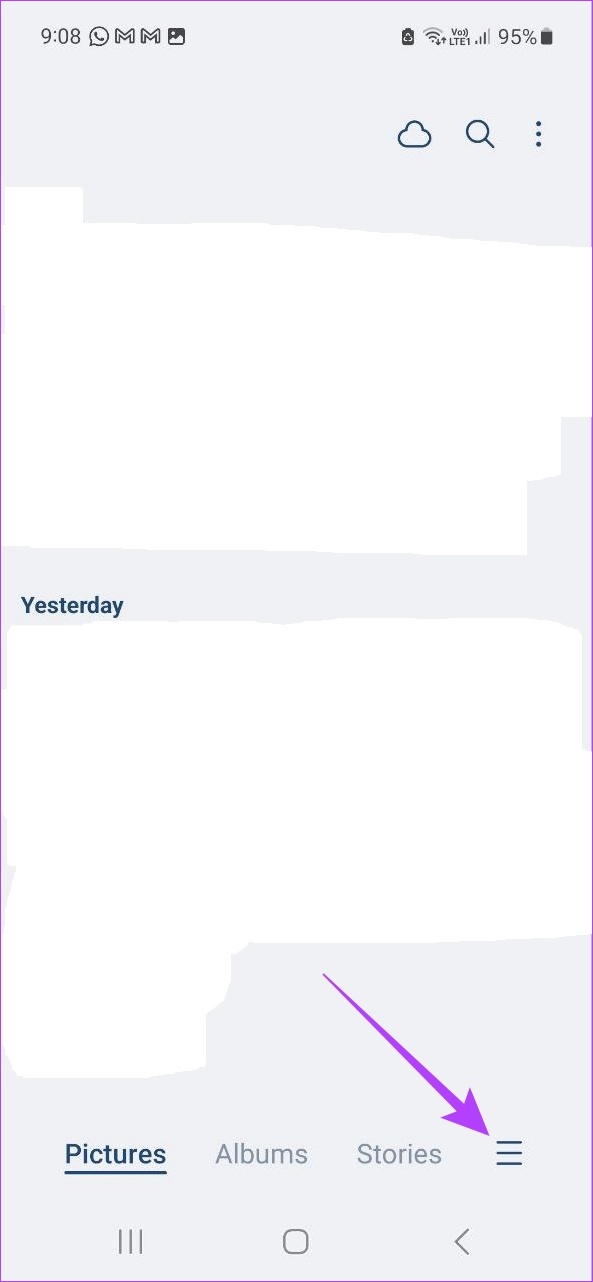
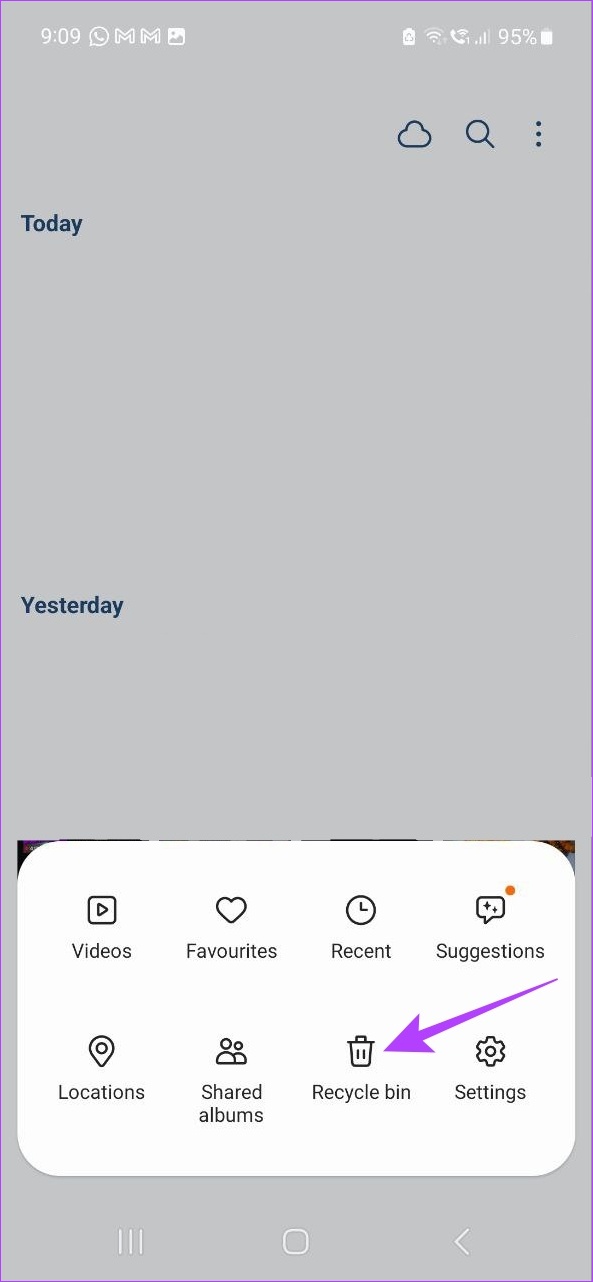
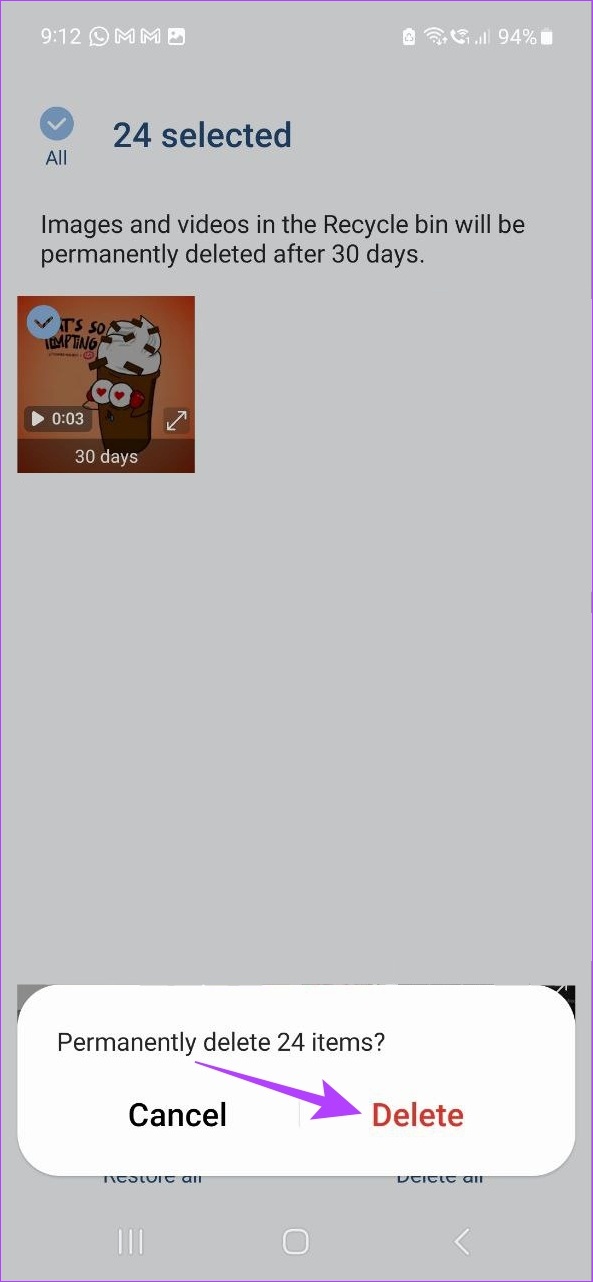
While photos are a good way to cherish your memories, we sometimes tend to go overboard with how many we take. And this is when the delete button comes in handy. However, these deleted photos might still be available in the trash folder. So, let us have a look at how you can find the trash folder in your device’s photo gallery. Note: We’re using the phone gallery of a Samsung Galaxy device for demonstration purposes. The process for finding trash on your device’s phone gallery might be slightly different. Step 1: Open your device’s phone gallery. Step 2: Now, tap on the hamburger icon and open the menu options. Step 3: Here, tap on Recycle bin. Step 4: Then, select all the items you want to delete. Step 5: Tap on Delete all. Step 6: Here, tap on Delete. This will instantly empty trash on Android.
2. Search File Manager App for Trash on Android
The file manager app helps you in accessing all your files and folder. It also houses the Downloads folder that automatically stores all your downloads. However, it can become frustrating when you’re deleting files but they’re still showing up on your device. To stop that, let’s have a look at how to find and empty trash on the Android file manager app. Note: Some file manager apps might not have a trash folder. Step 1: Open the file manager app on your device. Step 2: Here, tap on the hamburger icon to get all the menu options. Now, if your device has a trash folder, it should be visible here. Step 3: Alternatively, tap on the Downloads folder. Step 4: Then, check if the trash folder is visible. Once you’ve found the trash folder, you can then select and delete all the items currently present in it.
In Samsung Devices
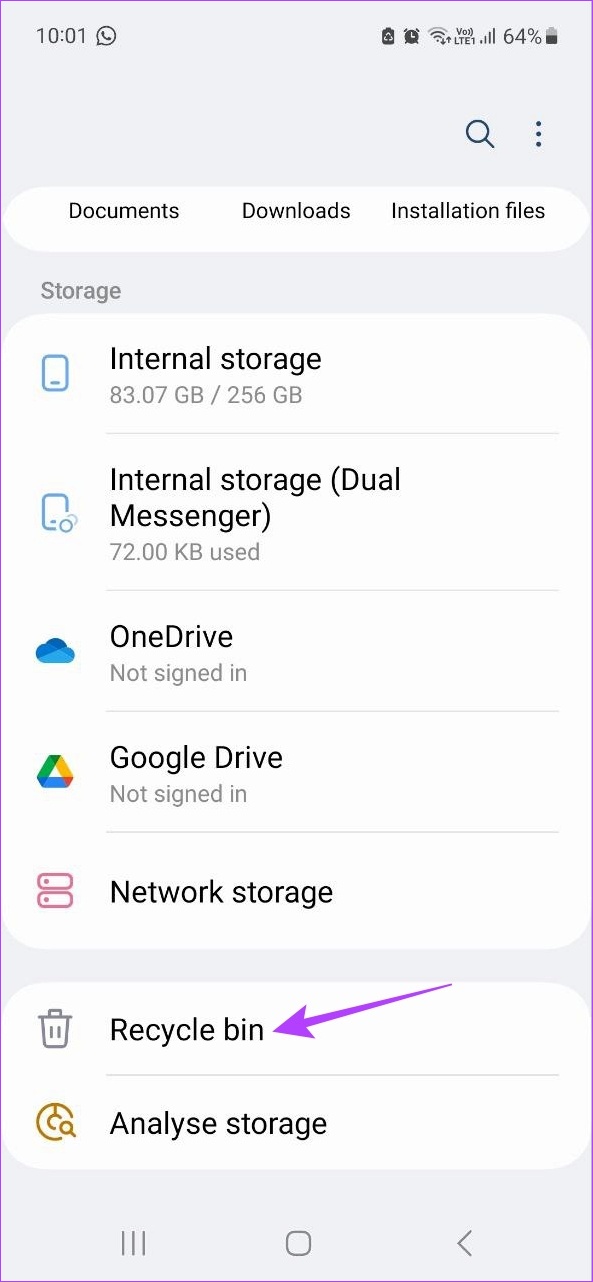
If you’re using a Samsung device, the process to find and empty the trash folder might be a little different. Follow the below steps to do it. Step 1: Open the My Files folder. Step 2: Here, scroll down and tap on Recycle bin. Step 3: Tap on the three-dot icon. Step 4: Then, tap on Empty. Step 5: Tap on Delete. This will instantly empty the trash folder.
3. Look for Trash on Android Using Cloud-Based Storage Apps
Most popular cloud-based storage like Google Drive and OneDrive also have their trash folder. This means that once a file has been deleted, it gets held in this folder for a certain period. While it’s a good way to make sure no important files are being accidentally deleted, it might also end up occupying unnecessary space on your drive. Follow the below steps to find and empty the trash folder on Google Drive and OneDrive.
In Google Drive
Step 1: Open Google Drive. Open Google Drive Step 2: Tap on the hamburger icon. Step 3: Then, tap on Bin. This will show all the files currently available in the trash folder. Step 4: Then, long-press on all the items you want to delete to select them. Step 5: Tap on the three-dot icon in the top-right corner. Step 6: Tap on Delete forever. Step 7: Select Delete forever again to confirm.
In OneDrive
Step 1: Open the OneDrive app. Open Microsoft OneDrive Step 2: Then, tap on the profile icon in the bottom-right corner. Step 3: Here, tap on Recycle bin. Now all the files that are currently in the trash will be visible. If you want to clear this folder, then simply select all the files and tap on Delete all.
4. Locate Android’s Trash Folder in Google Photos
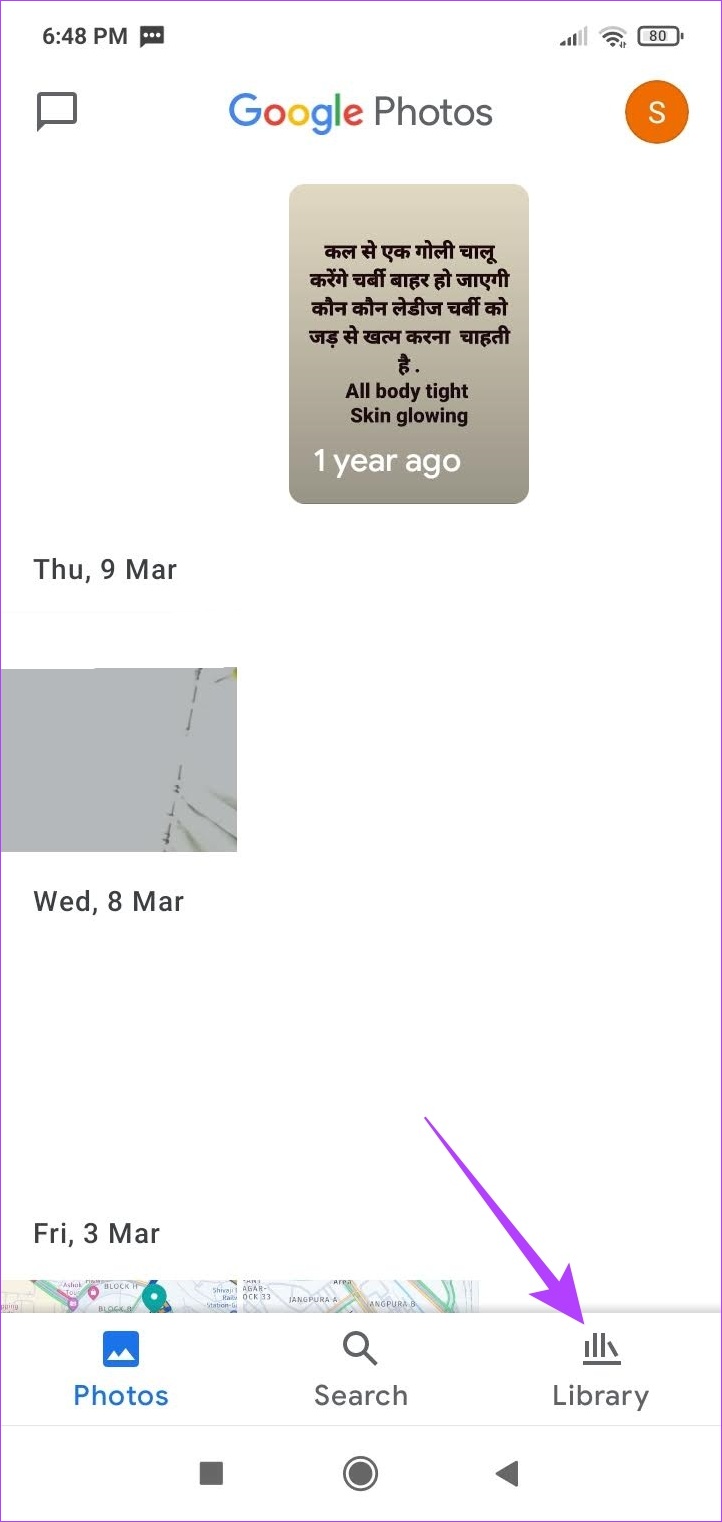
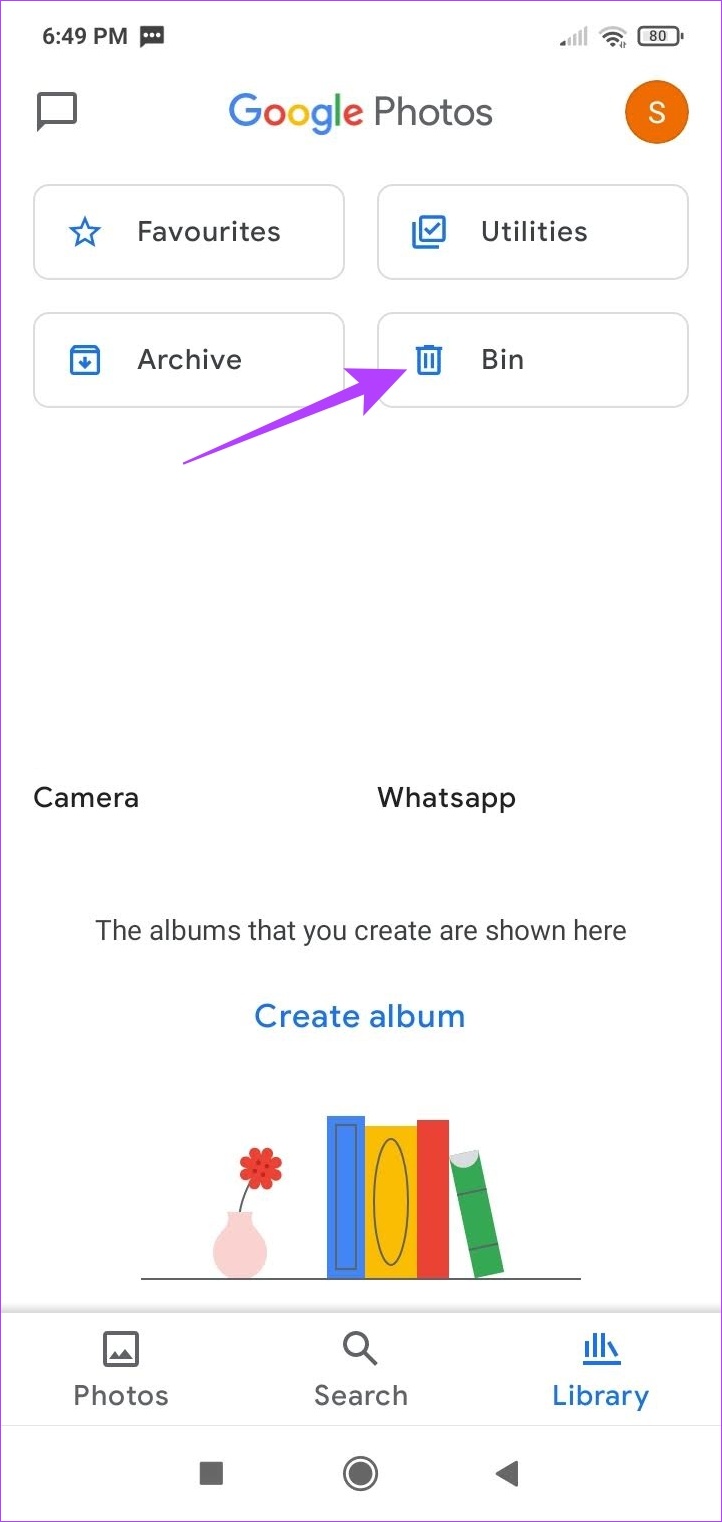
Certain Android devices might not have any native photo gallery app available and come only with Google Photos. So, let us have a look at how to locate and delete the trash in the Google Photos app. Step 1: Open the Google Photos app. Open Google Photos Step 2: Then, tap on Library in the bottom-right corner. Step 3: Here, tap on Bin. This will open the trash folder. Step 4: If you wish to clear the trash, long press and select the items to clear. Step 5: Then, tap on Delete. Step 6: Tap on Delete permanently. This will delete all the items from Google Photo’s trash folder. Check out this article if your Google Photos trash is still showing as full. Tip: If you delete an app on Android, its data will still be stored on Android. Hence, you might also want to clear cache and app data on Android.
Clear That Trash
While Android’s trash folder is an important tool to ensure you can recover any mistakenly deleted items, they can end up occupying unnecessary space on your device. So we hope that this article helped you in finding and emptying trash on Android. If you’re still having issues with space on your device, then you can use third-party apps to find large files on Android and delete them accordingly. The above article may contain affiliate links which help support Guiding Tech. However, it does not affect our editorial integrity. The content remains unbiased and authentic.